Guide to the Rev Caption & Subtitle Editor: How to Use the Caption Editor
In this article, we’ll be walking you through how to place a caption order through Rev.com, how to receive the outputs for such an order, and how to make final edits to the results using the caption editor. For anyone new to the Rev caption service, this will lead you through the entire workflow from start to finish and cover many of the common tasks that you might hope to accomplish.
First, it’s important to understand how the caption service differs from the transcription service. Notably, there are many more similarities than differences. Both services allow you to get the text associated with the speech in your audio or video file. Both guarantee 99% or higher accuracy of the final output. And both use fully on-shore, native English speaking transcriptionists to process your order. The transcription service provides you with the text in a single document that can be used for later review. The caption service goes one step further, however, and synchronizes the transcription with the actual speech, allowing you the ability to display the text in line with the audio or video as the speech is occurring.
Ordering Captions with Rev
The first step in using the caption service is simply placing an order. To do so, you go to our checkout page for english captions.
If you need foreign language subtitles (translated subtitles of your English language video content) you will go here to order. Most of the editing process is the same for both services.
You’ll be greeted with a screen that looks like this:
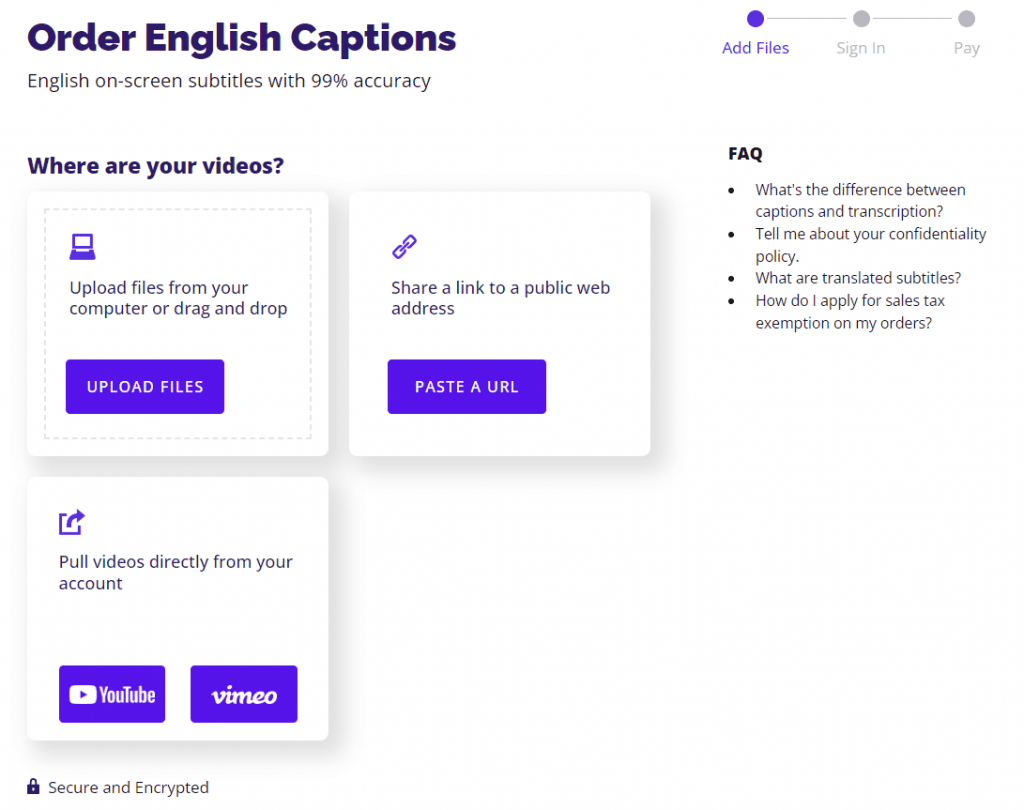
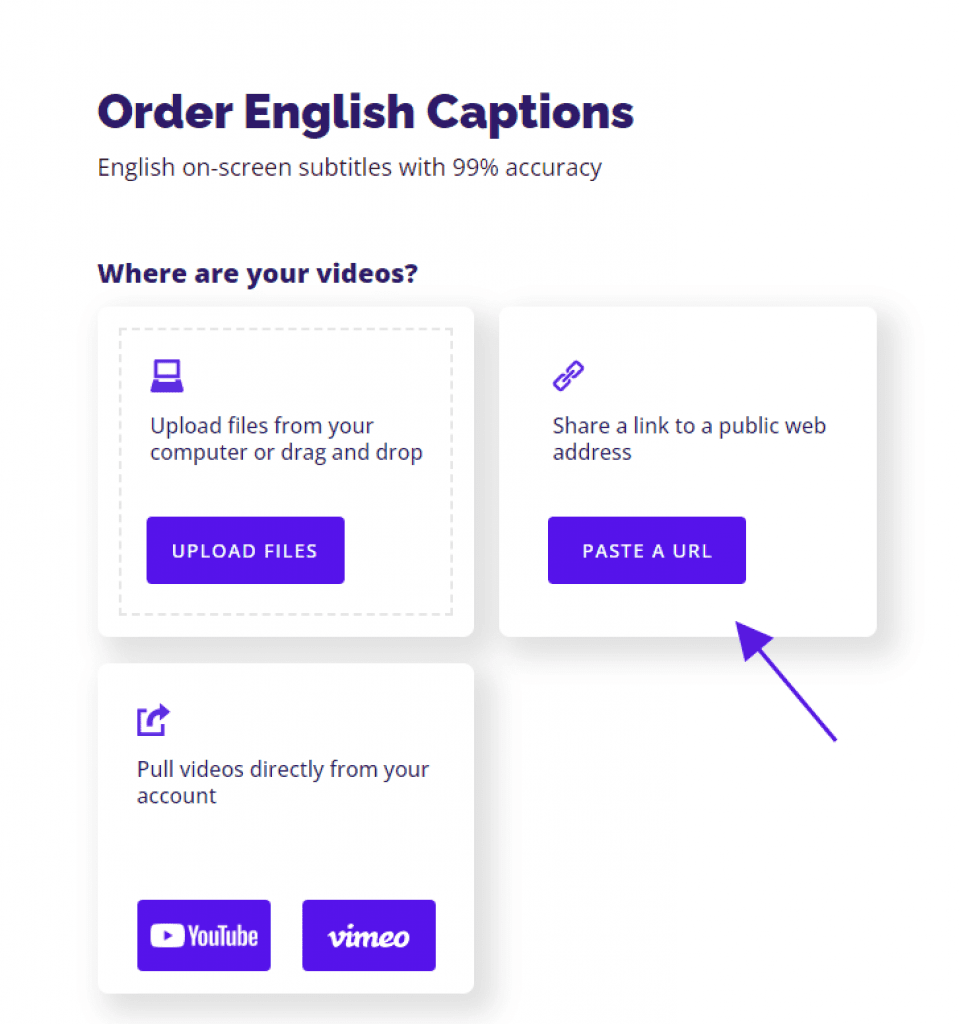
This is where you specify the input audio or video that you want captioned. For our example, we’ll specify a link to a public YouTube video.
Once you click “add” and the Rev backend processes the URL, you should see a page that looks like this:
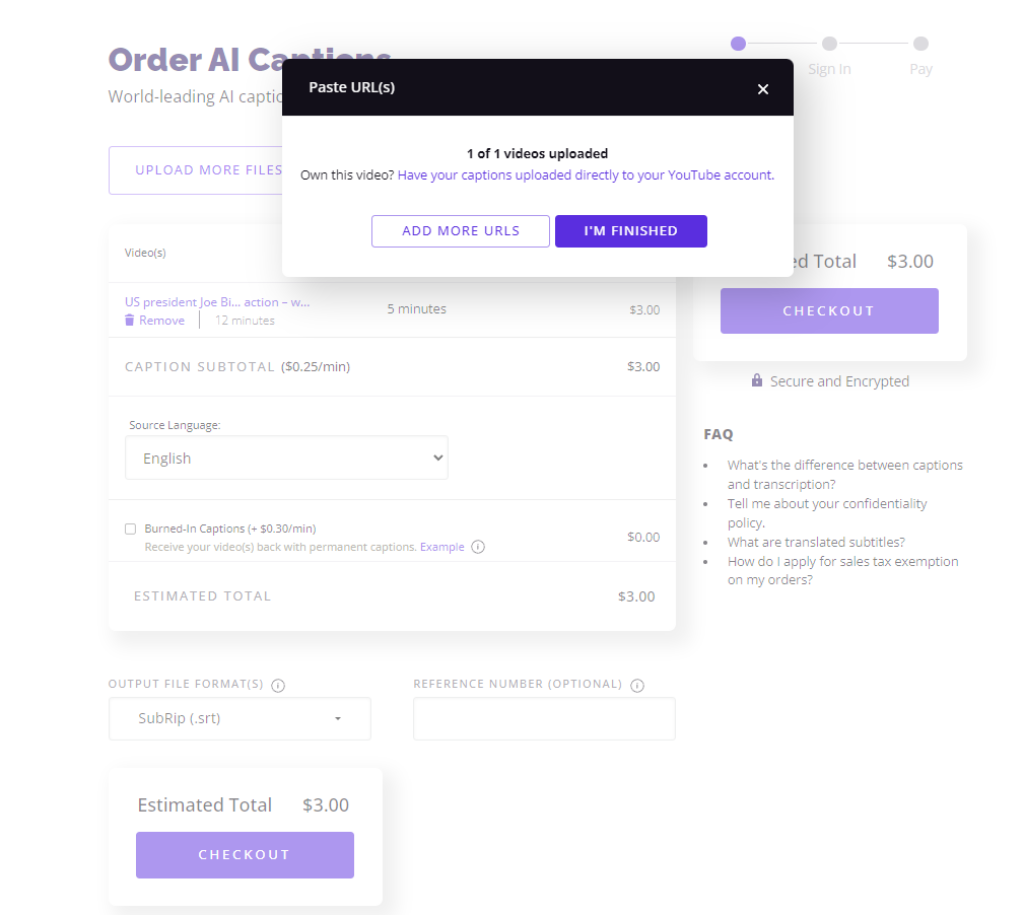
It shows that the video was successfully uploaded. In addition, the Rev service recognizes that we are sending in a YouTube video and asks if we are the owner of the video. We are not, but if you are a content creator, you can have the captions uploaded directly to your YouTube account.
Next, click “I’m finished” and you’ll see the following order detail page.
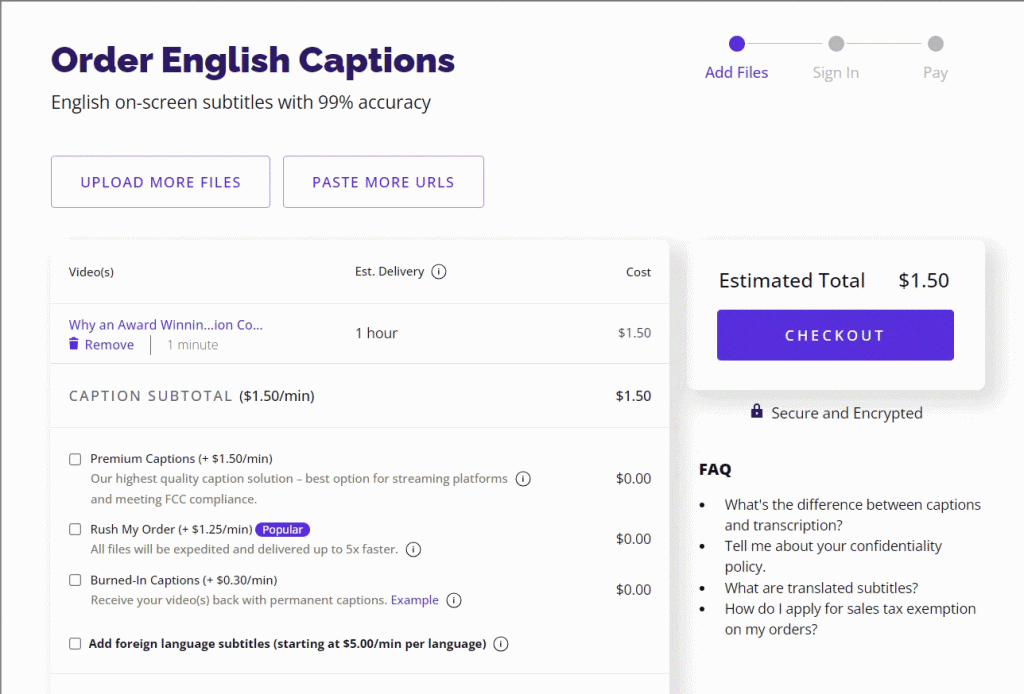
Rev has grabbed the title of the video, and estimates a 2 hour turnaround for the captions to be delivered. Since our video is only 0:39 seconds, it is billed as $1.99 at the standard $1.99/min rate. There are also options to rush the order as well as to receive burned-in captions (captions which display directly on top of the video player).
We’ll check both of those items now. You can also select the output file format, which differs depending on what media player and system you’re using. You can choose multiple formats if you wish. Now, let’s click “checkout”.
Next you’ll be directed to a screen, prompting you to either sign in or sign up for an account. This should be pretty simple – all that is required is your name and email address. Once you’ve created an account (or logged into your existing one), you will be directed to an order confirmation page where you can input your payment information.
Once you’ve confirmed everything, go ahead and click “order captions”.
Add Glossaries & Speaker Names
You’ll next be presented with some options to improve the quality of your order.
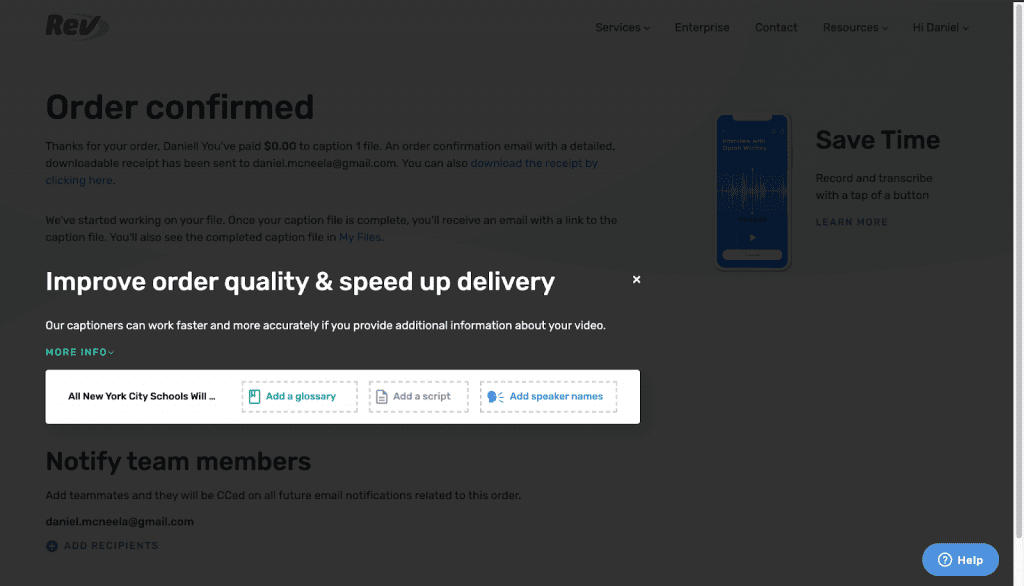
You can “add a glossary”, “add a script”, or “add speaker names”. A glossary will provide a list of uncommon or technical terms that show up in the audio for transcriptionists to refer to. You can also add a script. If you have access to the original script for the video you submitted, submitting it will help cut a lot of work time for the Revver who captions your file. This may result in a quicker turnaround time, and improved accuracy of the caption output.
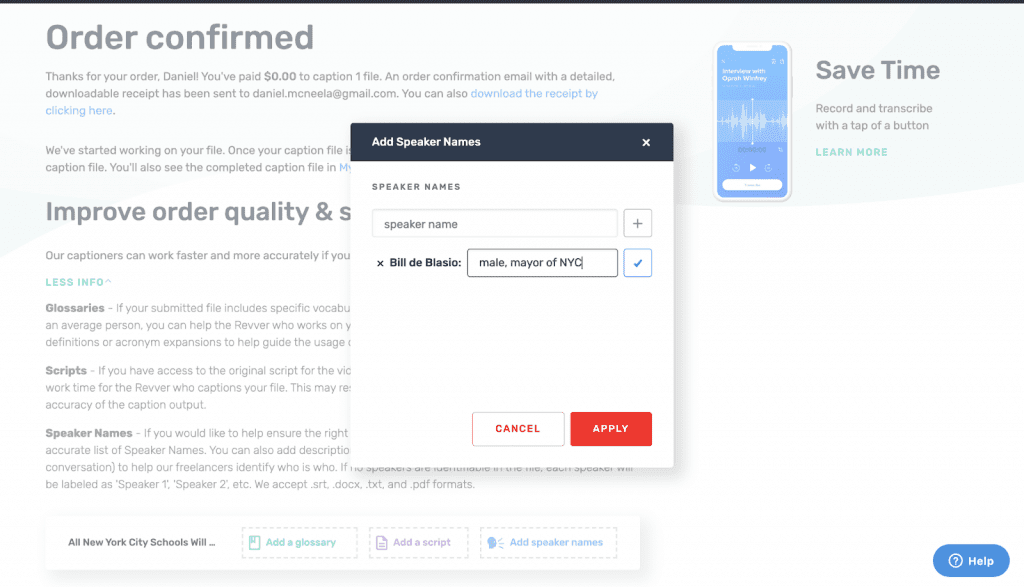
For our caption order, we’ll add the list of speakers. Luckily, this video only has one speaker, New York City mayor Bill de Blasio. We’ll add his details in the popup window.
When you’re finished adding details, go to the bottom and click “Go to my files”. This will bring you to your main account window. For our order, even though the estimated time to completion was 1 hour, the captions are already available just 5 minutes later. The time to completion is usually an upper bound, and often orders will be processed much sooner.
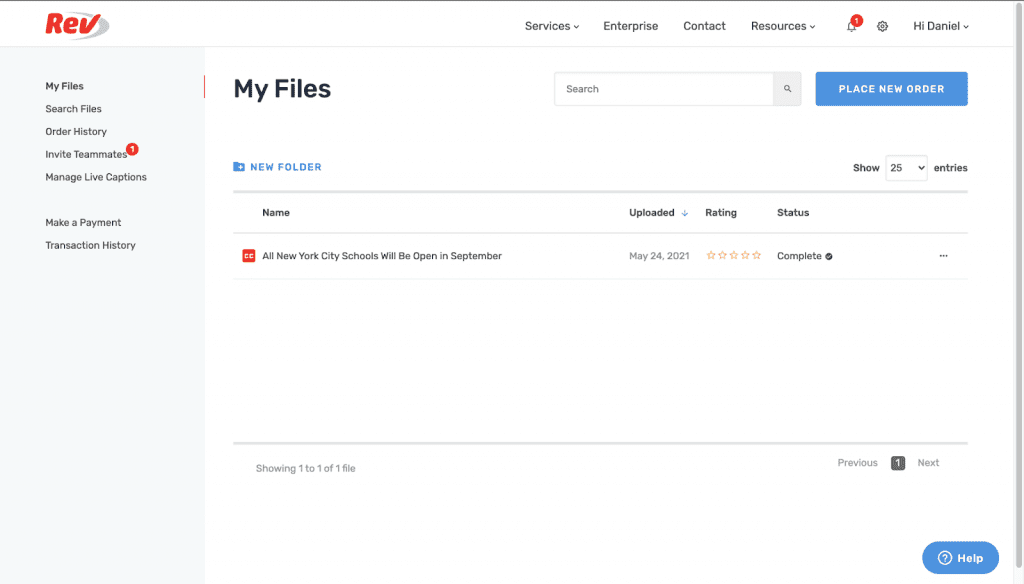
If you click on the title of the caption file (should be the same as the video title), it will bring you to the Rev Caption Editor.
Editing Captions & Subtitles in the Rev Caption Editor

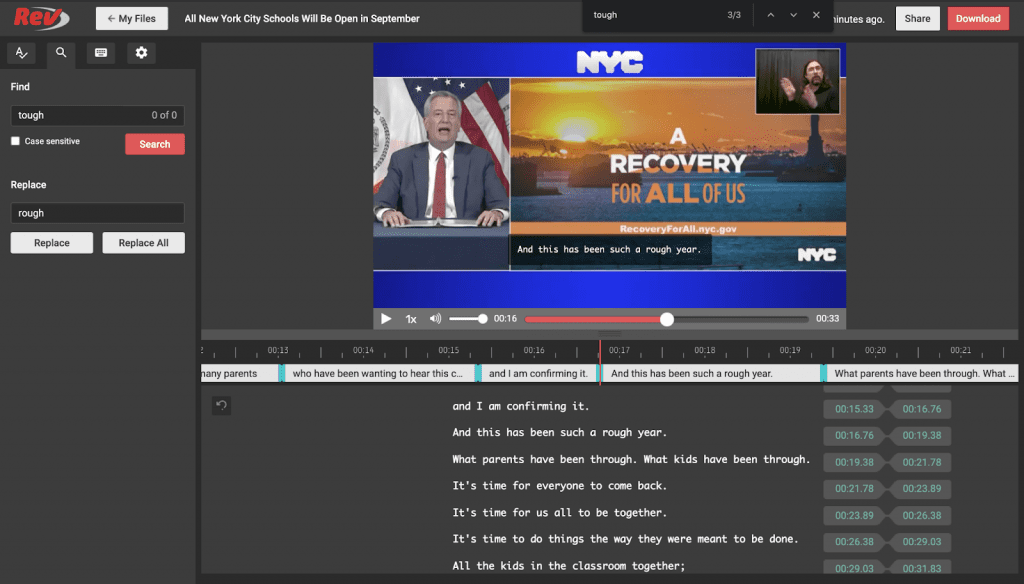
On this screen, you’ll be able to make adjustments to the captions that Rev has provided and download the finished product. We’ll walk you through all the common actions you can do within the editor and help you to get your caption editing workflow streamlined.
One of the first things you’ll notice is that the Caption Editor has an embedded media player that allows you to play back your audio or video file and watch the synchronized captions displayed in real time.

You’ll see on ours that the burned-in captions are overlaid on the video since we requested that option back on the original order screen.
Caption Editor Useful Tips
We can play through the video and use keyboard shortcuts for common options. “Tab” for example allows us to toggle the play/pause button.
Find & Replace
Many other shortcuts are given, and a full list is available on the “shortcuts” panel within the sidebar. Many of the shortcuts are the same as what you’re used to using with other software – for example, you can use cmd + F (or ctrl + F) to search for text. It will be found both on the burned in caption (if it’s displayed) and within the caption editor.

You can also do a classic find and replace operation. Let’s say we thought that the word “rough” was mistranscribed as tough in our video. We can click on the magnifying glass icon in the sidebar, search for the word “tough” and elect to replace it with the word “rough” within the captions.
Spell Check
To the left of the find and replace section, there is an icon that shows an A with a checkmark below it.
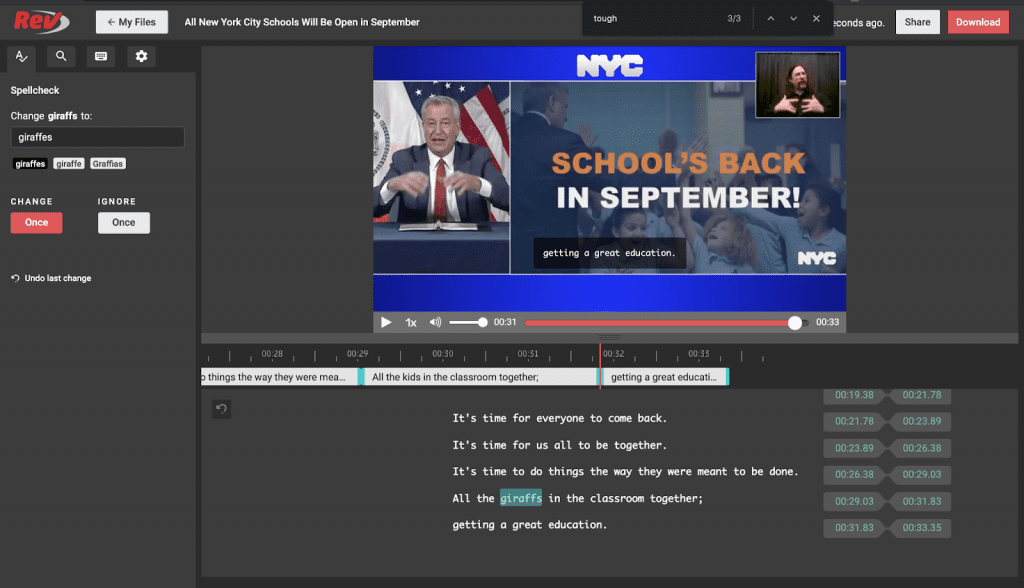
This is the spell-check tool which will detect any spelling errors in your captions. For example, I changed one of the words in the caption to “giraffs” and the spell-check tool detected this error. It also provided some suggestions as to words with proper spelling that I could use as a replacement. Thanks spell-check!
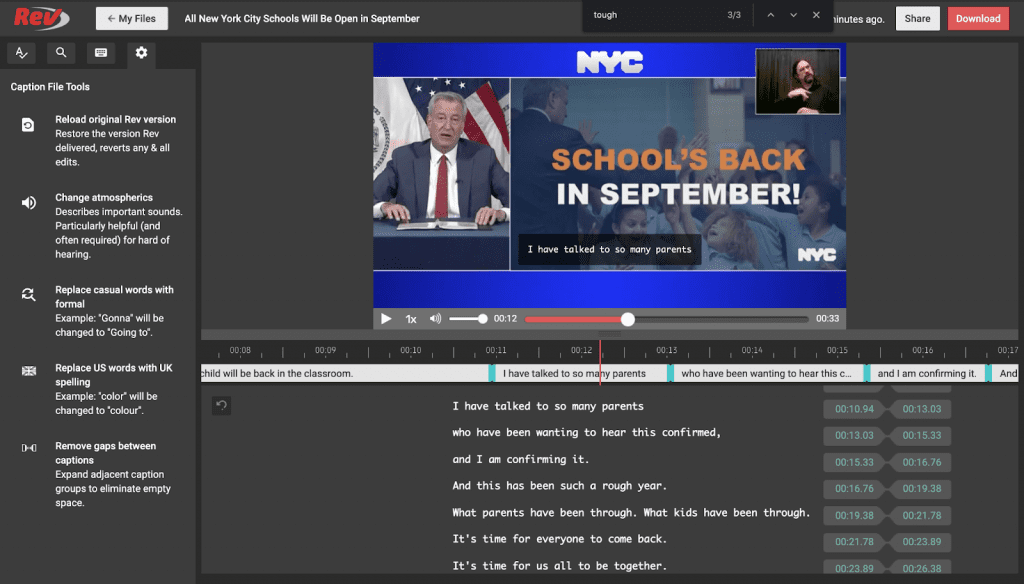
Other Useful Caption Settings
Finally, on the far right of the caption editor beneath the gear icon, you have a list of common caption editing tasks that the editor can perform automatically for you. This includes:
- Reloading the original captions (reverts any changes you’ve made)
- Removing or adjusting the formatting of the atmospherics in your file
- Switching between formal and informal language, switching between US and UK English (e.g. color to colour)
- Removing gaps between caption groups so that caption switches happen seamlessly.
We won’t need to apply any of these transformations for our file, but they are there if you need them!
Editing Caption & Subtitle Placement, Content, and Timing
Now we’ve come to the meat of the editor’s functionality, which is editing the placement, content, and timing of the video’s captions.
You should find the functionality very intuitive here, especially if you’ve ever used any sort of video editing software. In the bottom text area you can click on each line of text which will bring you into an editing mode, allowing you to insert, delete, or modify words in the caption. If you hover over any line, you should see two little buttons pop up to the left of the line.
If you click on the “+” button, a new line will be created below the existing line, allowing you to add a new caption to the timeline. Conversely, if you click the “double arrow” button to the right of that, it will merge the current line with the line below it into a single line. This is something to use if the current line is too short and you feel it can be combined with the next segment of text.
You’ll also notice that to the right of each line, there are two badges, each with a time listed on it. The left one is the start time for the caption, and the right is the end time for the caption. If you click on either of these, the player will jump you to that point in the timeline.
From there, you can adjust the start or end time by dragging the edge of the respective clips in the timeline editor. You can also drag the entire caption block to a different position. This allows you to precisely pair the caption text with the point at which the corresponding speech actually occurs.
Sharing Your Caption Editor Work Station with Others
If you decide you want some help with the editing process, you can click the “share” button in the upper right corner. This will bring up a popup that looks like this:

If you’ve ever used Google Docs, the sharing process here is very similar here. You can either share by email or get a shareable link. For the first option, you would just type in the email addresses of the users you want to share with here.
You can also include an optional message to the person you’ll be sharing the caption editor with. There is also a permissions dropdown on the right next to the email address box. You can allow the people you share with to either edit or view the captions.
Alternately, you can get a shareable link. To do so, just click the “Get shareable link” option in the upper right corner of the popup. It will look like this:

From there, you can copy the given link and send it to your editors, be that via email, text, Whatsapp or any other medium. As with the first option, you can also control the permissions level for the people you send the link to.
Downloading Your Caption & Subtitle Files
Finally, when you’re satisfied with the way your captions look then you’re ready to download the completed file! To do so, just click the red “Download” button in the upper right corner. You will be presented with the following popup window:
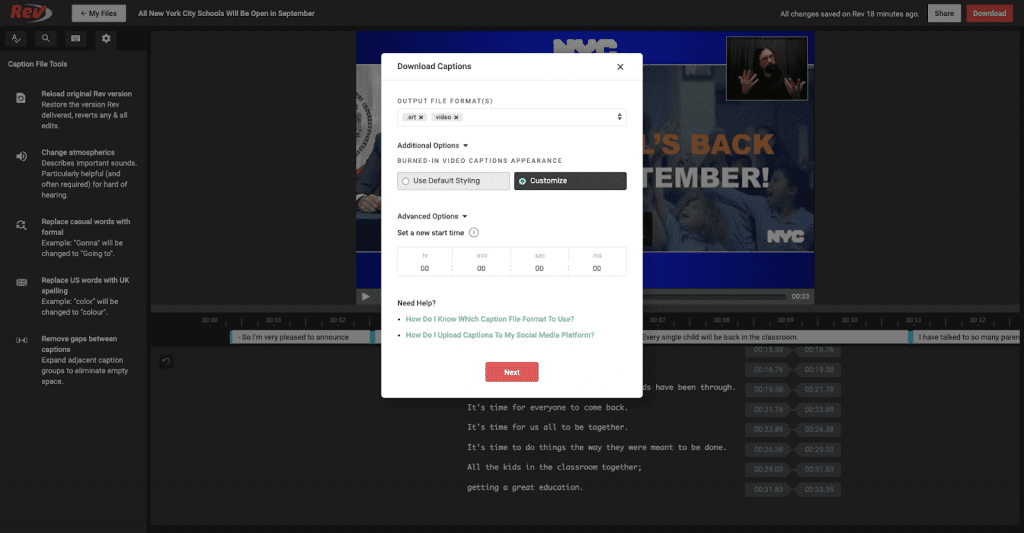
Here, you can first choose the output file format(s). The .srt file type is the standard for captions, but there are also a lot of other caption file options, including file formats specifically optimized for uploading to social media platforms such as Facebook and Vimeo.
If you click the links at the bottom of this window, they will redirect you to some informative articles to help you decide on which output file formats are best for you.
Customizing Your Burned-In Captions or Subtitles
Burned-In captioning is a new Rev feature which allows you to download a video with your captions attached & hard coded into the video (also called open captions). You need to select the “Burned-In Captions” checkbox option at the caption checkout screen to get this option. This is great for people who do not want to deal with caption files like SRT’s & video editor software.
You can choose whether you want to customize the burned-in caption styling or leave the default as is. We’ll select “customize”. In the third box, you can reconfigure the start time of the video or audio. This isn’t super important in most cases, and for most people you should just stick with the default.
When you click “Next”, you’ll be brought to the styling window for burned-in captions.
Burned-In Caption Font, Text Size & Alignment
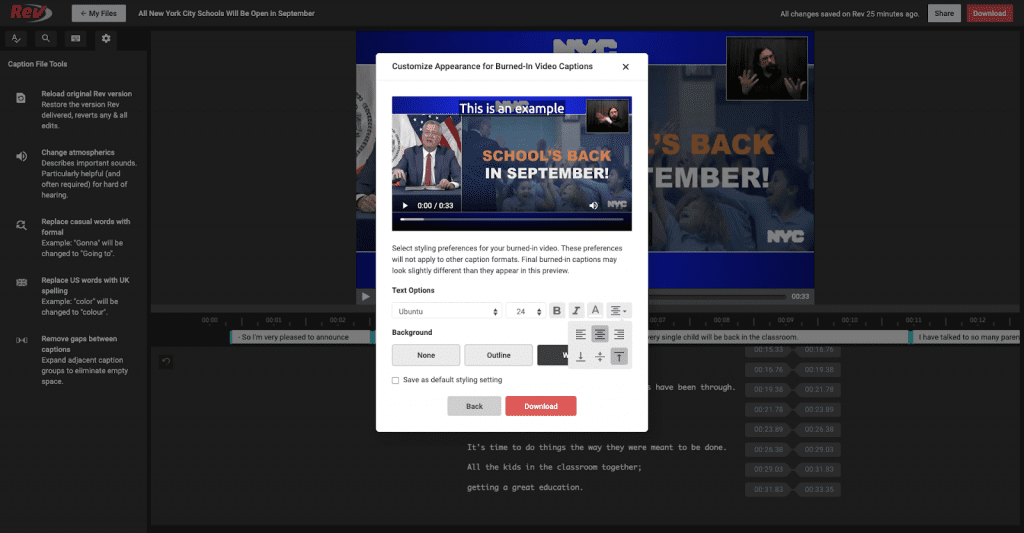
Here you can change the font type, size, and style. We’ve changed our font type to “Ubuntu” and increased the size to 24. You can set bold or italics as well as change the text color, although we did not change those settings here.
You can also choose how you’d like to vertically and horizontally align the caption text. We kept it horizontally centered but put it vertically at the top.
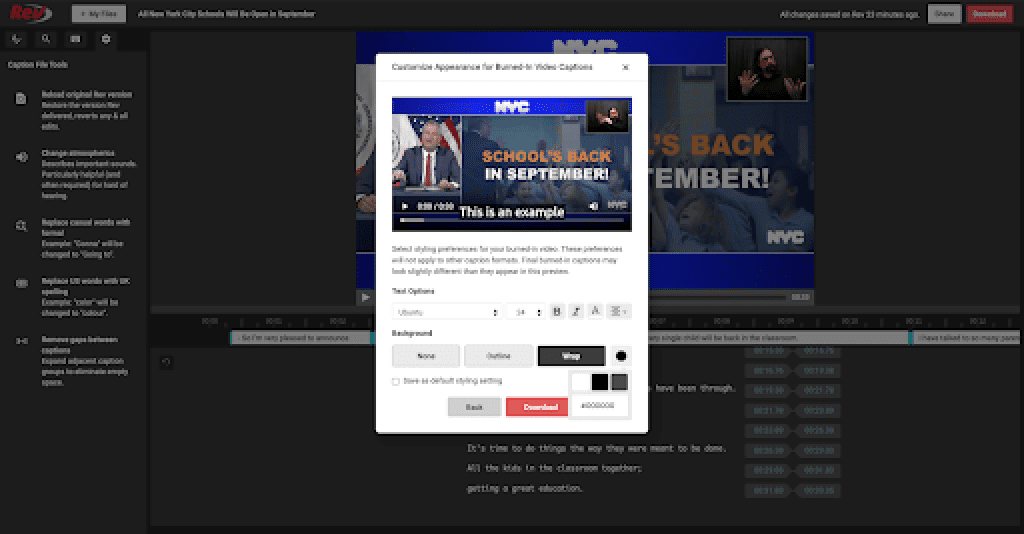
Burned-In Caption Background Color
You can also change the styling of the “background” of the caption. There are three options: None, Outline, and Wrap, which is sort of a somewhat transparent background for the text to sit on top of. You can also change the color of these backgrounds.
Downloading Your Video with Burned-In Captions or Subtitles
When you’re satisfied with the way everything looks, go ahead and click “Download”. The captions file (.srt) will download directly to your machine. You will also receive a message telling you that a link to download the video with burned-in captions will be sent to your email address as soon as it’s ready.
And voila, that’s how to use the Rev caption editor in a nutshell! Hopefully this article was helpful to you as you get started generating captions with Rev!

Subscribe to The Rev Blog
Sign up to get Rev content delivered straight to your inbox.