How to Set Up the Rev AI API in Postman
When working with the Rev transcription services, you’ll be interfacing with either the Rev.com or Rev.ai APIs. For more details on the differences and the use cases for these, check out our guide. If you’d like to learn how to work with the Rev.com API for 99% accurate human-powered transcription, check out our guide on setting up the Rev API in Postman. In this article, we’ll walk you through how to get your credentials for the Rev.ai API up and running, how to perform authentication and log-in, and how to submit requests to various endpoints in order to get your transcriptions completed.
The Rev AI API provides machine-generated transcripts rather than human-powered transcripts, so it’s better for quick calls, fast turnaround times, and building speech recognition into applications and software. The Rev.com API is for highly accurate transcripts when you’re able to wait about 12 hours for the transcription professionals to work on your transcripts.
The Rev.ai API uses advanced artificial intelligence and machine learning to process your audio or video files and generate accurate transcriptions. More specifically, it uses speech-to-text models to match the speakers in your audio, determine what they’re saying, and record the result as text. The Rev.ai algorithms are smart enough to parse a speaker’s words, regardless of accent, disfluencies, background noise, and other complications in the audio. The APIs allow you to authenticate into your business account, submit and manage requests, monitor the status of orders, and receive transcription results as a simple download. Ready to get started?
Creating an Account and Generating an Access Token
To get started with the API, you’ll need to sign up for a free account on the Rev.ai homepage. Once you’ve done so, login to your account and proceed to the “access token” link on the sidebar. This will take you to a page that looks like this:
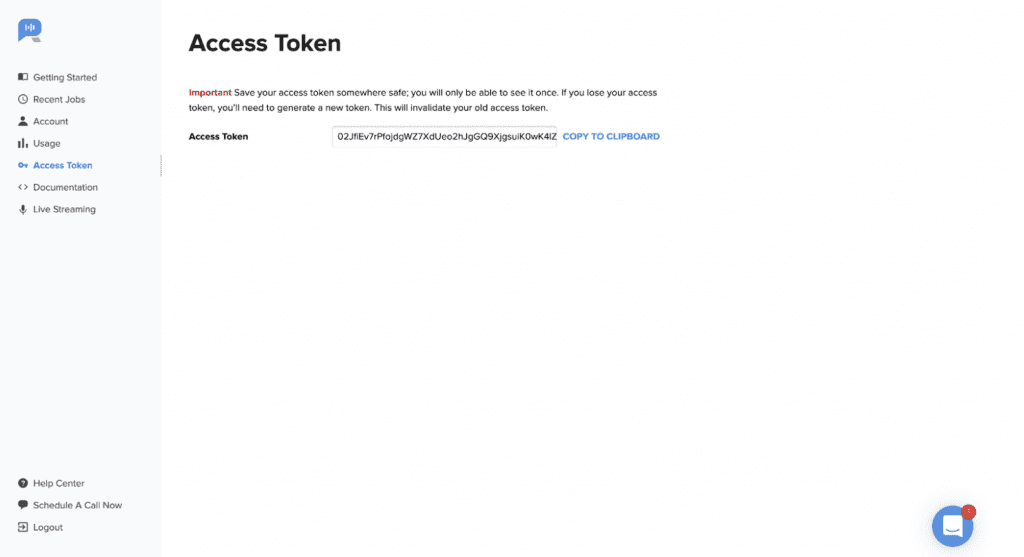
You’ll want to click on the button that says “generate token” and copy the result to your clipboard. This access token will be your key into the Rev.ai APIs for submitting and managing your transcription orders.
Your account will come pre-loaded with 300 free minutes of transcription, plenty of time to test out the API and assess whether it will work for your needs. Let’s create an order to get us started. We’ll use the public Rev Postman workspace which comes with pre-configured collections to help you make calls to the Rev API. You can access the workspace here.
Go ahead and open the workspace. On the left you can click the Rev.ai API collection dropdown. You’ll see a menu that looks like this:
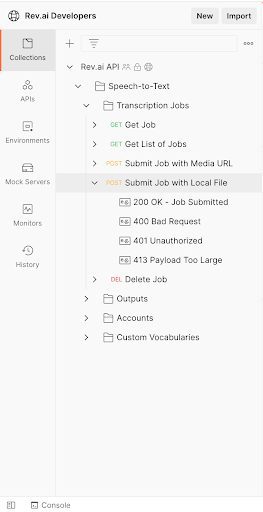
Go ahead and click on “Submit Job with Local File”. Now normally before we submit a job, we’ll have to add something called an authorization header to the request. Luckily, this workspace has one configured for us, so there’s no need to worry about it. This header allows you to authenticate with the Rev.ai API. We can take a look at its configuration under the “Authorization” tab.

Now, the Rev.ai API actually has two different versions. The first is an asynchronous API which allows you to submit jobs and have them process in the background. The API can then be configured to notify you when the job finishes and you can download your transcription. This is the version of the API that most people will use.
The other version is a streaming API which is used for jobs that require real-time transcriptions. This can be useful, for example, if you’re live streaming a podcast and want transcriptions generated for your users on the fly but you don’t want to shell out for a live transcriptionist. We’re going to cover the asynchronous API in this post.
The base url for the asynchronous API is
https://api.rev.ai/speechtotext/v1
This is the URL to which endpoints are appended. So each request will be made to this url, plus one specific endpoint specifying the function to be used. For submitting a transcription job, we’ll be using the jobs endpoint.
Submitting a File
There are two ways to submit a file to the Rev.ai API. The first is to host the file on a server somewhere (such as your website or a podcasting platform) and then point Rev.ai to it. It is passed to the API using a key called “media_url”. This is probably the most convenient way for most users as it’s just a bit easier to submit a url through a request rather than a file. Rev.ai will handle the downloading of the file on its backend, so no need to worry about that. Note that you can’t use a Youtube URL as this is not a direct download link.
The other way to submit a file is via a direct upload as part of the POST request to the API. For this you need to use an encoding called multipart/form-data. Note, if you use this format you are restricted to files less than 2 GB in size. This is what we’ll use in this tutorial. Here’s how to provide a file in Postman. Navigate to the tab that says “body”, and hover over the “Key” field. You should see a small drop down field appear. Click that and select “File”.
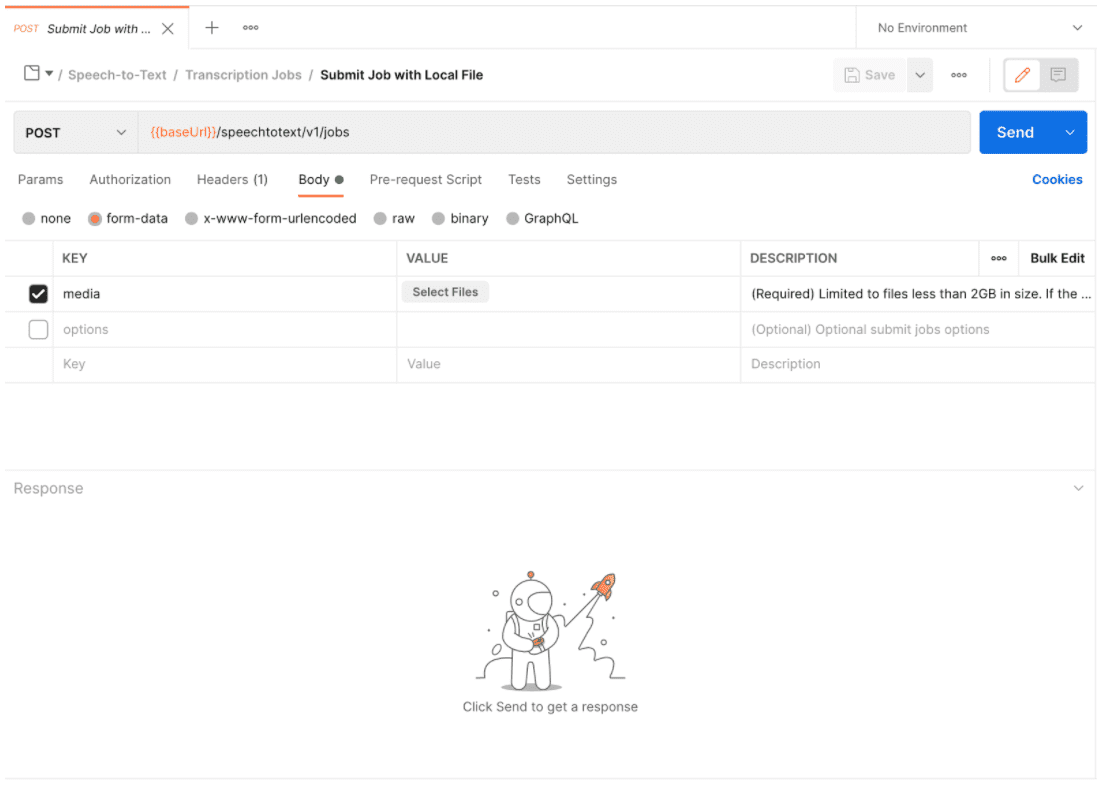
Now you’ll be able to click the “select files” button underneath VALUE to upload your files. For this test, I’ll be using an MP3 audio file containing the Fresh Prince of Bel-Air theme song. In the box for KEY type “media”.
You can also provide an “options” key with a json value that specifies options to use with the request. The complete list of options is available in the API documentation. We will provide one option called “metadata” which just allows us to specify a short description of the audio file that we can use to reference it in the future.
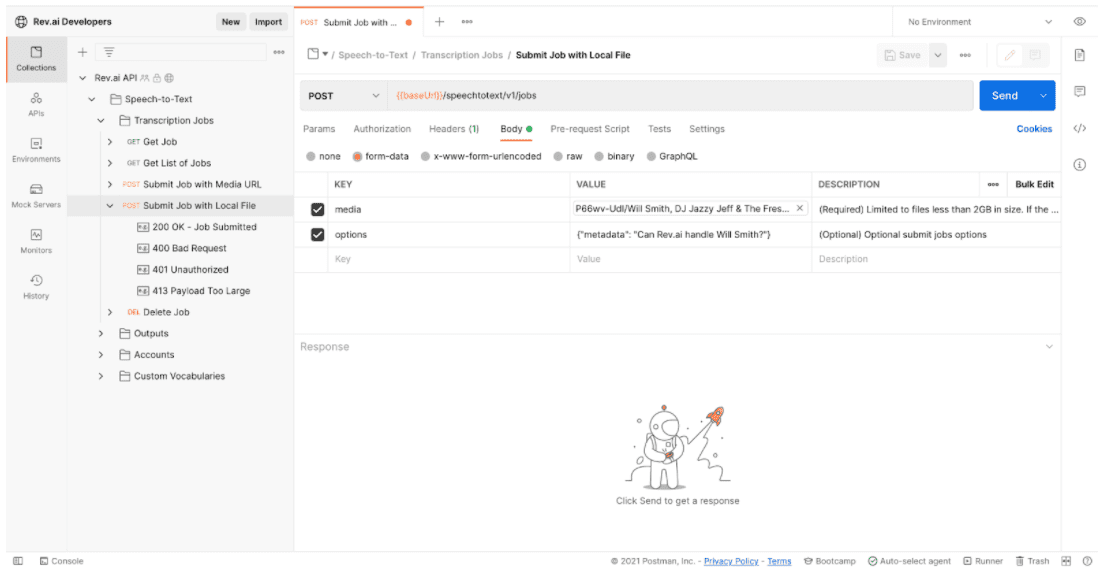
Once you’ve got all of that info in there go ahead and enter the URL, make sure POST is selected as the request type, and click “Send”.
If the request is successful, you should get a response that looks like this.
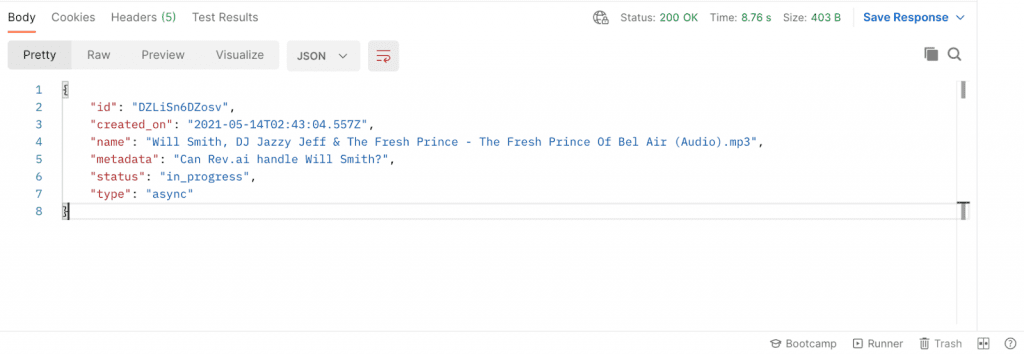
You can see it has the ID of the request, the date it was created, the name of the audio file, the metadata description we provided, the current status of the transcription progress, and the type of the API we used, in our case “async”.
Now that the Rev.ai machine learning models are working on our request, let’s go ahead and keep tabs on it. We’ll create a new GET request that we can use to query the API and check the status of this job. Go ahead and click “Transcription Jobs -> Get Job” on the left panel.
This request will be much simpler than the one before. We use the exact same URL, but we set the request type to get. We also use the same authorization headers as before. Finally, we add a key called “id” and set its value to be the order id that we received in response to the original POST request.
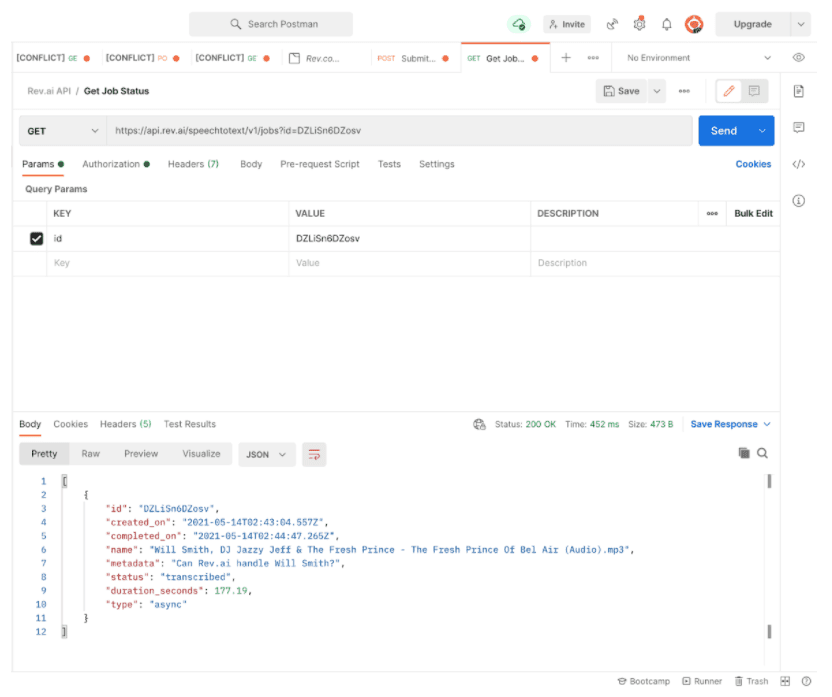
If the request is successful, you should see a result like the above. You’ll see that our order has finished and the file has been transcribed. Now we just need to download the transcription file!
Getting a Transcript
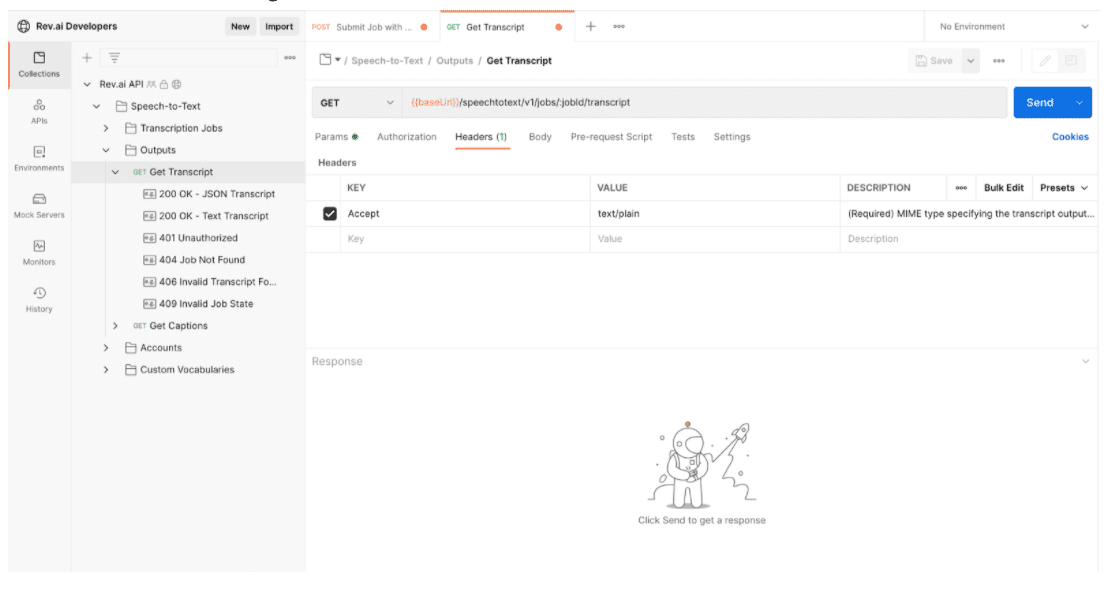
To download our transcript, we’ll use the “transcript” feature of the /jobs endpoint. This will be a simple GET request as before. Go ahead and click “Outputs -> Get Transcript” on the left panel.
As before, the headers are set for the request. You’ll see there’s one additional header called “Accept” which tells the API what format we want to receive our data in. Our choices are:
application/vnd.rev.transcript.v1.0+json
or
text/plain
For simplicity, we’ll use text/plain which will just give us the output as plain text that we can then copy into a Word document or similar file. The JSON version can be useful because it gives you confidence scores for each word in the transcription. You can then use these to, for example, filter out and manually correct words with a low confidence score.
It should look something like this when finished:
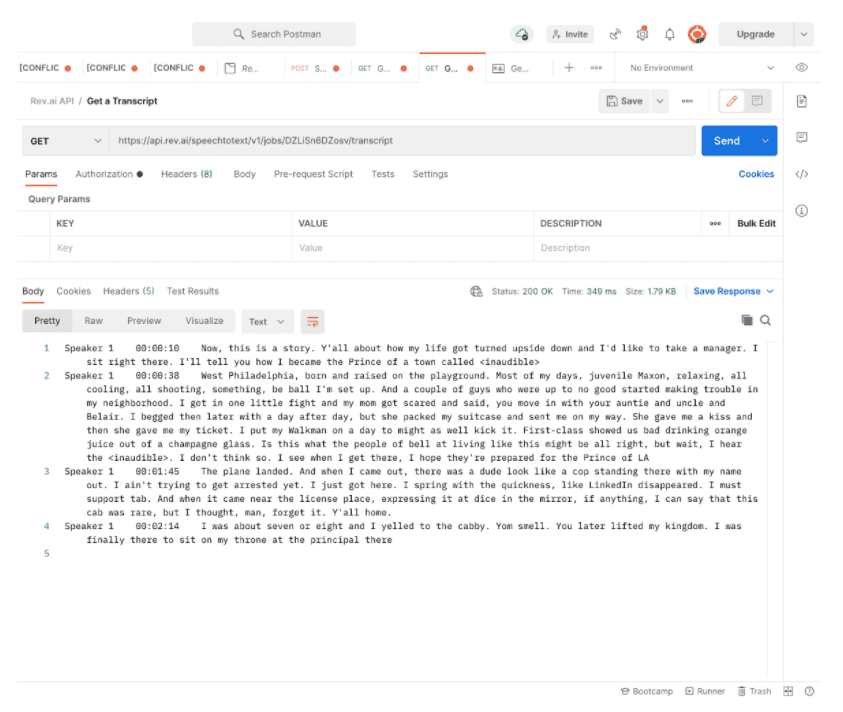
Now, we can submit the final request. The full endpoint for getting your transcript will be
GET /jobs/{id}/transcript
You will need to substitute your actual job id for {id} in the url. Let’s take a look at the final version of our request URL as well as the plain text transcript output that is returned as the response:
And there you have it, your guide to submitting a transcript order with Rev AI in Postman from start to finish!


Subscribe to The Rev Blog
Sign up to get Rev content delivered straight to your inbox.