


How to Add Captions and Subtitles to Adobe Animate Flash Videos
Including closed-captions and subtitles with your video is a great way to increase your content’s accessibility and boost its SEO. However, typing out your captions by hand can be a hassle. Fortunately, it’s easy to save yourself some time and effort by importing these caption files directly from Rev.
This guide will walk you through how to add captions and subtitles in Adobe Animate (Flash).
Note: Adobe Animate CC and Adobe Flash CC are essentially the same software. However, Animate contains some more advanced tools. For the purposes of this guide, the two will be used interchangeably.
What Subtitles Can I Use in Adobe Animate (Flash)?
Adobe Animate (Flash) supports the following closed caption and subtitling file formats:
TTML or Timed Text Markup Language (formerly known as DFXP or Distribution Format Exchange Profile) [.DXFP]
You can assume that TTML is being used throughout this article unless otherwise stated.
Adobe Animate (Flash) also supports Unicode character display which enables you to use special characters and non-Western alphabets in your captions.
Importing Captions into Adobe Animate CC
First, download your caption file and unzip it. This newly created folder should be populated with several files ending in .xml, .swf, .html and .js amongst others.
Once you have unzipped your file, follow these steps to import your captions into Adobe Animate CC.
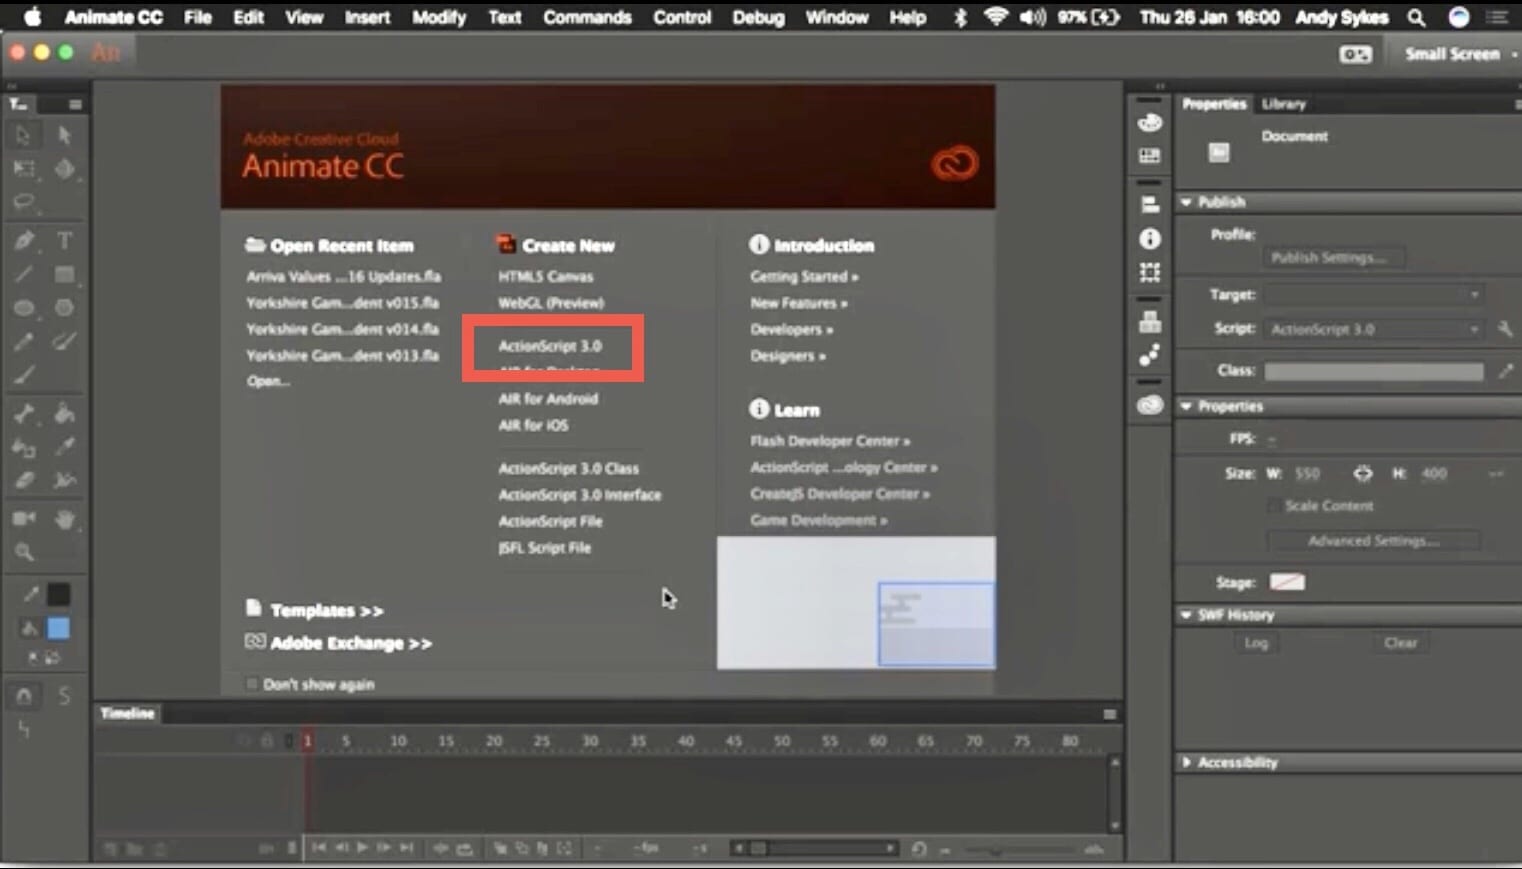
1. Create A New Document
In Adobe Animate CC, create a new ActionScript 3.0 document.
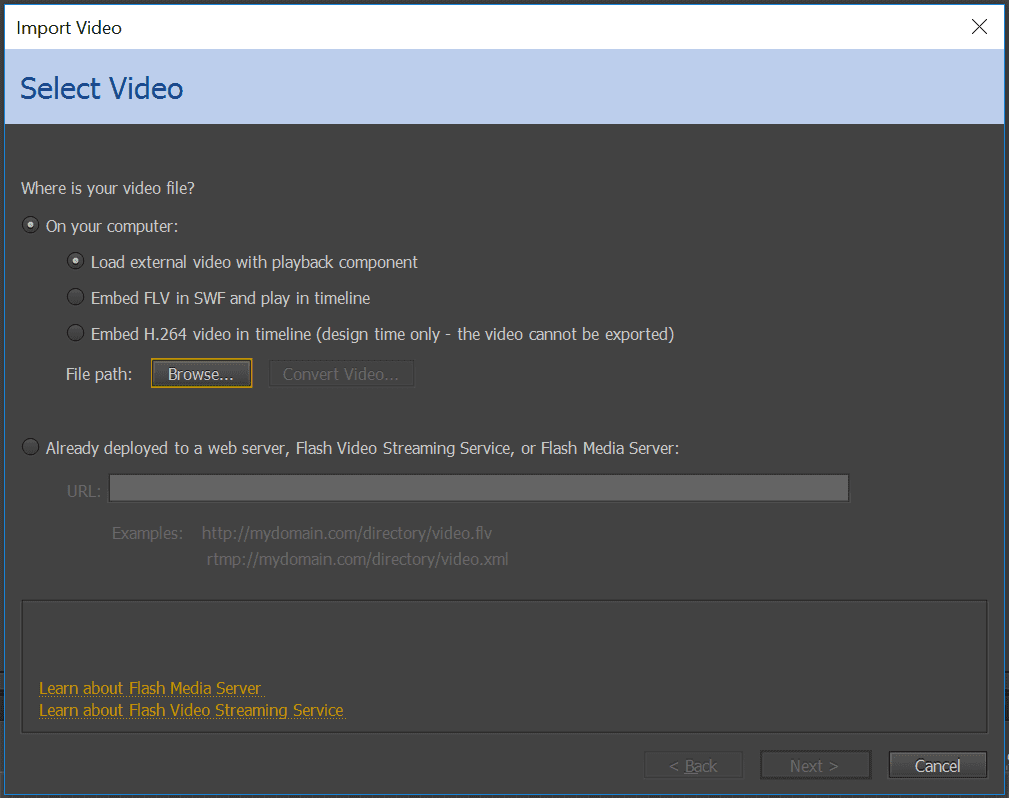
2. Import Video
Select File in the upper right corner of the menu bar then select the Import option within the list produced. This will open another list where you can select Import Video. Make sure that your video is already in Flash FLV or F4V format. If this is not the case, then you can convert your video to the aforementioned formats with a file converter.
3. Skin the Video
Select a skin that supports captions in the Import Video dialogue box. The default skin you’ll encounter is SkinAllOver.swf which provides the play, stop, back, forward, seekbar, mute, volume, full screen, and captioning controls.
You have three options to change the default skin:
- Choose a predesigned skin from the dropdown menu.
- Create a custom skin and add it.
- Customize individual controls in the FLV Playback Custom UI components.
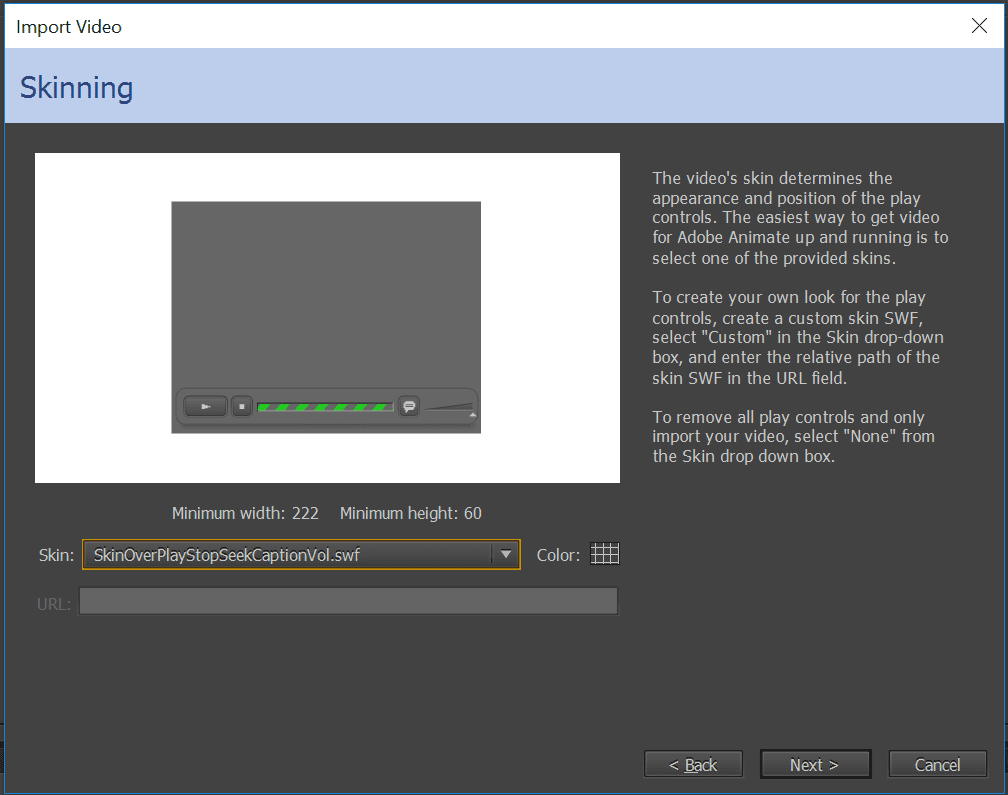
The selected skin will appear as the player interface near the bottom of the video and it is responsible for much of the user interaction. If you wish, you can change its color by clicking on the square icon next to the dropdown menu. Don’t worry if you need to change the skin later. Just select the FLVPlayback component and edit the skin there.
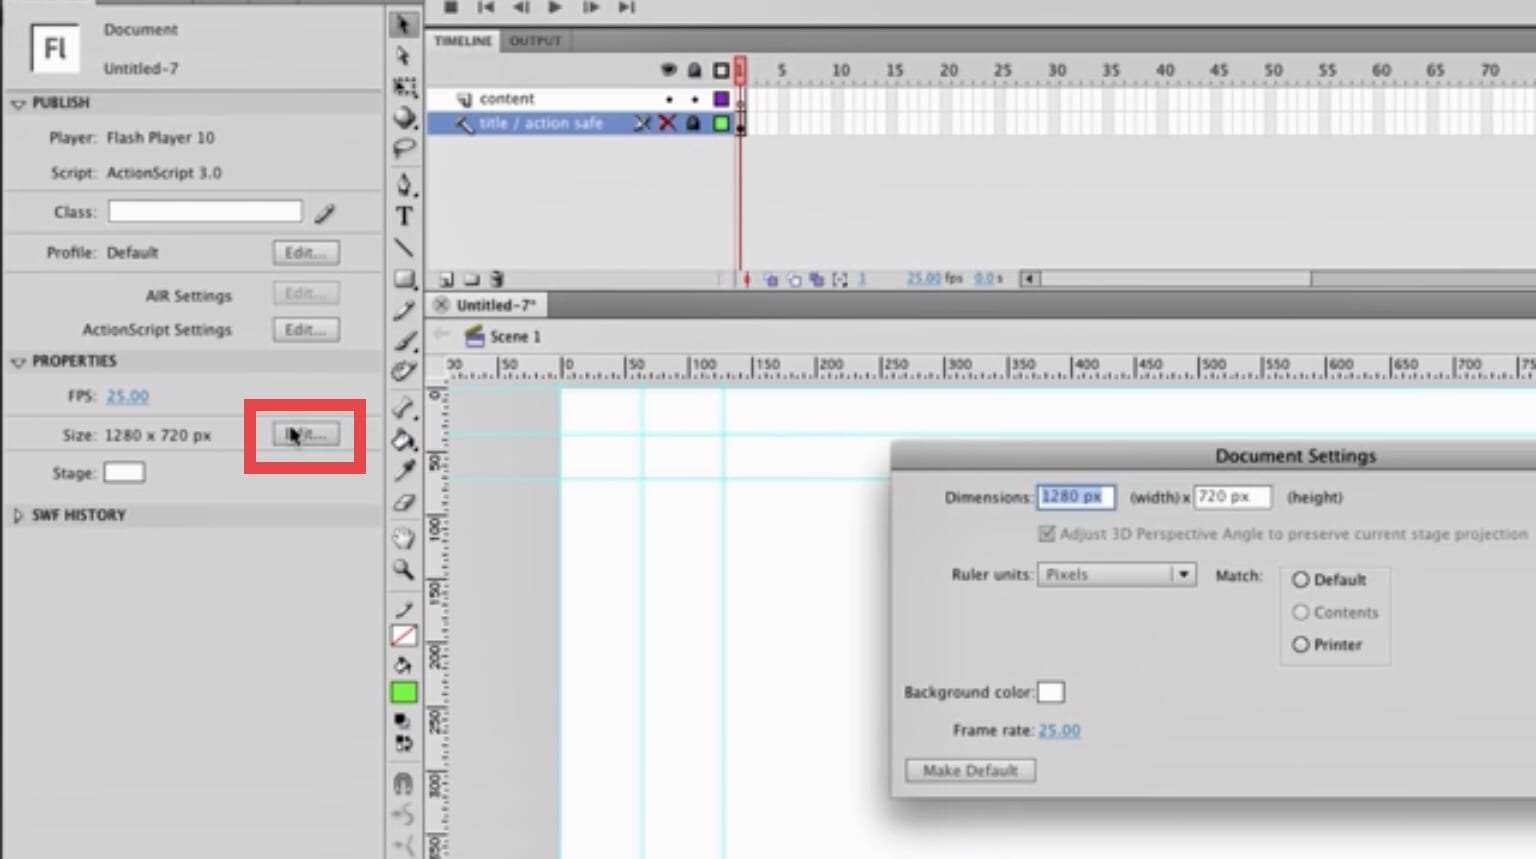
4. Adjust the Video
Click on Edit in Properties and open the stage’s Document Properties. Make sure the size of the stage is larger than your video. When you later export your video, this will ensure that nothing gets cropped out. If necessary, adjust the width and height of the stage in Document Properties.
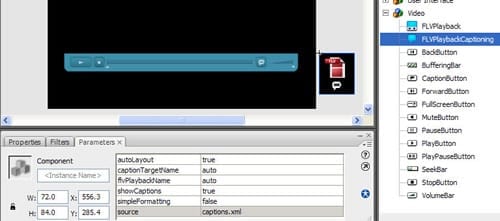
5. Enable Closed-Captions
Click on Windows then select Components. From Components choose FLVPlaybackCaptioning and drag your caption file to the stage. Then under the Component Parameters section, change the source field to the name and location of your caption file and set showCaptions to true. Your captions should now appear on your video.
Editing Captions in Adobe Animate CC
To optimize your audience’s viewing experience, you may wish to edit your captions. Adobe Animate CC makes it easy to alter the size, position, text and background color of your video’s captions.
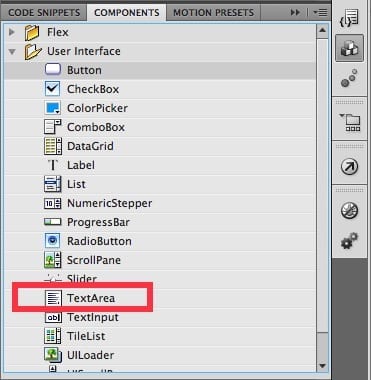
1. Adjust the Position of the Text Area
Select Windows then choose Components from the list of options produced. From Components click on User Interface where you can then select Text Area. Drag and drop the Text Area onto the stage. Position the text box wherever you desire using the arrows.
2. Adjust the Size of the Text Area
Next, change the width and height of the text box in the Component Parameters section of the Text Area. Make sure that there is enough room for two lines of text to fit comfortably. This will ensure the optimal viewing experience.

3. Commit Caption Edits
After you have finished adjusting the Component Parameters, set the of the component to CPCArea. Select the FLVPlaybackCaptioning component and also set the captionTargetName to CPCArea. The captionTargetName is case sensitive so check that the component name and captionTargetName are indeed identical. Then set the autoLayout field to false.
You can further adjust the visual aesthetics of the captions by adding the relevant Timed Text tags as found on www.w3.org.
Exporting Captions for Flash Videos in Adobe Animate
Now that you have edited your captions and everything is ready to go, it’s time to export.
1. Preview Captions
Select Control from the menu bar and choose the option Test Movie from the list produced. Now you can click on Test. This will show you how your flash video appears in browser which is useful for spotting any further adjustments that need to be made to your captions.

If you are happy with your captions, you can now move on to publishing.
2. Publish the Video
Once you previewed your captions, select File and then click on Publish. You have now published your captioned video.
Your Captioning Workflow in Adobe Animate
Congratulations! You should now be able to add captions to your Adobe Animate flash videos.
Adobe Animate/Flash is a great program to use if you want to caption your videos in a quick and painless manner. It is also very friendly to those who are new to adding closed captions and subtitles to their content. Hopefully, this guide has made you a whiz at Adobe Flash closed captioning.
You can make captioning even quicker and painless by using Rev to get your captions for only $1.99/minute and lightning-fast.

Subscribe to The Rev Blog
Sign up to get Rev content delivered straight to your inbox.