How to Add Captions and Subtitles to HTML5 Videos the Right Way
HTML5 provides flexibility for people to deliver content to audiences online. Learn how to get captions and subtitles to your HTML5 videos.
HTML5 provides flexibility for people to deliver content to audiences online. If you’re a video creator, HTML5 allows you to add subtitles and captions to your videos with relative ease.
In this article, you’ll learn how to add captions and subtitles to HTML5 videos.
Prepare the Video and Closed Caption Files for HTML5
To get started, upload the video and captions files to your website or webserver.
1. Upload Video for HTML5
Some browsers don’t play certain videos in HTML5 because it can’t read the codec or file type. To make sure that the video plays in most browsers, you need to add a couple of video file formats with different tags.
Other than .mp4, you should add a .webm version of your video. You can use a tool like Convertio to create a .webm copy of your .mp4 video.
2. Upload a Caption File for HTML5
The correct file format of the subtitle or caption data is Web Video Text Tracks or WebVTT.
If you don’t have the subtitles or captions for your video in WebVTT format, order subtitles and captions from Rev. In Rev’s captions editor, you can export your captions and subtitles in WebVTT, SRT, and many other formats to use across the web, at no additional charge.
Prepare the HTML5 Markup
1. Create the HTML markup for the videos
First, we want to create the HTML markup for the MP4 video:
<video id="sample_video" controls="controls" width="800" height="600"><br /><source src="sample_video.mp4" type="video/mp4" /></video>
In the markup above, there are two tags: <video> and <source>.
The former defines the characteristics of the video file when played online. The latter finds where the browser can find the video on your local drive or online.
For the width and height attributes of the video, feel free to enter the dimensions you’re most comfortable with.
Add the additional .webm format of the video with this tag:
<video id="my-video-stream" width="800" height="600" controls><source src="sample_video.mp4" type="video/mp4"><source src="sample_video.webm" type="video/webm"></video>
2. Create the HTML markup for the subtitles
Now, for showing the subtitles and captions onto the video, you will be using the <track> tag on HTML.
We will discuss the different attributes later to help you understand the purpose of each and properly label the information of your video.
Let’s assume that you want to show the English subtitles on the video. Here’s the HTML markup with the added :
<video id="sample_video" width="800" height="600" controls><source src="sample_video.mp4" type="video/mp4"><source src="sample_video.webm" type="video/webm"><track label="English" kind="subtitles" srclang="en" src="REV_TRANSCRIPTION_V3.vtt" default></video>
Whereas:
- label – title of the track
- kind – type of the text track (subtitles or captions)
- src – path of the file in your local drive or online
- srclang – language of the track
Upload the markup, video, and subtitles to the same hosting. Ideally, save them in the same folder to make things less complicated for you.
Make sure that the file sources are correct in the markup. If not, then the video won’t play or the subtitles and captions won’t appear.
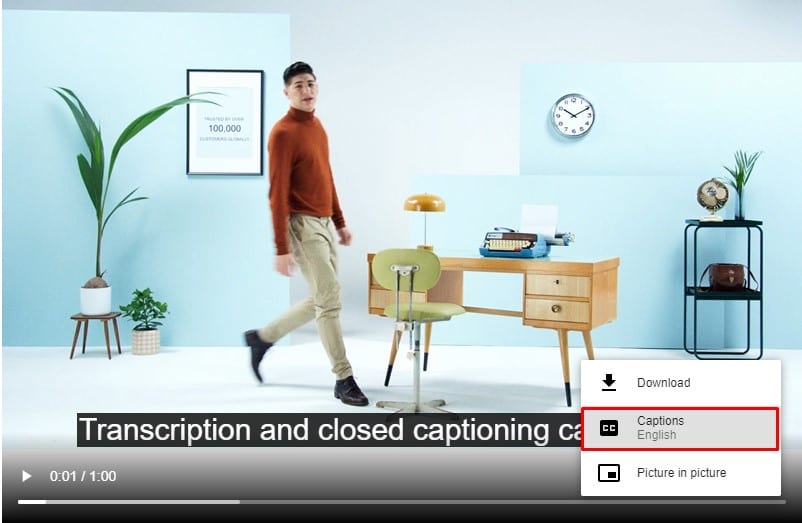
If the markup works, you can turn on the subtitles by clicking on the three-dot icon.
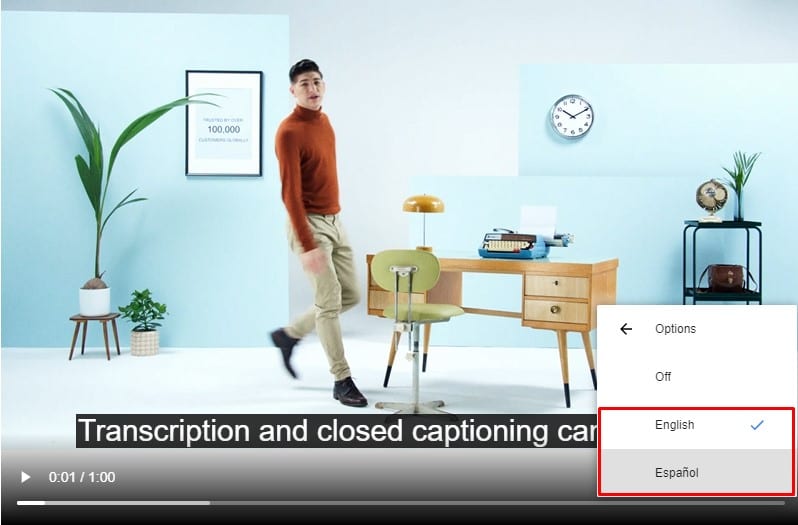
You can add more tracks if you have subtitles and captures of the video in another language by creating another tag on the next line.
Here’s what the markup would look like if you have English and Spanish subtitles of the video:
<video id="sample_video" width="800" height="600" controls><source src="sample_video.mp4" type="video/mp4"><source src="sample_video.webm" type="video/webm"><track label="English" kind="subtitles" srclang="en" src="REV_TRANSCRIPTION_V3.vtt" default><track label="Español" kind="subtitles" srclang="es" src="REV_TRANSCRIPTION_FINAL.es.vtt"></video>
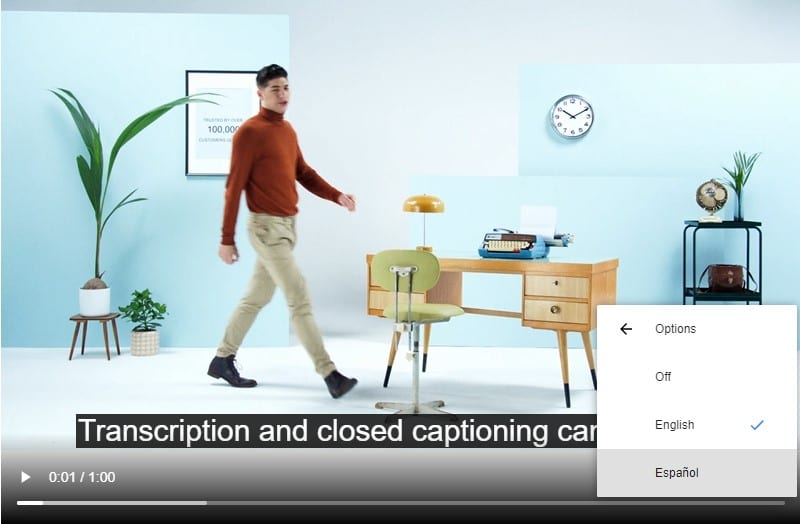
To toggle the subtitles, click on the three-dot icon and choose Captions.
How to Change Style of HTML5 Video Subtitles
If you’re not happy with how your subtitles look, you can change their appearance using CSS.
In the file where you place the HTML markup, you must add the <style> tag before the </video> tag. This is where you can customize the appearance of the subtitles and captions.
Next, enter the pound sign and the video id followed by the ::cue pseudo-element. It lets you target specific texts to style in your subtitles and captions.
From here, you enter the following attributes and customize accordingly:
- background (shorthand properties only, i.e. background-color, background-image, etc.)
- font
- outline (shorthand properties only, i.e. outline-style, outline-color, etc.)
- color
- visibility
- opacity
- white-space
- text-decoration
- text-shadow
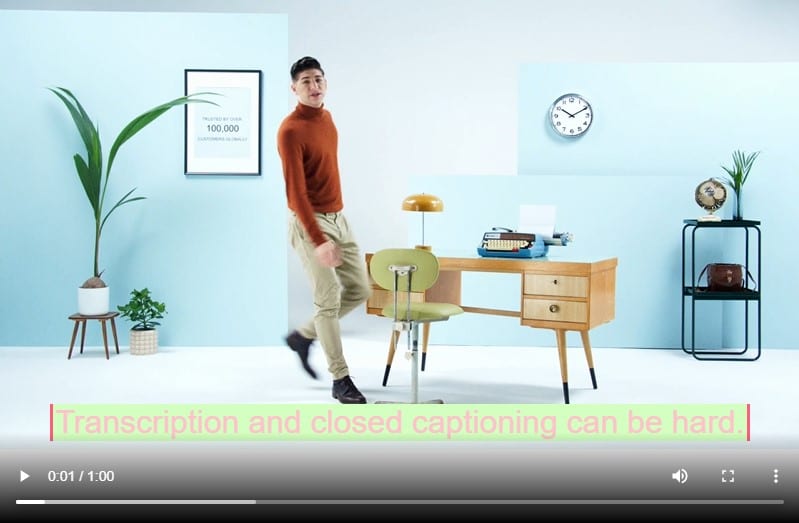
For example, you want the subtitles to have a light green background and pink text with a darker pink outline. Here’s its markup:<style>Again, the markup above should appear before the </video> tag.The subtitles should look like this:
#sample_video::cue {
background-color: #D3FFC0;
color: #FFC0CB;
outline-style: solid;
outline-color: #FF5D7A;
font-size: 32px;
font-family: "Times New Roman", cursive;
}
</style>
For font-family, you must use web safe fonts to help make your subtitles legible.
While using a unique font will help set your subtitles apart, not all browsers may support your chosen font. Therefore, it’s best to choose the ones that are readily available on all browsers.
Test Browser Compatibility
Before moving forward, make sure that the subtitles appear correctly on all browsers if possible. You don’t want your video to show subtitles with incorrect styles.
The screenshots above show the video and subtitles from Google Chrome. Below are images of the video and how they look like in their respective browsers.
Google Chrome
Apple Safari

Mozilla Firefox

Opera
Microsoft Edge

Get WebVTT Subtitles for HTML5 Videos
Order your captions and subtitles from Rev and get WebVTT, SRT, and multiple captions formats to use across the web at no additional charge.
Rather Not Use Caption Files?
Rev now offers burned-in captions (open captions). Just check the “burned-in captions” box at checkout and you’ll receive a video with permanent, hard-coded captions added straight to your videos. This means you can markup the video file in HTML5 without using the VTT or SRT file markup.


Subscribe to The Rev Blog
Sign up to get Rev content delivered straight to your inbox.