How to Add Text in Adobe Premiere Pro – Add CC, Titles, Subtitles and Text in 2020


A Guide to Adding Text, Captions and Subtitles in Adobe Premiere Pro
There are many reasons why you might want to add text to your video projects in Adobe Premiere Pro. Sometimes you just need a simple title at the beginning of your short film. Or you might need a credit crawl at the end of your feature. But just as often, you’ll need to add text for captions and subtitles.
For those just starting off in Adobe Premiere Pro who haven’t used the platform and those who might not be familiar with past generations or other NLE apps, adding text isn’t that tricky once you get the hang of it. It just takes a little bit of start-up knowledge to learn where things are and how to customize them to your liking.
For this article, we’ll go over the steps you need to take to add text to your video projects in Adobe Premiere Pro. We’ll include examples as a guide for you to follow along.
Adding Closed Captions (CC) and Subtitles in Premiere Pro with Rev (Easiest Solution)
1. Go to Rev.com and upload your video file to be captioned
2. Once you get your fully captioned video file back, import your files, including the video file plus the captions file from Rev.com (.SRT, .SCC, etc.)
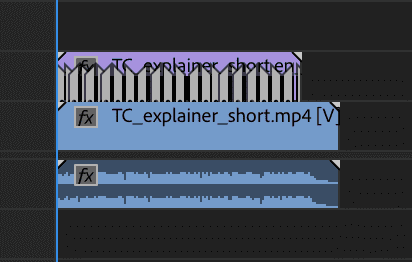
3. Drag the files into your timeline.
You’ll notice that the audio and video are separated into different tracks (if you don’t have them separated already), which can come in handy later if you only want to overlay different visuals over the corresponding audio.
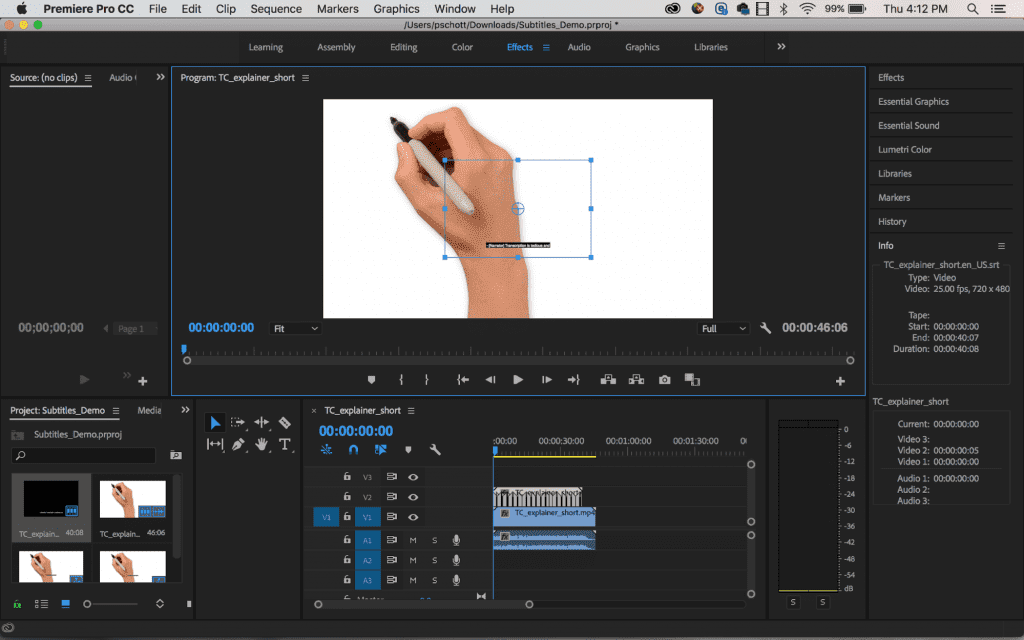
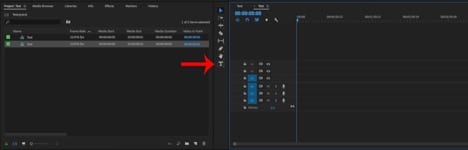
4. Make sure that the “Closed Captions Display” setting is enabled.
To do this, find and click the tool icon in the Program area and find the “Closed Captions Display” menu option.
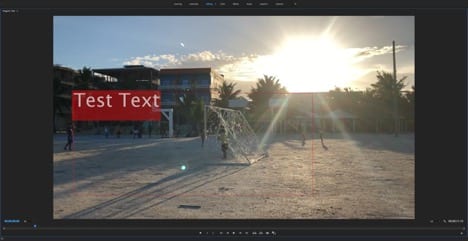
5. Adjust the caption placement and size
Premiere may default to options that you’d like to change. You can easily relocate the placement of the captions and make them bigger or smaller as needed.
7. Test your captions
Use the slider at the bottom of your timeline to zoom into a smaller portion of your sequence, which will allow you to clearly see the written captions in each section and make it easier to move or edit them.
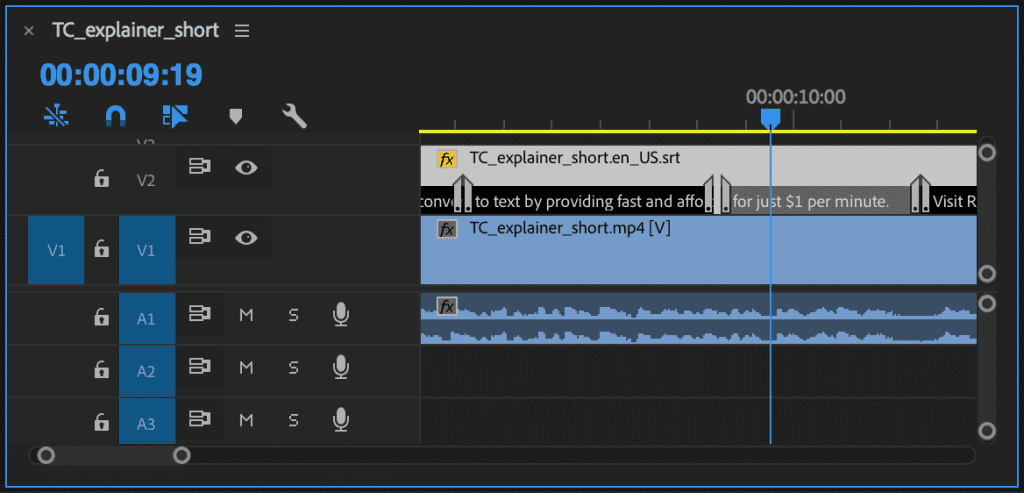
8. If you need to adjust the caption locations, move the playhead (blue vertical bar) in your timeline
Pinpoint the exact place where you’d like the next caption to start. Then drag and drop the caption to the desired location
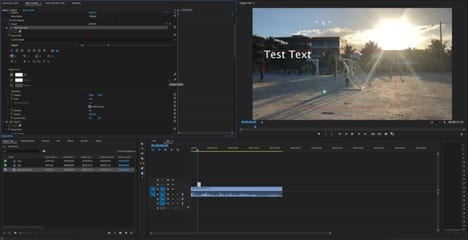
9. On the left side of your screen you will see the “Caption” panel options, where you can edit the text of your captions line by line
Here you can edit their text font, color, add musical notes, adjust the size, and other options
10. Export your media!
When you export, pick your desired format like H.264, and under the captions tab on the export window, you’ll have the option to create a Sidecar File. This will export and download two separate files: one file with the complete video (with burnt in captions) and another .SRT file (only the captions)
Steps for Adding Other Text to Video in Premiere Pro
- Open Project and Create Sequence
- Click the “Type Tool” then choose a spot on the Program Screen
- Type your Text
- Move and Shape your Text Box
- Work with the Text in the Effects Controls
This section of the guide is for adding text to videos without using Rev for your captions & subtitles
1. Open Project and Create Sequence
To begin adding other types of text, or your own captions (without using Rev.com), you’ll need to open Adobe Premiere Pro and create a new project. From there you’ll need to upload the footage that you’d like to work with (remember to stay organized!) and create your sequence based on your footage and desired export requirements.
Once you have your project and sequence started, we can dive into working with text. It’s worth noting though, that unless you’re planning to make text a major part of your video, then it’s usually best to wait to add text until later – once you’ve made your edits and color corrections.
2. Click the “Type Tool” then choose a spot on the Program Screen
Adobe has a handy “Type Tool” which makes creating text boxes simple and exact on your program screen. You can either navigate to the “Type Tool” by clicking the “T” icon at the bottom of your mouse selections, or by simply pressing the letter “T” on your keyboard.
Once the “Type Tool” is activated, you’ll need to navigate to the Program Screen to and find a spot to click. You can either do a single click, or you can click and drag to create your text box (this is preferable if you’re looking to create a specific space for your text).
3. Type your Text
While you don’t have to type your full text here, it’s usually best to get it copied in so that you can start working with the size. If you have several sentences worth of text, it might not show up due to being too large – but don’t worry – it’s there you just can’t see all of it until you change the size.
4. Move and Shape your Text Box
Once your text box is created and your text is there, you can either go into working with the text to change color, font, size, etc… or you can also begin moving and shaping your box for its ideal location. Moving and shaping the box should be as simple as when you first placed it. There should be a red outline showing your box on the program screen. Move that around and re-shape it until the text inside of the box looks ideal on the screen.
5. Work with the Text in the Effects Controls
You can also begin to customize your text in the “Master *Graphic” “Effects Controls” panel on the upper left side of your screen. (If you have several effects already in use you might need to scroll down to find the “Text” line.)
Many of these controls can range from self-explanatory to more in-depth. But the basics will all be there: Font, Size, Alignment, Tracking, Kerning, Leading, Opacity, etc… You can read up more on these controls on Adobe’s website here.
Other Tips for Working with Captions and Subtitles
As mentioned above, when working with longer blocks of text like captions and subtitles, it’s often best to make a template that will allow for the text to be an appropriate size and color (as well as the length of the box) to stand out on screen. To start, if you could find an average sized block of text and create a box for it. Change the text size and work with the box dimensions to create an ideal spot on your screen.
Both captions and subtitles usually go best at the bottom of your screen. But if you’re working with particularly bright or dark footage, you might have to add elements like drop-shadow, edges, or background colors to make the text stand out and appear readable.
Once you have a text box that looks good and works for your project’s needs, you can simply copy and duplicate that text box as many times as needed (be sure to rename it each time though). With each new duplicate, you can add a new block of text and tweak it as needed.
Related Content
Latest Article

Revcommendations: International Film Favorites
Read the articleMost Popular
How to Download YouTube Subtitles as Text & Transcript Files
Read the articleFeatured Article