


How to Add Captions and Subtitles to Adobe Captivate Quickly
Learn how to add closed captions or subtitles to your Adobe Captivate projects to make your online courses accessible and ADA compliant.

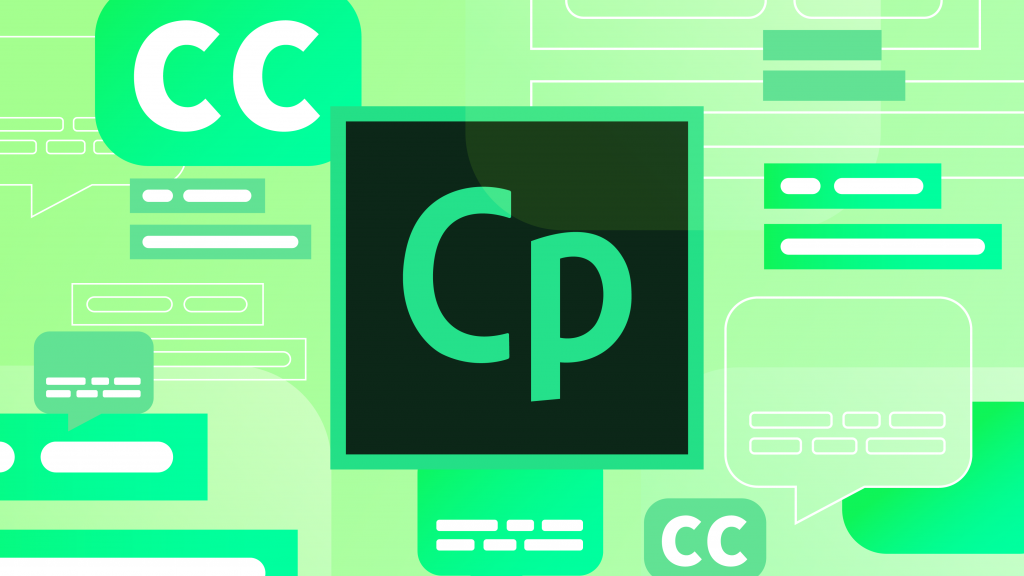
Did you know you can create courses in Adobe Captivate that meet accessibility standards and foreign language needs? With a few clicks of a button, you can add closed captions to your audio-based courses, include closed captions on video content, or add customized subtitles in any foreign language.
Adding closed captions or subtitles to your Adobe Captivate project comes with the following advantages:
- Adding closed captions makes your training Section 508 compliant.
- Meet Web Content Accessibility Guidelines 2.0.
- Expand your audience reach by offering training in various foreign languages.
- Provide training to people that can’t access audio files.
This guide will offer instructions on how to add captions and subtitles to your Adobe Captivate presentations for audio-based courses, video-based courses, and how to use the customizable closed caption features.
Which caption formats are compatible with Adobe Captivate
Before delving too deep into how to add captions to Adobe Captivate, it’s critical to know which caption formats from Rev are compatible with the software. Compatible caption formats for Adobe Captivate are:
- Scenarist (.scc)
- MacCaption (.mcc)
- XML (.xml) Note: You may order captions in TTML (.ttml) format to be compatible with XML)
- Spruce Subtitle File (.STL).
Easiest Option for Captions in Adobe Captivate
Adobe Captivate makes it easy to add closed captions and subtitles to your Adobe Captivate presentation.
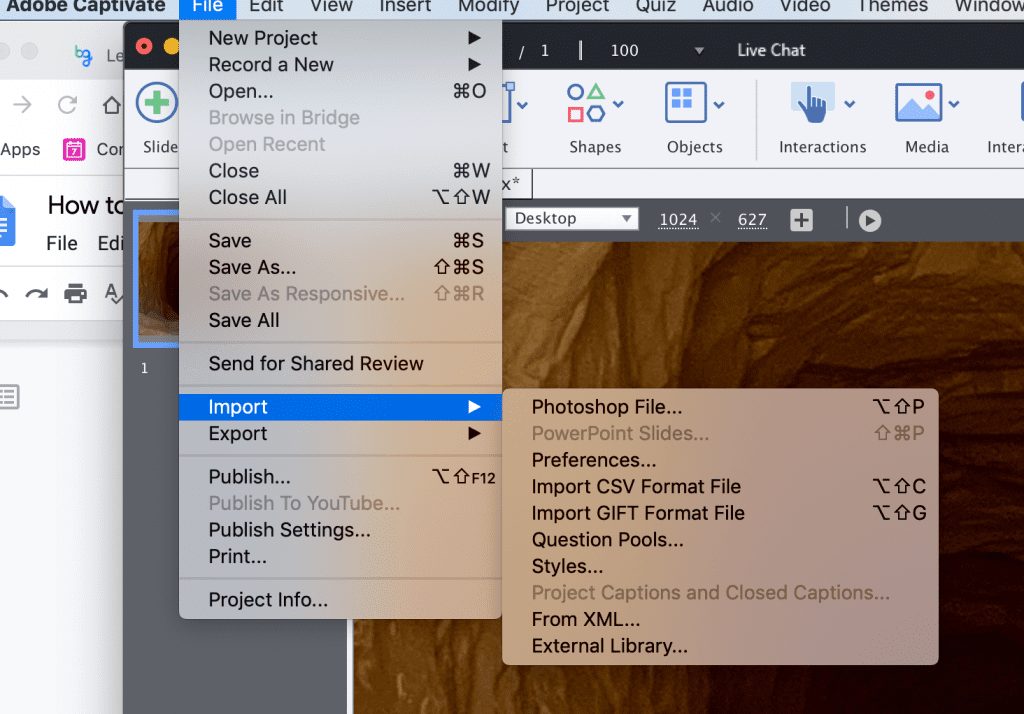
Remember, you don’t have to write all of the captions yourself. If you are using captions from Rev, you can simply import the captions into Adobe Captivate by clicking on “file,” “import,” and then “project captions and closed captions.”
Easiest way to caption a video for Adobe Captivate
Rev offers a new burned-in captions feature in which we will add captions directly to your video for you. Just send Rev the video file and we will deliver you a fully captioned video file that you can import directly into Adobe Captivate. Be sure to check the “Burned-In Captions” option when you checkout.
How to add closed captions yourself to audio-based content in Adobe Captivate
Adding closed captions to audio-based content is easy. Here are the steps you need to follow.
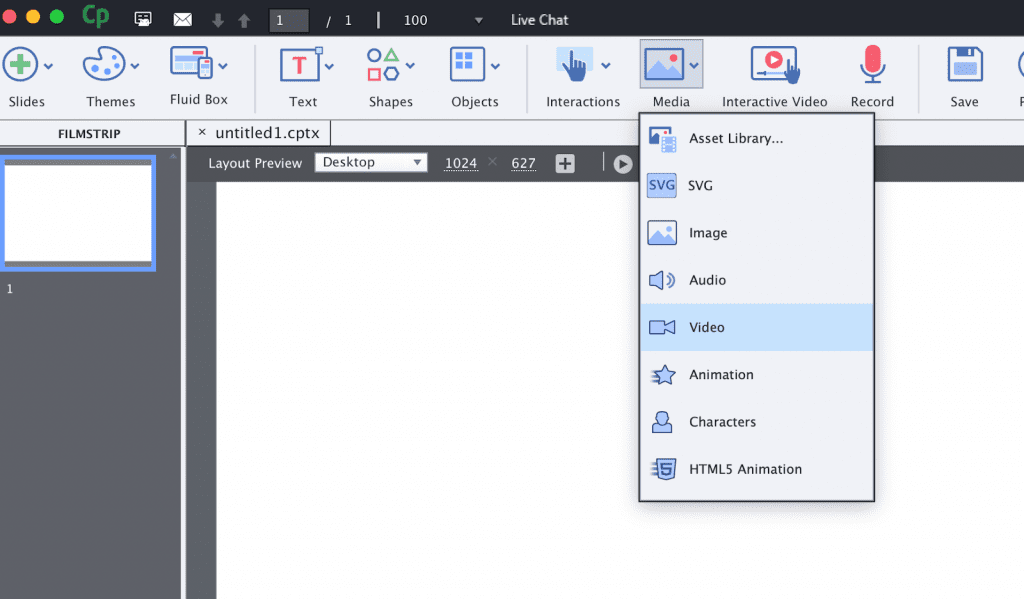
1. Add your audio content.
When you look at the homepage of your project, you’ll see a box that says “Media” at the top of the navigation bar. Click on this box and select “audio.”
2. Add your audio file to the slide
Adobe Captivate will redirect you to a page where you can either use a sound from Adobe or you can choose an audio file from your computer. Choose the audio file you want to include for that slide.

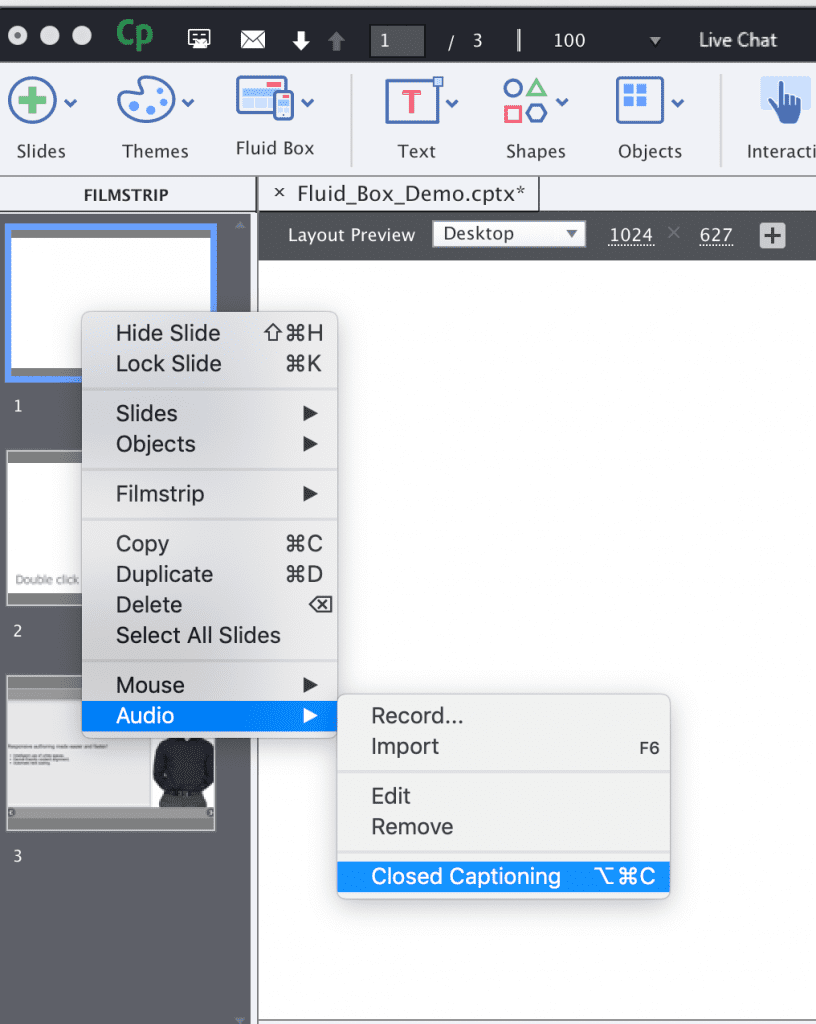
3. Select closed captioning
Once you have added your audio file to the slide, right-click on the slide. Then, scroll down to “audio” and select “closed captioning.”
4. Add your caption
Adobe Captivate will direct you to their “closed captioning” feature. From here, you click on the blue “+” on the right side of the screen to add your first caption. You’ll notice you can add more than one caption and choose the start and stop time for each caption.

5. Save
Don’t forget to save your work.
An alternative way to add closed captions to audio-based courses is to add narration to your screen, add slide notes, and then convert those slide notes to closed captions.
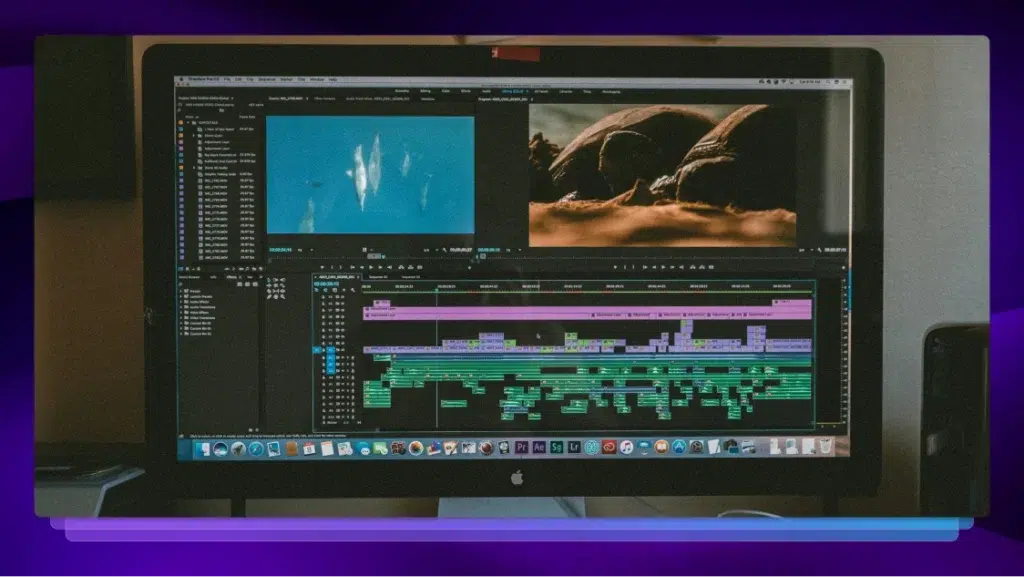
How to add your own captions and subtitles to video-based content on Adobe Captivate
Adding captions and subtitles to video-based content is a surefire way to make sure everyone understands your presentation. Here are the steps to follow to add captions or subtitles to videos.
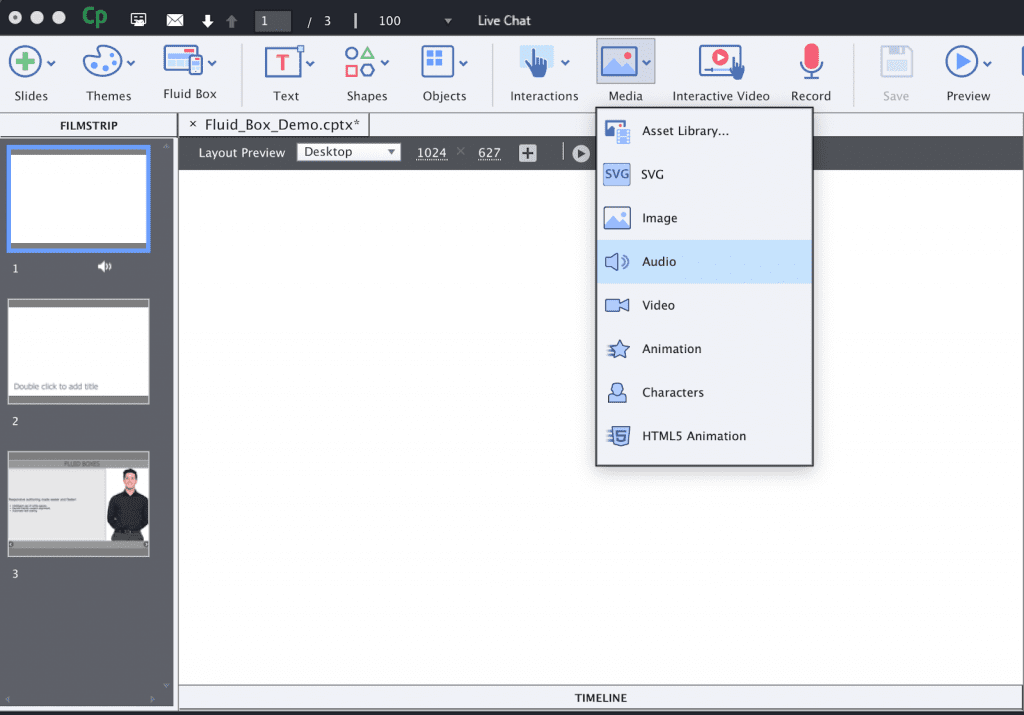
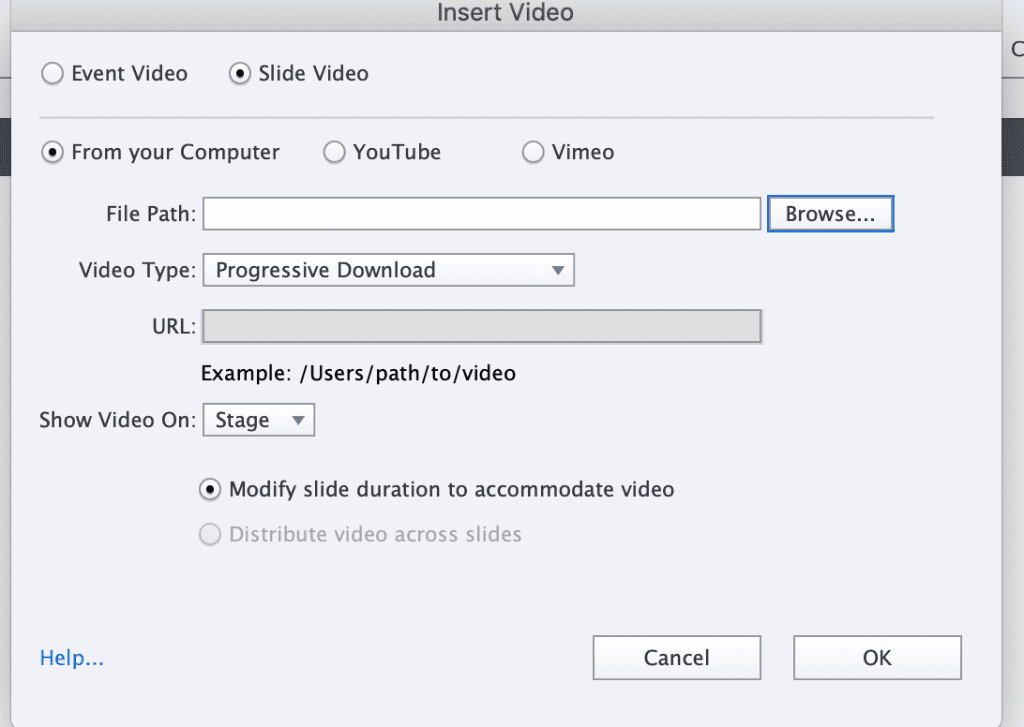
1. Add your video
From the main page of your project, click on the “media” button, and select “video.”
2. Upload your slide video
From here, select “slide video,” and upload your file from either your computer, YouTube, or Vimeo.
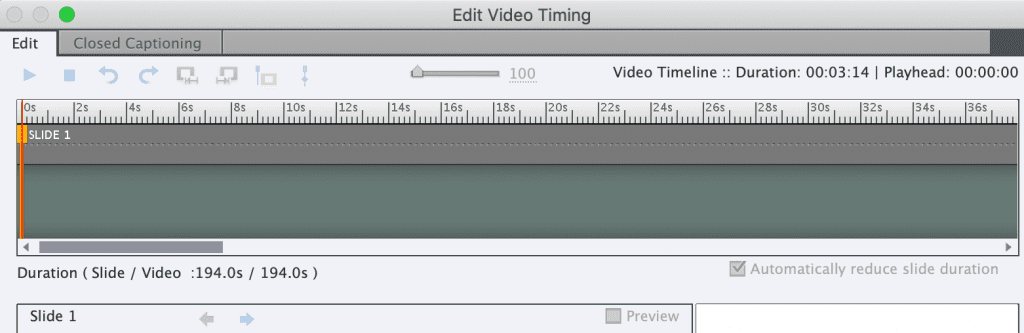
3. Edit video
Once you upload your video, click “video” on the top navigation bar and select “edit video timing.”

4. Click the closed captioning tab.
Next, click the “closed captioning tab” that appears on the top left side of the screen.
5. Start captioning
Once you are on the “closed captioning” tab, you can place your cursor where you want to add the CC. Then, click the blue “+” sign to add your text.
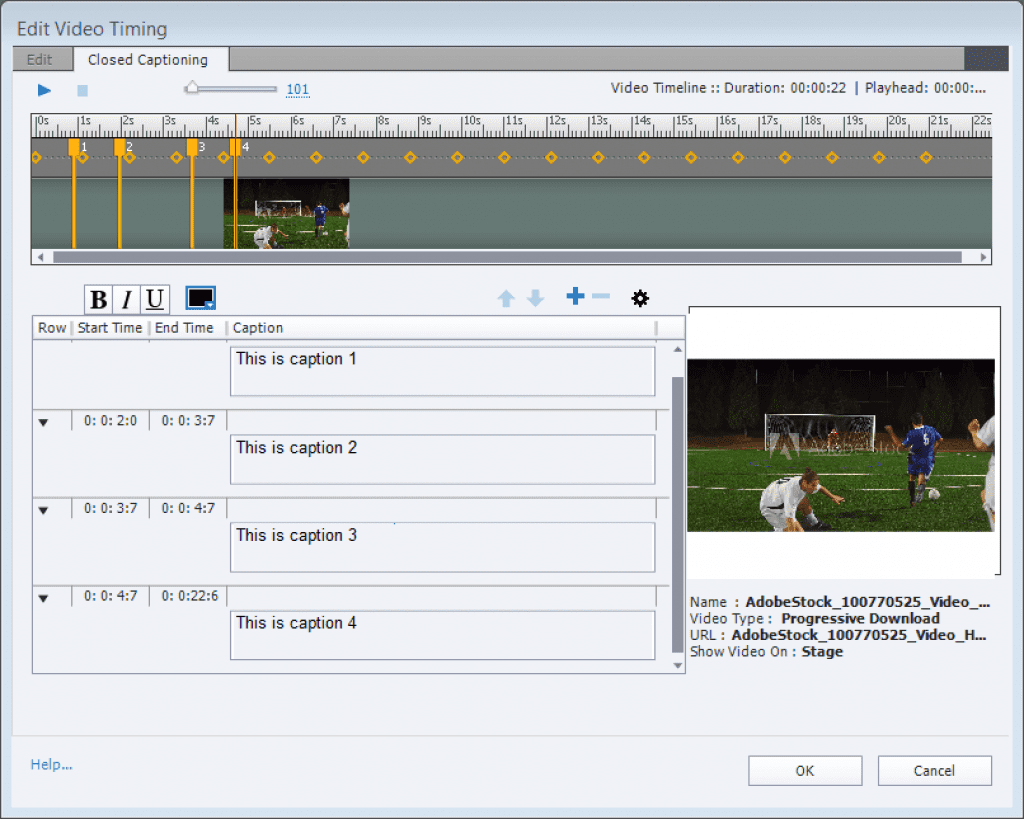
Image source – Adobe
6. Choose your closed captioning settings
To change your settings (e.g., font, size, color, etc.), click on “CC Settings.”
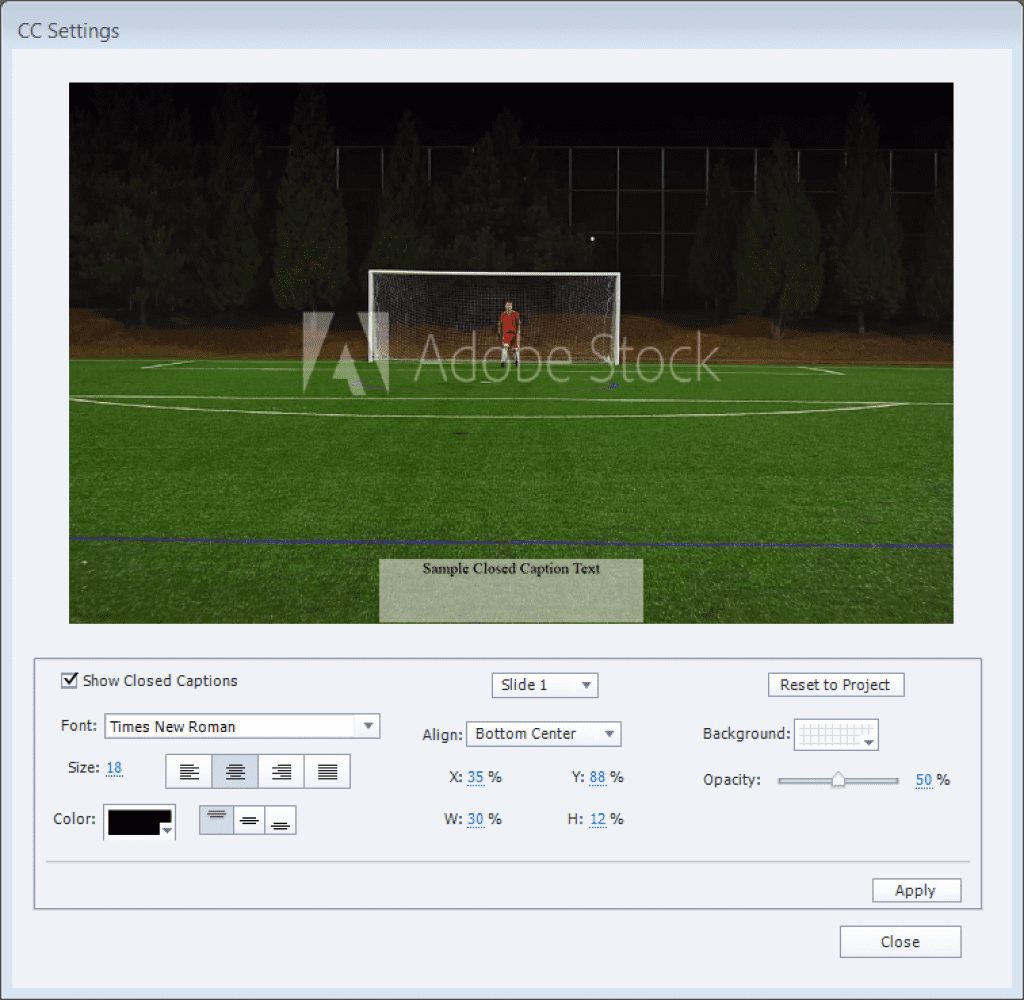
Image source – Adobe
Once you are done entering your closed captions or subtitles, you can enable the display of the closed captions in the published projects. You do this by selecting “show closed captions.” Then, the “CC” button will appear in the play bar, where viewers can choose to view closed captions.
Rather have Rev caption your content and add them straight to your videos? Rev now offers burned-in captions (open captions). Just check the “burned-in captions” box at checkout and you’ll receive a video with permanent, hard-coded captions added straight to your videos. Also available for foreign language subtitles!
How to use the customizable closed captions feature in Adobe Captivate
Have you ever run into the problem where you want to add subtitles or closed captions to your presentation, but the placement of the captions are in the way of critical design elements?
If so, don’t worry. Adobe has thought of it all, and with the 2019 Adobe Captivate version, you can now create custom close captions or subtitles. Here is how.
1. Select the slide with the audio file
The first step is to select the slide with the audio file you want to caption.
2. Select “properties” and “options”
Once you are on the correct slide, look to the right side of the screen. You’ll see a box that says “properties” and “timing” on the top. Click on “properties” and then “options.”
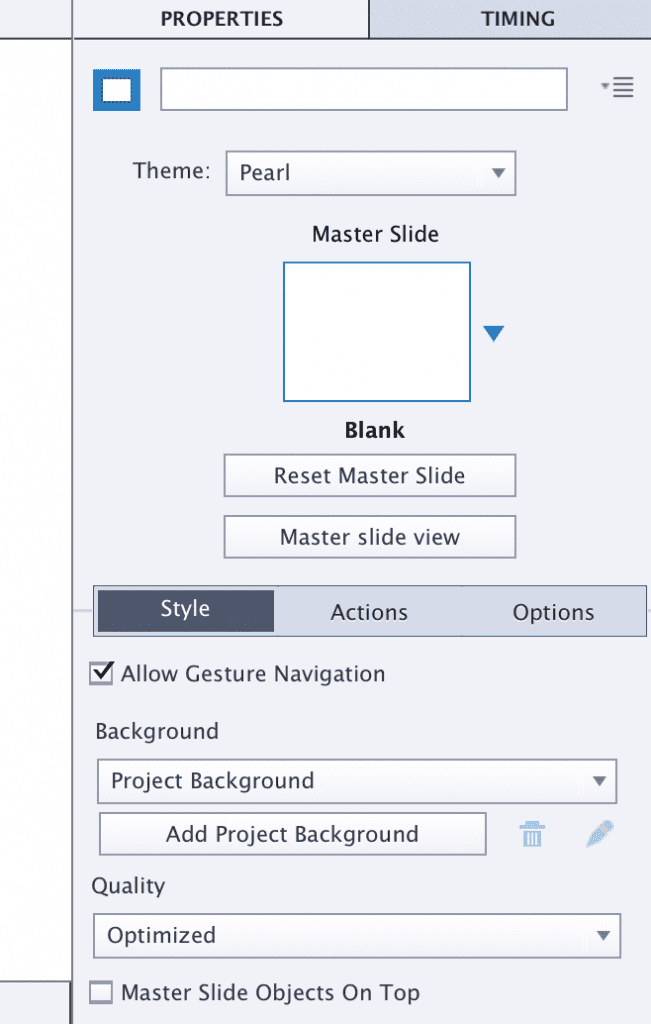
3. Click on the audio file
Once you have clicked on “options,” click on the audio file.
Alternatively, you can get to this same place by right-clicking on the audio slide and selecting “audio,” and then “closed captioning.”

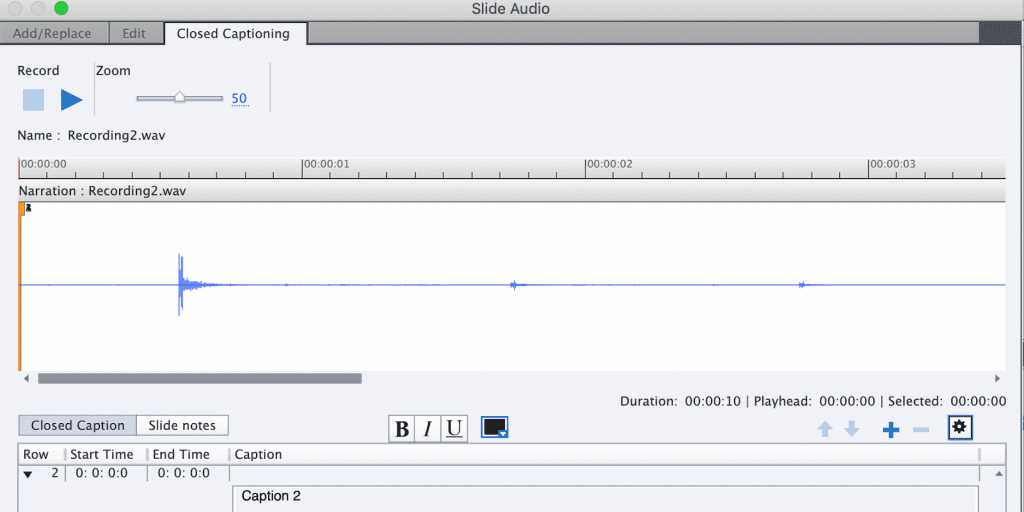
4. Add captions in the “closed captioning” section
Once you are on the closed captioning screen, add your desired captions.
5. Click on the gear icon in the “closed captioning” section
After you have created your captions, click on the little gear icon on the right side of the box.
6. Customize your captions
Once you have clicked on the gear icon, Adobe Captivate will bring you to the “CC Settings” page where you can customize your captions or subtitles.
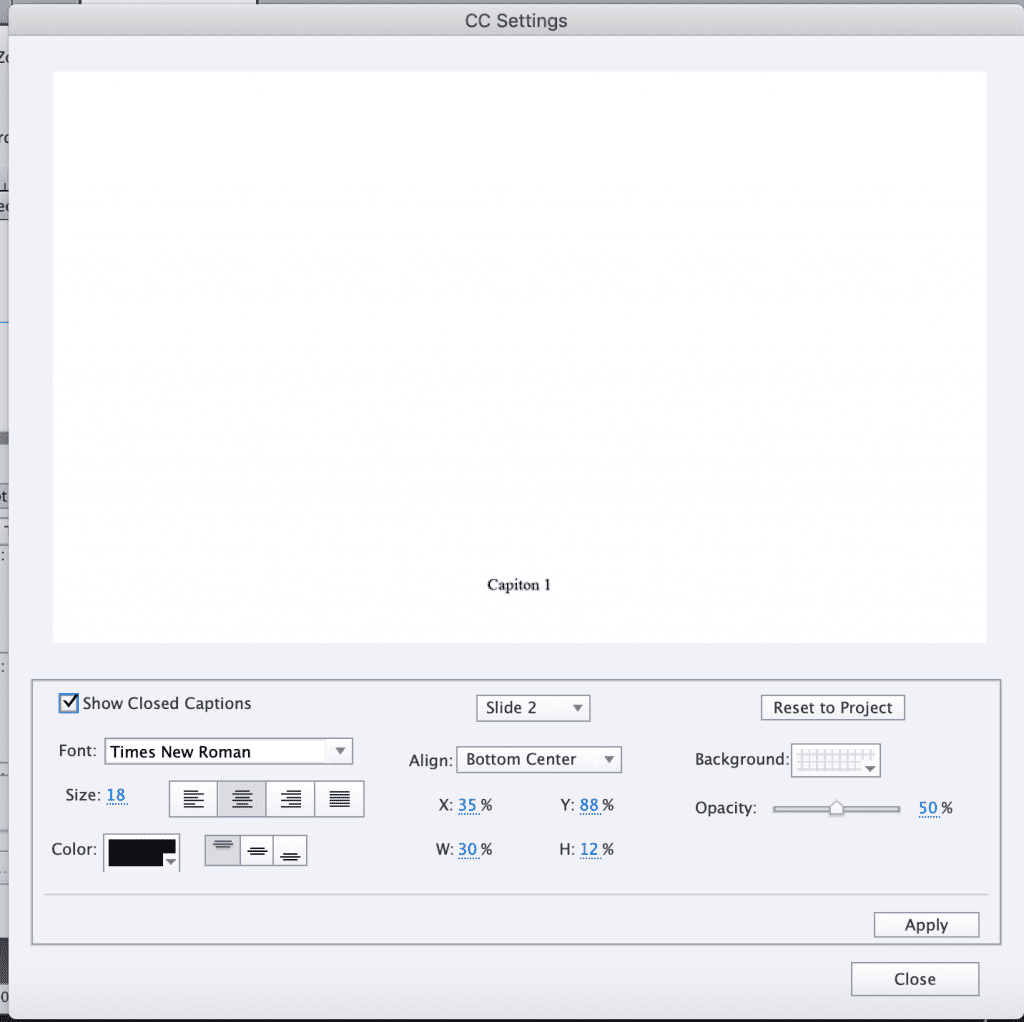
You’ll notice you can change the font, the size, the color of the text, the alignment, the background, the opacity, etc.
You can also customize various slides from within the “CC Settings” by selecting the respective slide from the drop-down menu.
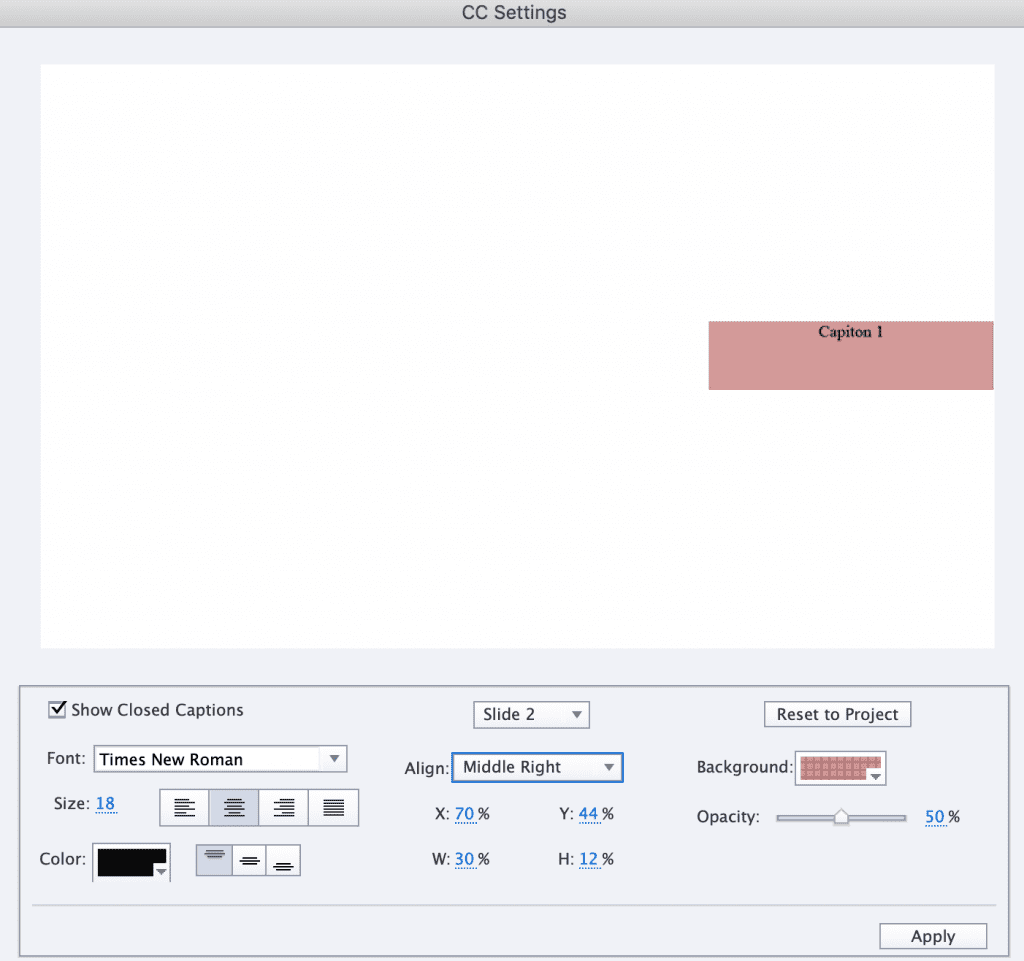
7. Apply changes and close the window
When you are satisfied with your changes, you can press “apply,” and close the window. You will notice your closed captions look just how you customized them.