How to Edit Videos Faster in Premiere Pro: 5 Tricks
Learn how to edit videos faster in Adobe Premiere Pro with these five useful tricks. Learn more about how to use shortcuts, transcripts, and optimized workflows.

In today’s age of constant social media and instant content, the role of the digital video editor is changing rapidly. And for an art form that was born out of the methodical splicing of film stock, it’s with great contrast that today’s editors are often asked to piece together projects very fast – and often on the go.
While every editor will always ask for one more day to make those last few changes, the reality of the industry means that editors need to always be looking for ways to speed up their workflow through shortcuts, customized workspaces and by utilizing all the platforms, tools and effects at their disposal.
So, let’s dive into how to maximize your speed and optimize your workflow when editing in Adobe Premiere Pro.
Learn How to Edit Videos Faster Using Transcripts
1. Keyboard Shortcuts
As is the case with many of the Adobe Creative Cloud products, there are standard keyboard shortcuts for pretty much every function. If you’re familiar with Photoshop or After Effects, you might find that many of the shortcuts are similar, or often the same. And, the exact presets for the latest edition of Premiere Pro can be found here.
However, if you’d like to know some of the best to use, here are some of my favorites to get started with:
New Sequence: Ctrl + N
Audio Gain: G
Speed/Duration: Ctrl + R
Add Edit: Ctrl + K
Trim Edit: Shift + T
Apply Video Transition: Ctrl + D
Apply Audio Transition: Ctrl + Shift + D
2. Use a Professional Service for Transcriptions, Captions, and Subtitles
One of the best ways for video editors and producers to speed up their edits is by using one of the greatest resources for working with your transcriptions, captions, and subtitles – Rev. When working with long interviews or lots of dialogue, transcribing by hand can take hours of your precious time. It’s also extremely hard keep your captions or subtitles time-coded and coordinated with your sequences.
Using an outside resource like Rev for transcription, captions and/or foreign subtitles is as simple as uploading your video and audio files (directly or through a URL link) and you can get full transcripts with 99%+ accuracy within hours.
Learn how to import an EDL into DaVinci Resolve Studio
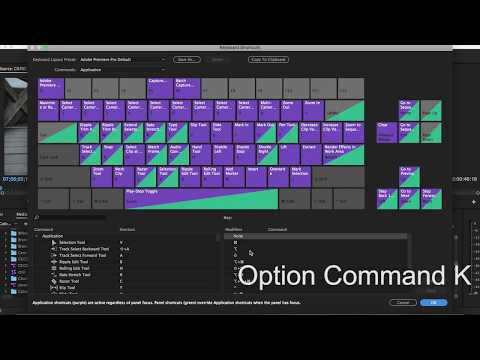
3. Customize Your Workspace
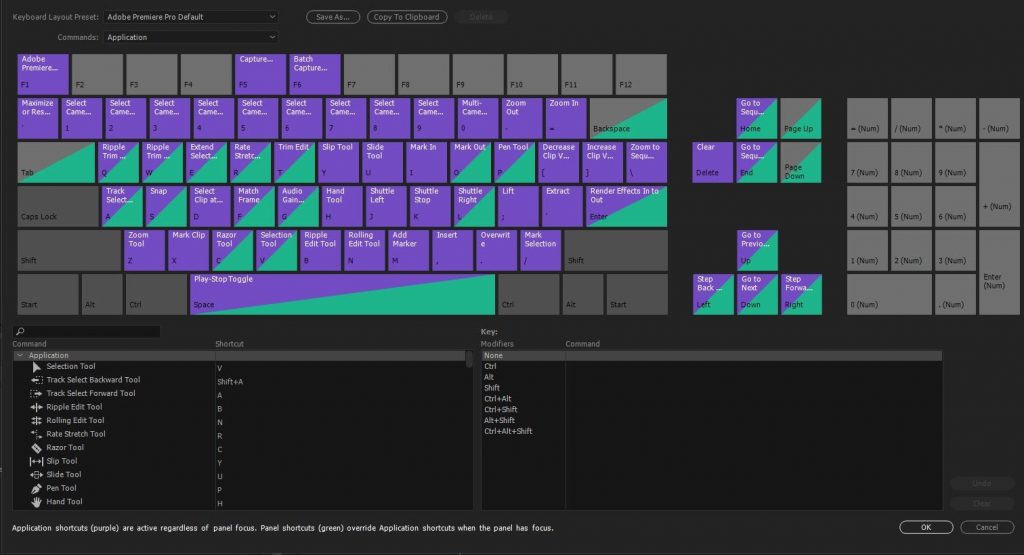
Similar to the above, Adobe Premiere Pro does a great job of allowing users to fully customize their workspace for your own, personalized efficiency needs. If you are looking to maximize your speed, customizing hotkeys and color coordinated sectors of your keyboard together can help to make editing and toggling between functions much faster.
To create your own shortcuts, all you need to do is open the Keyboard Layout and simply drag-and-drop the commands to where you’d like for them to be. Premiere Pro will let you know if there are any issues with a warning if you’ve moved a command to a spot where it isn’t allowed, or might create a conflict.
4. Embrace the Ripple Edit Tool
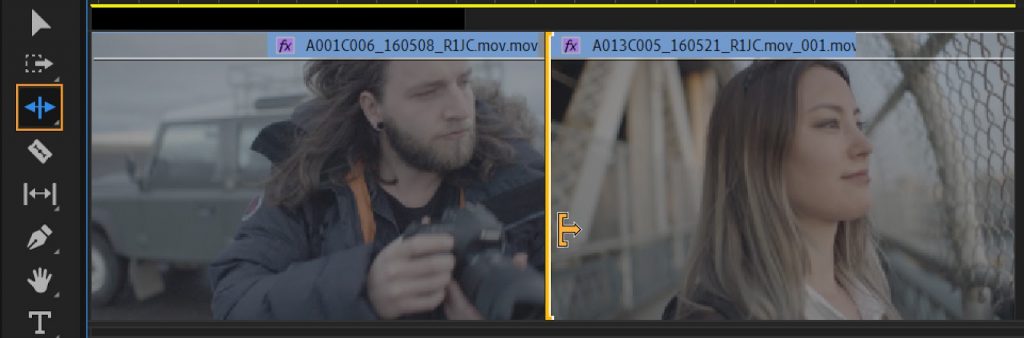
Focusing in on one time-saving tool, the ripple edit is perhaps the most powerful function you can utilize in Premiere Pro. The ripple edit speeds up your edits by automatically closing the gaps usually caused by the trimming down of certain clips. The ripple edit can also be used to add length to clips while pushing the rest of your edit forward without overlapping.
Pro Note: the ripple edit is best used early on in your editing process as you try to lay out a rough draft. Be careful using it once you have more layers as it might move more things around then you intended.
To select the ripple edit tool, click on on the mouse function which looks like two arrows pointing away from each other (<-|->) – or by simply pressing “B” on your keyboard. When selected, a yellow trimming icon will appear when you hover over the beginning or ending of a clip, which signifies that you can “ripple edit” it without overlapping any other clips.
5. Optimize Your Workflow for Speed
Another way many video creators and editors can save time on their projects is by simply optimizing the order of their workflow. If you work out of order and add extra elements like color correction or other high-processing-power effects to your clips too early, it can cause major delays in rendering (and even crashes) later.
For optimal time-saving performance, here is a recommended workflow:
- Upload and organize footage (bonus: create proxies if needed)
- Create timeline with rough draft of the video
- Edit audio as needed
- Add audio and video transitions
- Color correct and color grading
- Add titles, lower thirds or other graphics
- Finish and Export
Learn How to Edit Videos Faster Using Transcripts & EDL files