How to Add Captions and Subtitles in Sony Vegas Pro
This tutorial will guide you through the steps of adding captions and subtitles in Sony Vegas Pro.


Adding captions and subtitles to your video is a great way to ensure that you a reaching the largest possible audience and it can help your content stand out. However, it can be quite daunting to caption hours of video yourself in Sony Vegas Pro. Importing these files directly from Rev will save you crucial time that can be better spent on other important tasks.
This tutorial will guide you through the steps of adding captions and subtitles in Sony Vegas Pro.
Try Captions for Sony Vegas Pro
How to Add Captions to Sony Vegas Pro Videos
First, upload the video you want captioned to Rev. It is helpful if the submitted video is the final version from Vegas as this will ensure that the timing of your captions perfectly matches the events on screen. After you’ve uploaded the video, select SubRip (.srt) from Output File Format(s) and then checkout. When the caption file is ready, navigate to the ‘My Files’ page and click the download button next to the relevant file.
Once you have downloaded your file, follow these steps to import it into Sony Vegas Pro.
1. Create A New Project
In Sony Vegas Pro, choose New from the File menu. This will display the ‘New Project’ dialogue box. Use the dialogue box to set your project’s properties and then select OK to create the project.

2. Import Video
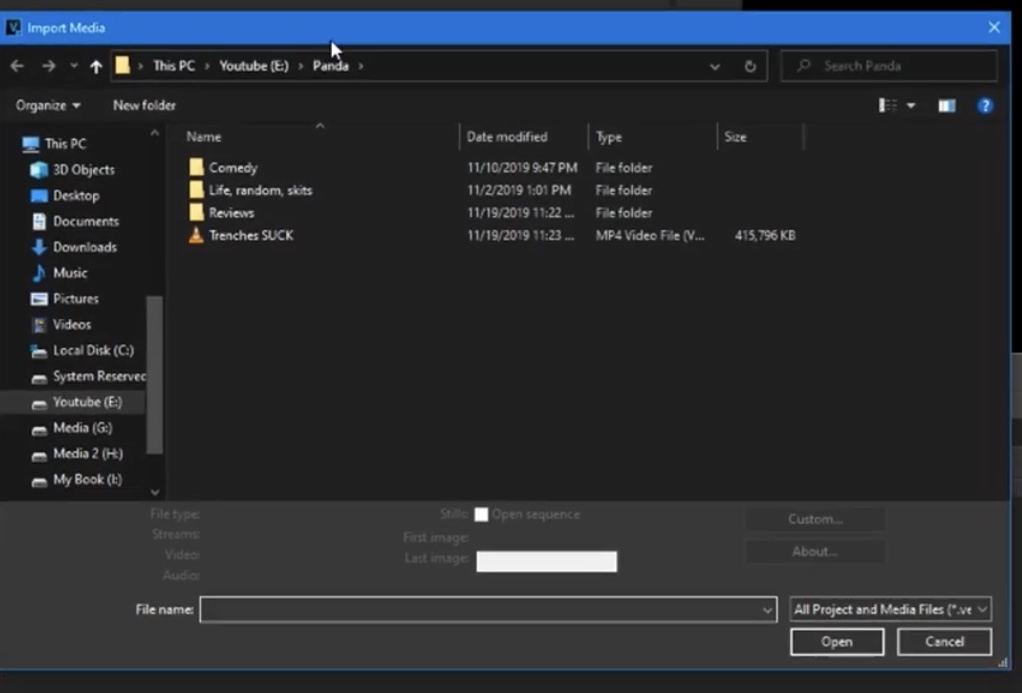
Select File from the upper left corner of the menu bar and then select Import. From the list produced, click on the Import Media option. This will allow you to browse your computer for video files. When you have found the file you want, select it and then click on the Open button. The video will then appear in the ‘Project Media’ tab. Drag the video into the timeline. It is now ready to be edited.
3. Import Your Caption File
Choose Insert from the menu bar and then select Insert Subtitles From File. From the dialogue box produced, select the location of your downloaded caption file using the Folder drop-down. Leave the Preset field as the default. Click on OK to import your captions.
Order a Caption File for Sony Vegas Pro Here
4. Display Captioning in Video Preview
Select the Overlays button from the right-hand side of the menu bar and then choose your desired caption type from the drop-down menu. For primary language captions this is likely CC1. Leave the Overlays button depressed and the captions will appear in the video preview. This will make it easier to check your captions alongside the video.

Rather us add captions to your videos for you? Rev now offers burned-in captions (open captions). Just check the “burned-in captions” box at checkout and you’ll receive a video with permanent, hard-coded captions added straight to your videos. Also available for foreign language subtitles!

Editing Captions in Sony Vegas Pro
To ensure the best viewing experience for your audience, you may wish to edit your captions. This can be done by using markup language. Markup language can be used to add/edit the following properties of your captions in Sony Vegas Pro:
- Pop-Up Text
- Roll-Up Text
- Paint-On Text
- Flashing Text
- Italic Text
- Underlined Text
- Text Size
- Text Color
- Background Color
- Background Transparency
- Tabs
- Rows
1. Insert Command Markers
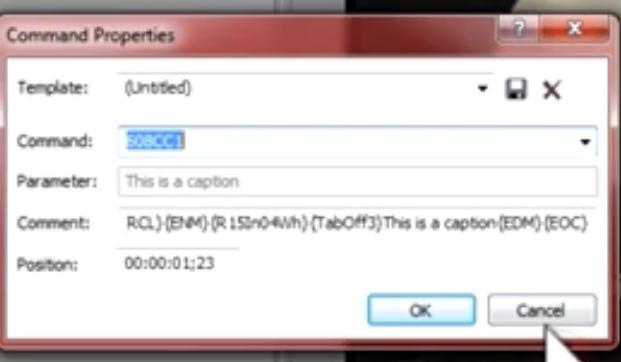
You can edit the captions on the timeline using caption markers. Click to position your cursor over the timeline and then select Command from the Insert menu. This will open the ‘Command Properties’ dialogue box. Alternatively, place your cursor over the timeline and press ‘C‘. This will insert a new marker. Repeat this until you have placed all the markers. Next, select an appropriate 608 closed-caption format. In most instances where primary captions are in use, CC1 will be the appropriate format
If you want to move a marker, then drag the marker tag across the timeline to the desired position. Double clicking on the marker tag will allow you to edit it. To delete a marker tag, right-click on it and then select Delete from the drop-down menu.
2. Editing Caption Format
In the ‘Command Properties’ dialogue box, write the relevant CC markup in the Comment text field in order to achieve the desired font color, font decoration and background color among other things.
- {BlTxt} will produce blue text.
- {BlUTxt will produce blue underlined text.
- {ITxt} will produce italicized text.
- {IUTxt} will produce text that is both italicized and underlined.
- {BgWh} will produce a white background
- {BgWhSemi} will produce a semi transparent white background.
This list is illustrative rather than exhaustive. For a full list of captioning markup, review your Sony Vegas User Manual.
3. Editing the Caption Content
The caption content appears in the Parameter field of the ‘Command Properties’ dialogue box. To change the content of that caption marker, edit the text that is in the Parameter field and then click OK.
4. Editing the Caption Position
To change the position of your captions, edit the time displayed in the Position text field.
Exporting Captions From Sony Vegas Pro
Now that you have finished editing your captions, it is time to export them from Sony Vegas Pro. There are several ways to export your captions depending on the final destination of your video.
1. Rendering Captions With Video
Select File and then choose Render As from the menu produced. In the ‘Render As’ dialogue box, use the Folder text field to choose the location where you want your file saved. Use the Formats selection box to select the format you wish to render your file in. Pick an available template for that format in the Templates selection box. Choose the format XDCAM HD/XDCAM HD422 MXF. Check Save project markers in media file to embed the captions into the video file. Click the Render button and wait for the render to finish. An external .SCC file with the same name as the media file is also generated. Select Open Folder to open the folder where the file is saved.

2. Exporting Captions As An External File
For some Webcasting formats such as YouTube, it is necessary that the captions be saved as an external file. In this case, select Tools and then choose Scripting. From the menu produced, choose the relevant command. In the ‘Save’ dialogue box, specify a file name and folder for the captions file. Click on the Save button.
Your Captioning Workflow
Congrats! You should now know how to add captions and subtitles in Sony Vegas Pro.
Sony Vegas Pro is an excellent editing software and makes it easy to add captions and subtitles to your videos. You can make the process even easier by getting your caption files directly from Rev starting from only $1.25/minute.
Try Captions for Sony Vegas Pro