How to Add Captions to VLC Media Player Videos
VLC Media Player is a free, open-source multimedia player compatible across platforms. Its user-friendly interface allows users to easily add captions and subtitles to videos and movies. In fact, there are several ways of doing so, whether you’re on Windows, Mac, or Linux. Here’s how.
There are two ways of adding VLC Player subtitles and captions. You can either embed captions into the video file itself or open a sidecar captions file alongside your video file. Determining the right method for you depends on your end goal – luckily, we’ll explain both in this article.
Opening a sidecar captions file allows you to view it alongside the video. This method works best when you’re looking to check the accuracy of your subtitles and captions at the beginning of your editing phase. This is also the preferred option for players and platforms that require subtitles to be uploaded in a separate file.
Rev offers burned-in captions (open captions). Just check the “burned-in captions” box at checkout and you’ll receive a video with permanent, hard-coded captions added straight to your videos. Also available for foreign language subtitles!
To learn how to easily order a professional, 99% accurate caption sidecar file from Rev, watch the video below. The most popular format for sidecar caption files is SRT, but be sure to check the platform that you’re using to ensure that your caption file is in the correct format.
Now that you have your caption file, here are a few methods for adding your caption or subtitle file to VLC:
Method 1: Embed Captions Into Your Videos
To permanently add VLC Player subtitles, you can use a service like Rev, who will send you a fully captioned video with the captions permanently hardcoded. This way, they will automatically be enabled on any player.
You can also encode the SRT file with Handbrake, a free open-source video transcoder. To do so:
- Order a professional caption file from Rev and download it in the SRT file format.
- On Mac, open the video in Handbrake, then go to the Subtitles tab.
- Expand the Tracks drop-down menu and select Add External SRT
- You can now add as many subtitle files as you want – also in multiple languages.
There is also an option to add VLC Player subtitles directly in the program. However, as this is a media player and not an editing tool, its encoding options are limited. To encode subtitles in VLC on Mac, go to the File tab, then select Convert and Stream:
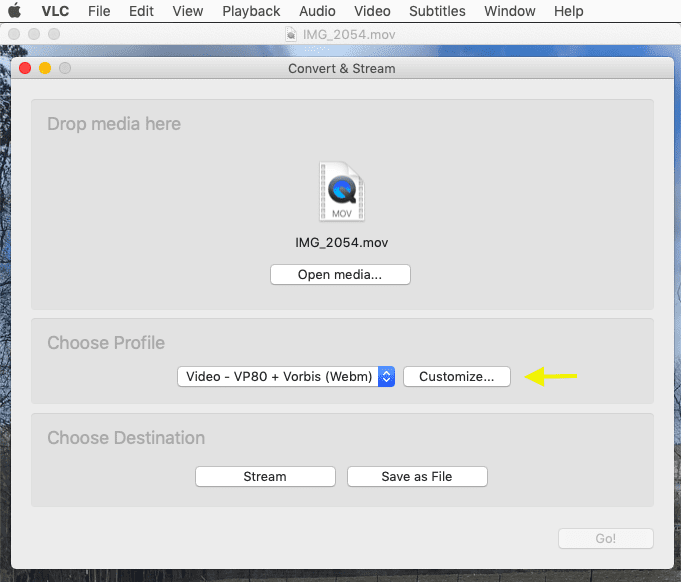
Here are the steps to complete this:
- A dialog box will open, indicating the selected video file.
- Add the subtitle file by clicking on Open Media.
- In the choose profile section you can select your desired profile.
- Click on Customize to select the additional subtitle options.
- A new dialog box will open, allowing you to choose a subtitle file format. There are only two options available: DVB Subtitle, and T.140.
- Choose DVB Subtitle, then check the box next to Overlay subtitles on the video.
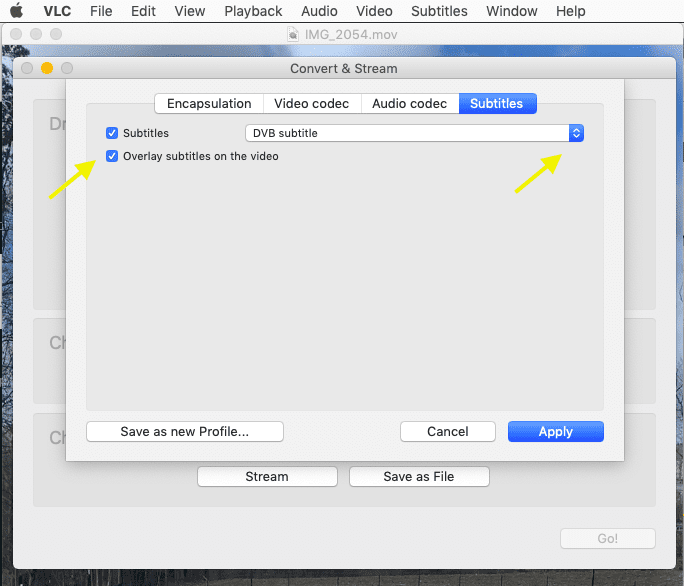
Click on Apply, next on Save File, then on Browse.
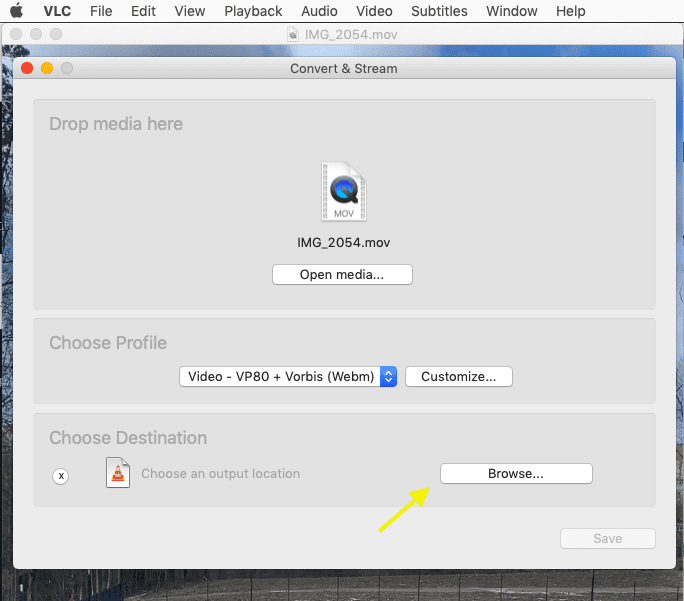
Once you’ve selected the folder in which you want to save your file, you will be able to save the file. That’s it — you’re all set!
Method 2: Automatically Open a Sidecar Captions File in VLC Media Player
To automatically open a sidecar captions file in VLC Media Player, you just need to follow two simple conventions. First, name both the video and subtitle file in the exact same way (it’s okay for them to have different extensions). Secondly, place them in the same folder. That’s it! By opening the video file, VLC will automatically recognize the presence of a related subtitle file, and open it at the same time. You can also do this on VLC for iOS, iPhone and Android.
There is also the option to manually select the subtitle file. To do so, open the video in VLC. Go to the Subtitles tab and select “Add Subtitle File”. Pick the file from the resulting dialog box to display your captions/subtitles. To switch between languages, go to Subtitles Track and select the preferred option. If you still can’t view your subtitles, check the procedure at the end of this article
What caption formats can I open in VLC Player?
In VLC Media Player, you can use several different caption formats. Here is the complete list of supported formats:
- DVD
- MicroDVD (.sub)
- SubRIP (.srt)
- SubViewer (.sub)
- SSA1-5 (.ssa, .ass)
- JACOsub (.jss)
- MPsub (.sub)
- Teletext
- SAMI (.SAMI)
- VPlayer (.txt)
- Closed captions
- VobSub (.sub, .idx)
- Universal Subtitle Format (.usf)
- SVCD / CVD
- DVB
- OGM (.ogm)
- CMML
- Kate
- ID3 tags
- APEv2
- Vorbis comment (.ogg)
How Do I Turn on Subtitles in VLC Media Player?
Your video is finally ready – you’ve correctly added your subtitles and closed captions file, either in a sidecar captions file or by encoding it in the video itself. But how do you turn them on in VLC Media Player, so that they get displayed? On Mac, go to VLC > Preferences > Subtitles/OSD, and check the box next to Enable OSD.


Subscribe to The Rev Blog
Sign up to get Rev content delivered straight to your inbox.