7 Super Easy Steps to Timecode a Film, Movie, or Video Project
For filmmakers looking to work on film and video projects, using a timecode can be a very helpful part of your filmmaking process. Movies in particular can benefit from a timecode to help with your shooting, reviewing and editing workflows. So, if you’re just starting off on a film project, let’s go over the steps for how to timecode a film – as well as some tips and tricks for utilizing a timecode.
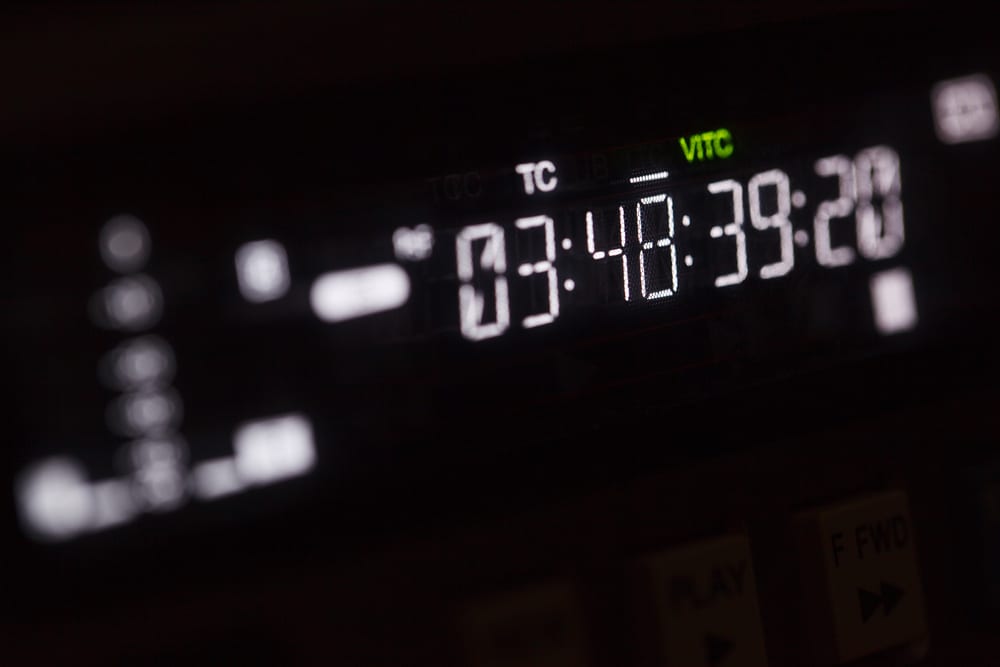
Did you know that you can actually use Rev to create and add a timecode for your movie? There are many benefits to using Rev for all parts of your production. (It’s also especially helpful when working with interview footage, as outlined in this article on No Film School.)
Let’s dive into the step-by-step process of how to timecode a film below.
1. Choose Transcription on Rev.com
So, to get started all you need to do is go to the Rev Transcription Page. (Or if you needed Caption or Foreign Subtitle services, you could use those when you need them as well.)
2. Upload Your Video Files
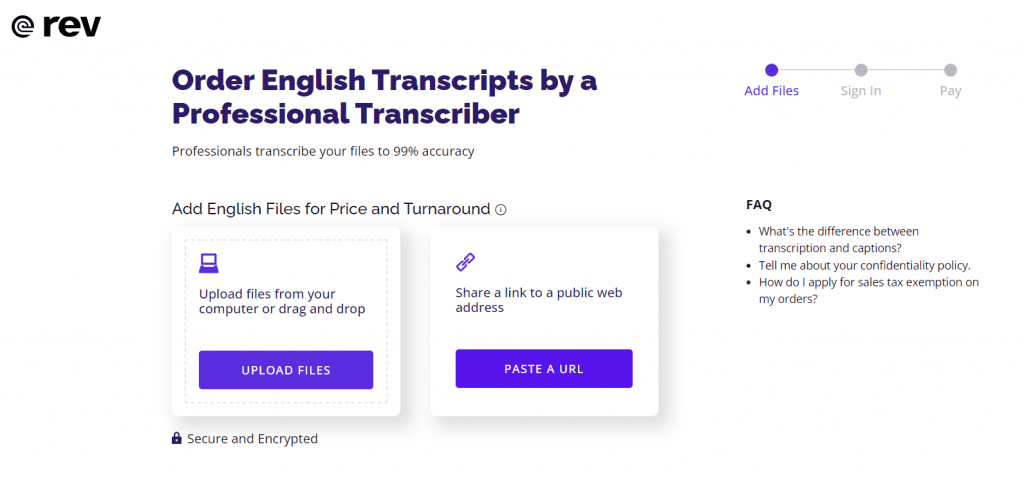
On the transcription order page you’ll be given two options as to how to provide your video. You can either upload a video file, or you can link directly to a video that you’ve already published online (Vimeo or Youtube links work fine). You can also upload multiple video files at once if you have individual videos or a big order to work with.
3. Check “Timestamping”
From there, Rev will do its work and bring you to an order page. Now this is the important part for creating a timecode for your film project. You’ll need to check the “Timestamping” option as shown above. (Please note that this will add an additional $0.25 per minute of your video file.)
4. Use Rev’s Transcription Editor
Once you’ve reviewed your order and added any additional resources that you’d like to include, you can complete your order. You’ll get a confirmation email as well as an email letting you know that your transcription is done and ready to dive into.
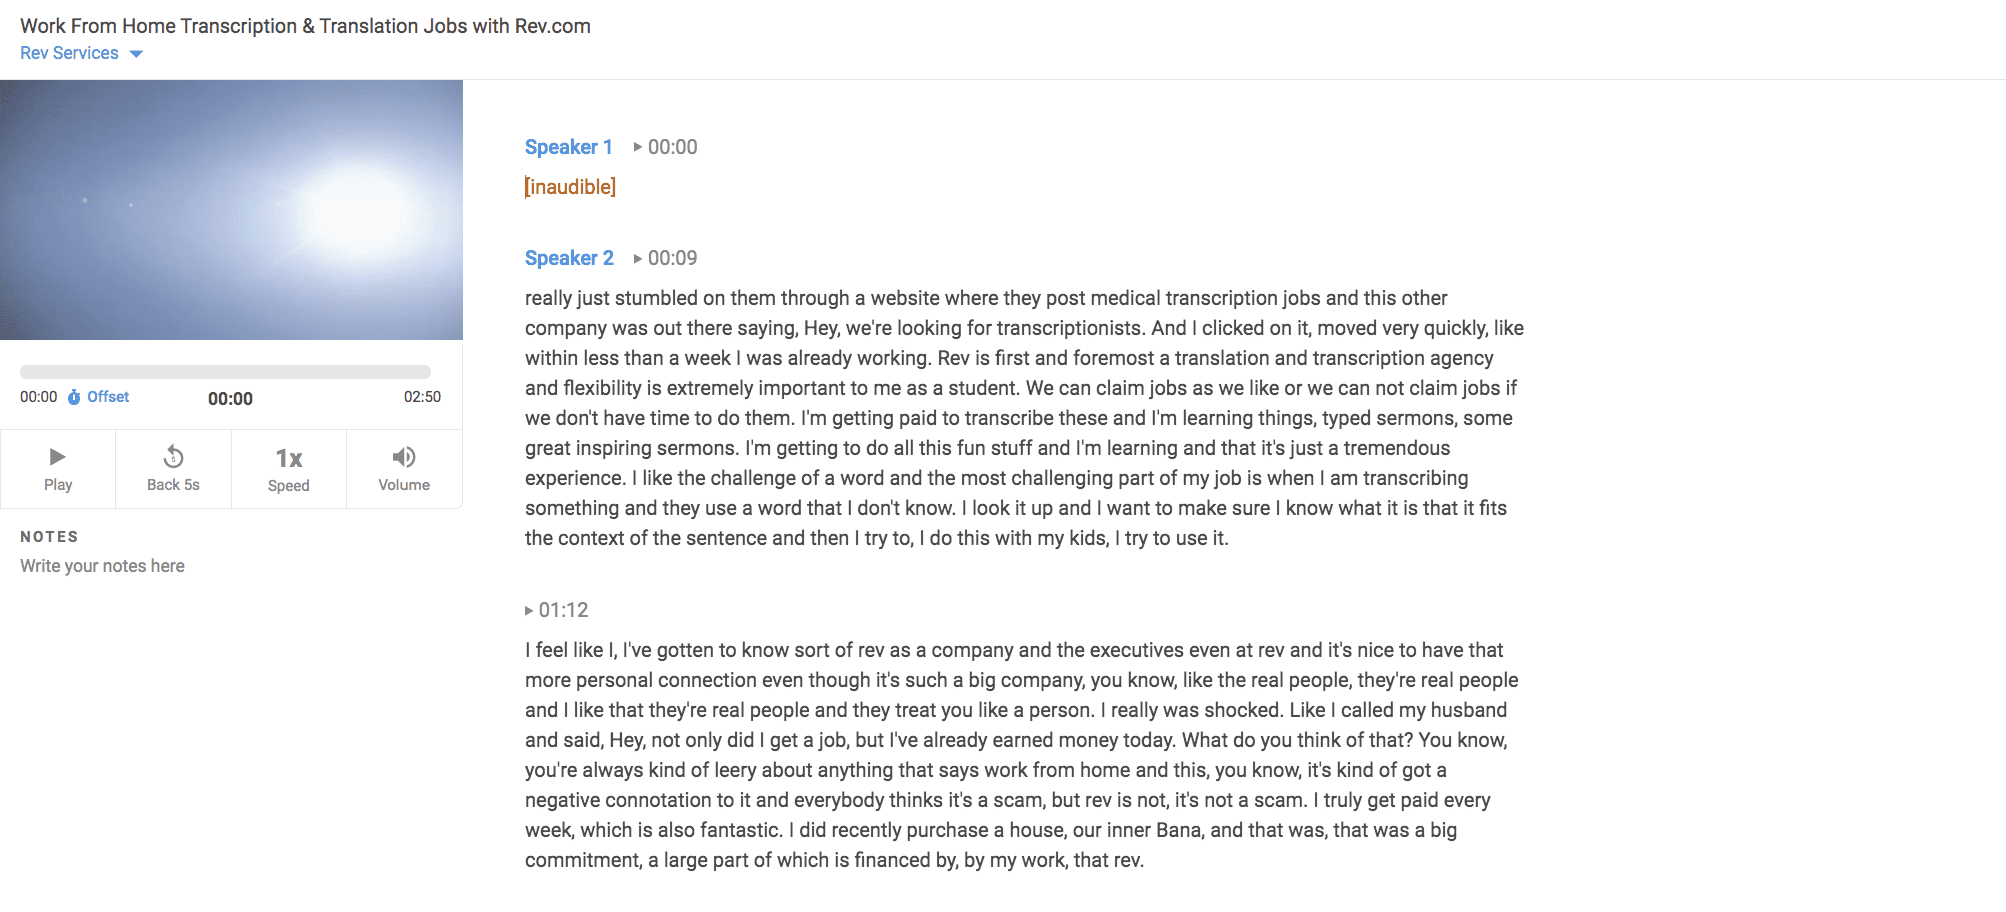
Click on the “View and Edit Transcript” button in your email and it will take you to the Transcription Editor (pictured above). Note that the editor is only available to subscribers.
Pretty cool, huh?
5. Insert Timecodes as Needed
Now we can start working with the transcription and inserting timecodes as needed. There should already be timecodes in the transcription that will usually be broken up by person speaking. These can be very helpful for filmmakers as they share their projects with collaborators or as a way to plan and consolidate their edits on paper.
Try clicking around in the Transcription Editor and you’ll find that when you select a word, the video will be taken to that exact spot. You can follow along with playback that way as well.
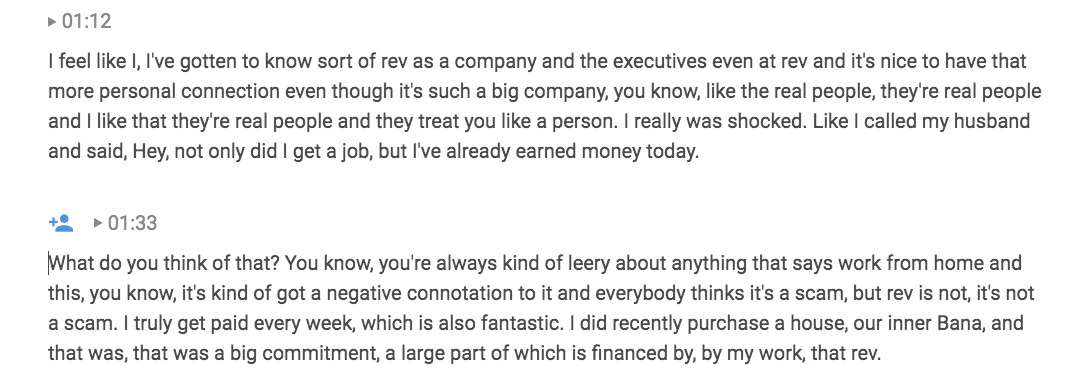
If you’d like to add additional timecodes, simply select the text spot you’d like in the Transcription Editor and press “Enter” or “Return” on your keyboard. A new timecode will be added (and you can even assign the name of the person speaking if needed).
6. Share Your Transcript

From there, once you’ve added your timecodes and reviewed and edited the transcription to your liking, you can choose to share the transcription with others by simply clicking the blue “Share” button in the top right corner. If you’re familiar with Google Documents this share functionality is similar.
All you need to do is add the emails you’d like to share with, as well as an option message box to go along with the email that they will receive inviting them to view or edit the transcription (based on which you choose to offer). Select either “Can Edit” or “Can View” from the dropdown box depending on who you’re working with. “Can Edit” allows the owners of the email addresses to edit your transcript and timecodes, while “Can View” only gives them ‘Read’ access, where they can see the transcript & timecodes and play the audio.
If you’re working with multiple producers, editors or just the rest of your filmmaking partners, this can be a great way to organize your film or video project based not just on timecodes, but also on having an exact transcription of all the dialogue in your film.
7. Export a Transcript
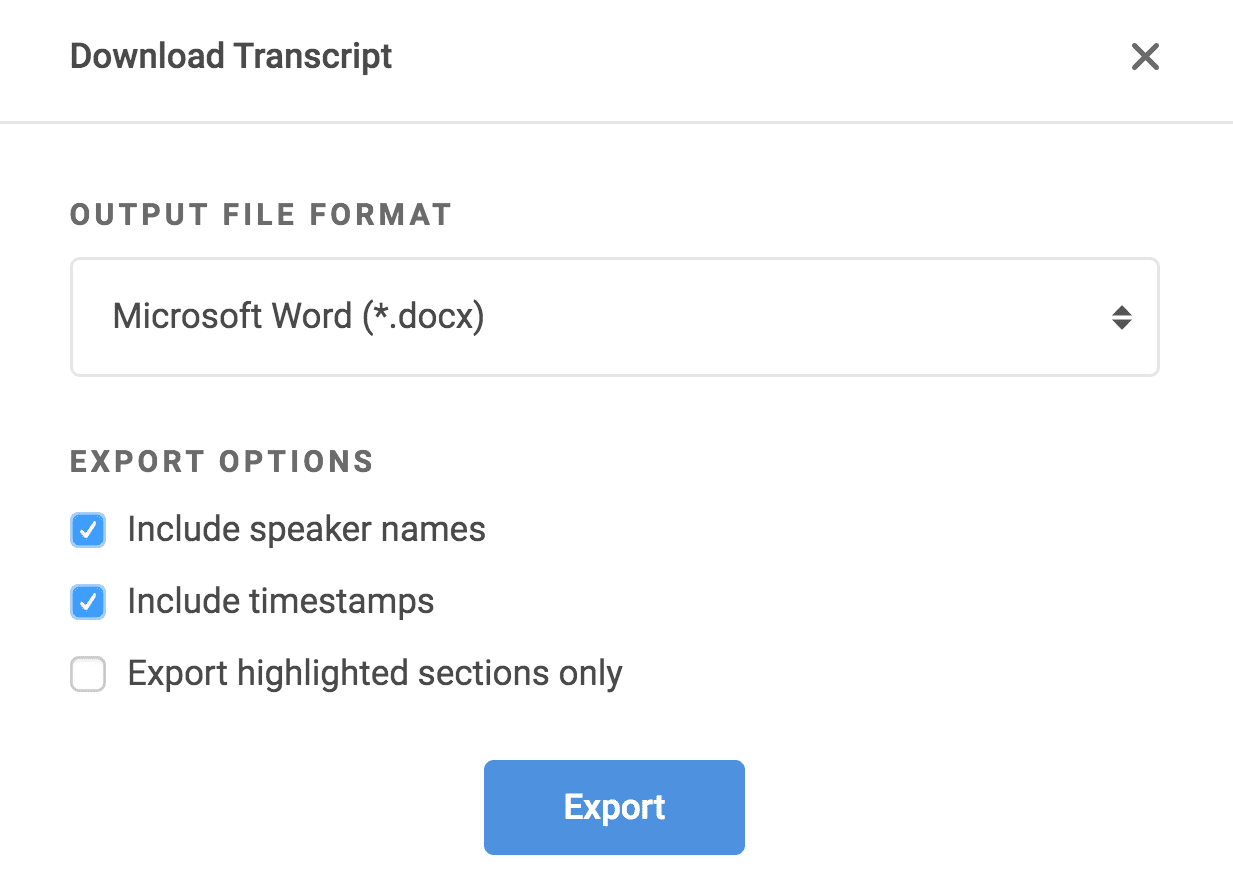
You also have the option to export and download your transcription. Just click on the “…” button next to the blue “Share” button in the top right hand corner of the page and choose “Export” at the bottom of the drop down.
You’ll be taken to a menu box where you can choose your output file format which includes Microsoft Word (*.docx), PDF (*.pdf) or Plain Text (*.txt), as well as options for including speaker names, including timestamps (timecodes), or just exporting highlighted sections only if you don’t want to share the entire document.
Note: these documents will also include clickable timecode links that will take viewers to the Transcript Editor as well.
That should be it! Pretty simple, right? If you have any further questions or issues, you can check out Rev’s more in-depth Transcript Editor Guide, learnm more about the benefits of transcripts for movies, or contact Rev directly.


Subscribe to The Rev Blog
Sign up to get Rev content delivered straight to your inbox.