How to Export an Edit Decision List (EDL) from Rev Transcript Editor
When you transcribe your videos with Rev, you can highlight selects in your transcripts, export an Edit Decision List, and make a selects sequence of those video clips in your video editing timeline.
To do this, you’ll need to export an Edit Decision List, or (.EDL) file format from the Rev Transcript Editor to use in a non-linear editor like Adobe Premiere Pro.
What is an Edit Decision List (.EDL) file?
An EDL file communicates to your video editing software the in and out timecodes of the clips you highlight in the transcript editor. Premiere can generate a new sequence of clips, eliminating the need for you to manually make any cuts to make your initial selects sequence.
You can get access to the Edit Decision List export format for your Rev account.
Once you have access to the EDL export format in the Rev Transcript Editor, you can follow these steps below.
The EDL we export is in the most commonly used format CMX 3600 at 30fps.
1. Transcribe the Video File
To get started, order transcription for your video footage file(s).
If you have a multi-camera shot or multiple clips, we recommend you sync, merge, and export your video and audio clips as one single file before uploading to Rev. You’ll use this new sequence as your master sequence.
2. Highlight the Selects
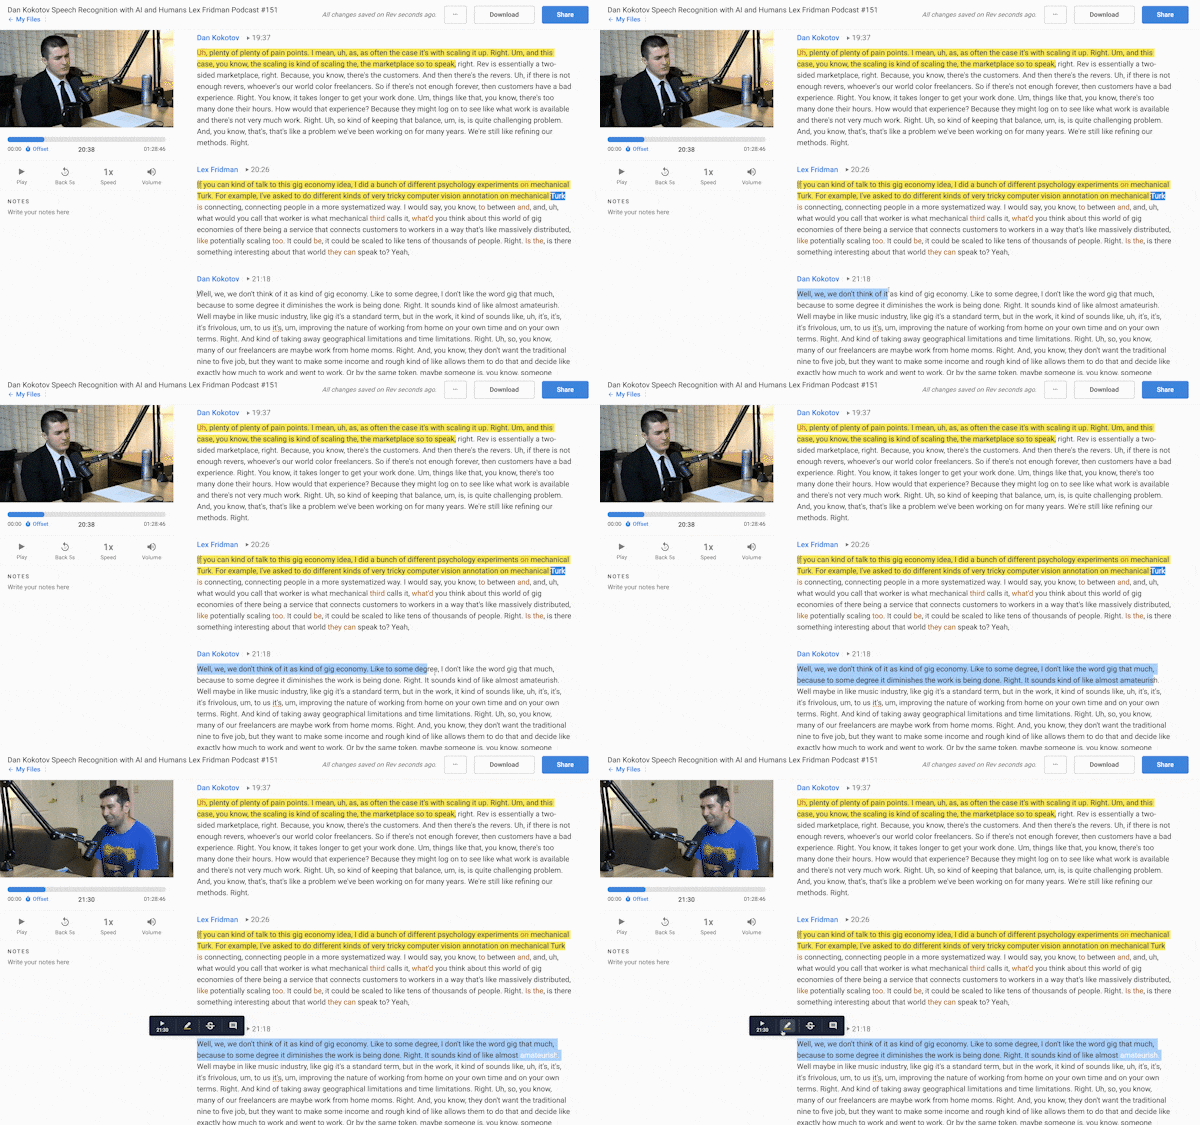
When you’ve received your transcript from Rev, you can begin highlighting selects, or sections that you’d like to include in your Edit Decision List. Simply use the existing highlight function in the Rev Transcript editor to make your selections.
3. Export an EDL File
Once you’re finished highlighting the best bits in your transcript, you are now ready to export the EDL file.
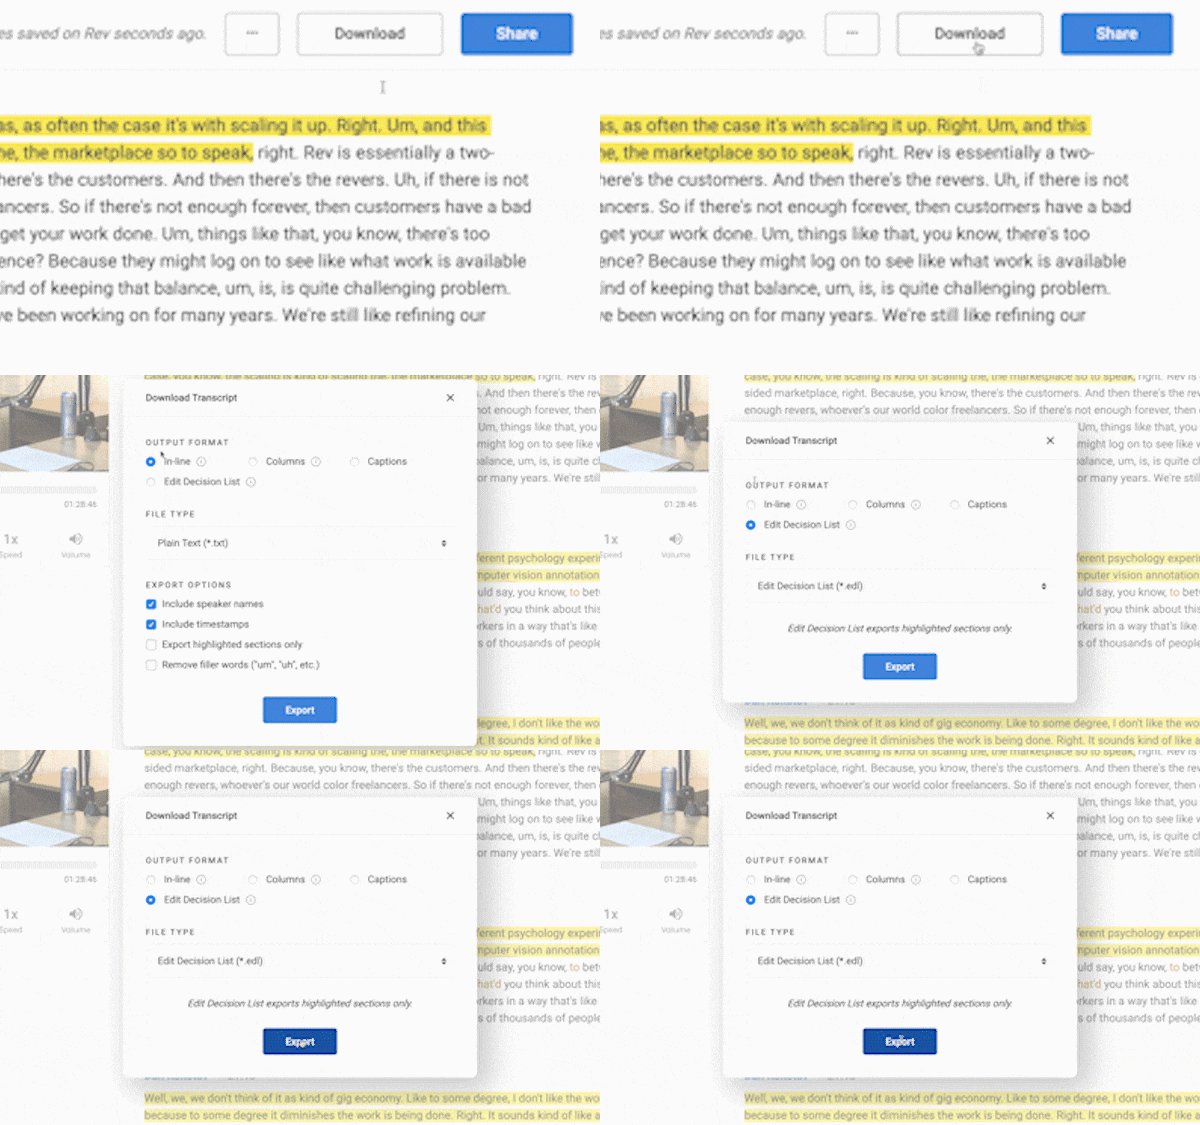
To export an EDL in the Rev Transcript Editor:
Now that you have the export of your highlighted sections from the transcript, you can import the EDL into Adobe Premiere Pro.
Subscribe to The Rev Blog
Sign up to get Rev content delivered straight to your inbox.

