


Your Best Option for Speech Recognition in React
How to use ReactJS to build speech recognition into your front end web applications using a speech-to-text API.
This article details how to code a simple web application that works with the Rev.ai speech-to-text API using React. The web application will allow a user to submit an audio/video file to be transcribed by the Rev.ai API. The web app will also allow a user to stream audio using their microphone and receive real-time speech-to-text transcriptions from the Rev.ai API. Going forward the Rev.ai API will be referred to as the API.
This article details how to code a simple web application that works with the Rev.ai speech-to-text API using React. The web application will allow a user to submit an audio/video file to be transcribed by the Rev.ai API. The web app will also allow a user to stream audio using their microphone and receive real-time speech-to-text transcriptions from the Rev.ai API. Going forward the Rev.ai API will be referred to as the API.
Architecture
Communication with the API is dependent on an individual’s access token which is also linked to payment information and can incur charges. For this reason, the access token should be kept secret to prevent unauthorized use. While it is technically possible to communicate with the APIs directly from the browser, browsers are not very good at keeping secrets. Using secrets and access tokens in the browser should be avoided.
A server is used to keep communication between the browser and API secure. The browser communicates with the server using a combination of HTTP requests and WebSocket messages. The Rev.ai NodeSDK is used to communicate with the API from the server. The server also provides a webhook endpoint that can be called by the API when an asynchronous job submission is completed.
3rd-Party Libraries Used
The following 3rd-party libraries are used in this article:
- ReactJs –The front-end of the app is written in React. React is a JavaScript library used for creating interactive user interfaces. Although React can be written in plain JavaScript it also provides a JavaScript syntax extension called JSX. JSX allows us to write HTML elements in JavaScript that are eventually rendered to the DOM.
- RecordRTC – The RecordRTC library is used to capture the user’s audio, encode it and stream it to the server.
- Tailwind CSS – Tailwindcss is a utility-first CSS framework that is used to style the front-end of the web app.
- ExpressJS – The server is written in NodeJs using the Express web framework. The Express web framework is used to expose HTTP endpoints that are called by the front end.
- Socket.IO – The Socket.io library is used to provide real-time bi-directional communication between the front-end and server.
- Multer – Multer is a middleware library that is used to handle multipart/form-data file uploads.
Development Tools
The following tools are used for developing the project:
- Snowpack – Snowpack is a front-end build tool that is used to build the react code into JavaScript that can be interpreted by the browser.
- Nodemon – Nodemon is a development tool that restarts a process when the tool detects that a file has changed. For this project, Nodemon keeps the server code up to date while developing by restarting the Express server whenever one of the server source files has been updated.
- Concurrently – Concurrently is a development tool that allows multiple processes to be controlled from one process. For this project Concurrently controls the Snowpack build process and Express server process in one process.
Environment Variables
The following environment variables need to be defined:
- REVAI_ACCESS_TOKEN – rev.ai access token
- WEBHOOK_BASE_URL – base URL that rev.ai should send a request to indicating processing of the job is complete
- MEDIA_PATH – the path on the server to store the uploaded media files.
Running the server
To run the development server run the command `npm run dev` from the command line. This command will use Concurrently to run both the Snowpack build command and start the Express server using Nodemon. Any changes to the server source code files will restart the server with the changes. Any changes to the front-end source will be updated but the browser window must be refreshed to see the changes. The production server can be run by running the command ‘npm start’ from the command line.
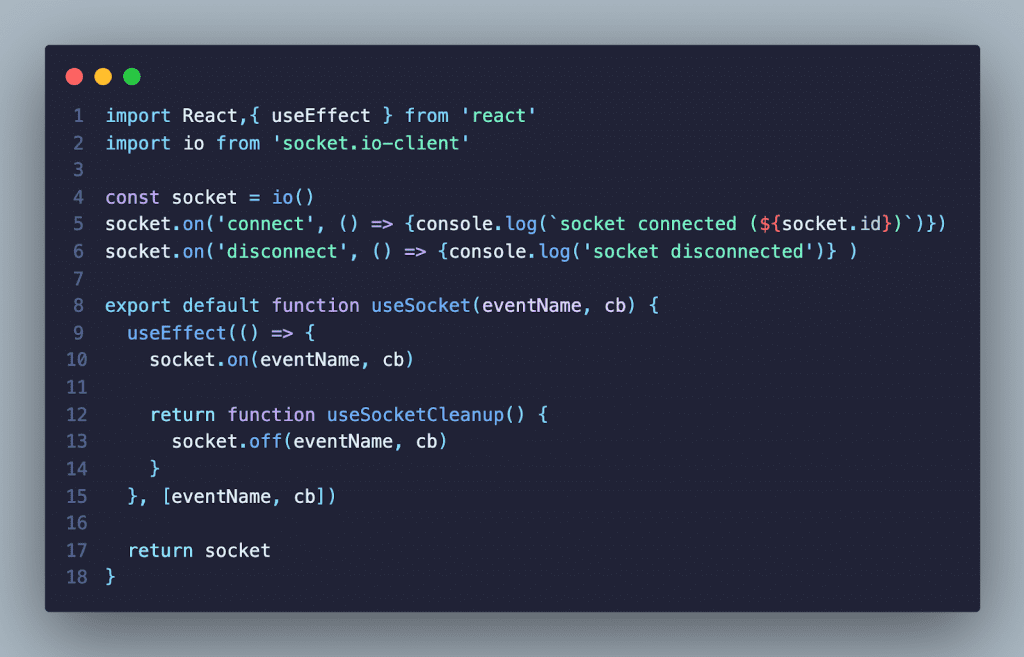
useSocket Hook
To handle Socket.io communication within react, the useSocket custom hook was created. The hook creates a connection with Socket.io the first time the hook is created. Subsequent calls to the hook use the same connection. This hook allows individual components to listen for socket messages within the component.
User-Interface
The user interface consists of two separate tabs that can be toggled by selecting the appropriate tab header.Async TabWhen the async tab is selected the AsyncForm component is rendered. The AsyncForm demonstrates the API’s asynchronous functionality. The AsyncForm encapsulates the following inner components:
- MediaUploader – This component is used for selecting the file to be uploaded and submitted to the server.
- MediaPlayer – This component is used for displaying the media file and retrieving the caption to be loaded of the current job.
- TranscriptionViewer – This component gets and displays the transcription for the current job from the server. This component is only rendered when a job object has been set.
When the Async Form is first rendered, the MediaUploader is shown. First, the user selects either an audio or video file to be processed by the API. After clicking the submit button the file is then uploaded to the `/api/media` endpoint on the server as multi-part form data. Multer stores the file on the server. A job is submitted to the API with a URL that points to the uploaded media file along with the URL to the webhook pointing to the `/api/job endpoint`.
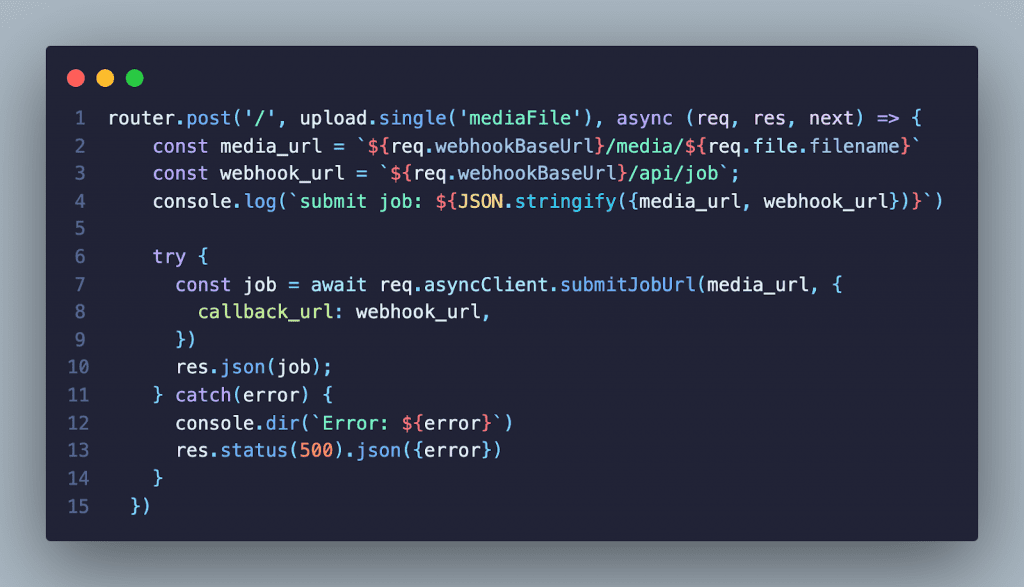
When the API has completed processing the job it sends an HTTP POST request containing information about the processed job to the webhook endpoint. The server then sends the response from the API to the browser using the WebSocket connection. A status of 200 is returned to the API.

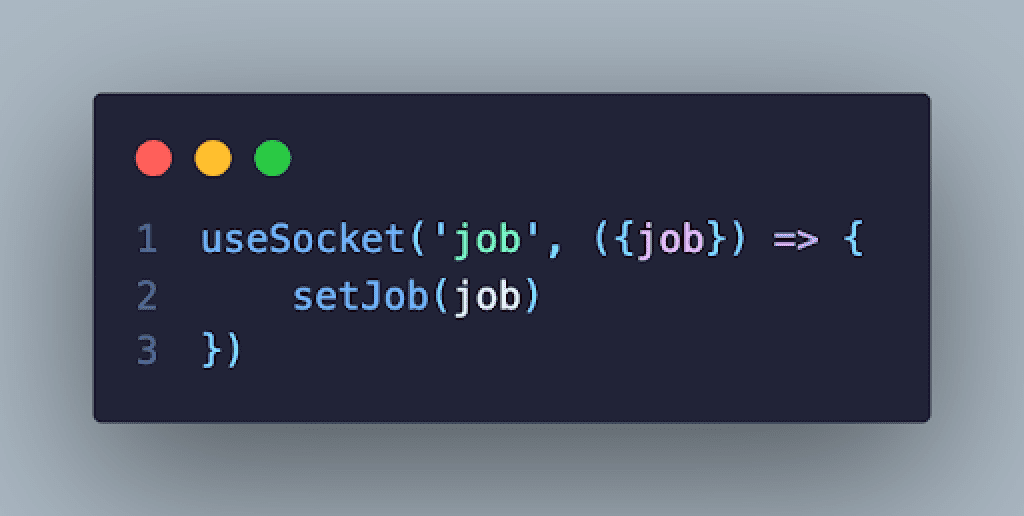
When the useSocket hook receives the job message it sets the job object in the state and the asyncForm component is re-rendered.
With the job object loaded the MediaPlayer then retrieves the caption and loads it into the video element. The MediaUploader is also replaced with the TranscriptionViewer. The TranscriptionViewer then retrieves the transcription for the current job and displays it.
Streaming Tab
When the streaming tab is selected the StreamingForm component is rendered. The StreamingForm component demonstrates the API’s streaming functionality. The StreamingForm encapsulates the following components:
- StreamingController – This component controls starting and stopping the stream.
- StreamingCaptionViewer – This component listens for transcription socket messages and displays them.
First, the user clicks the Start Streaming button to start the streaming session. When the button is clicked the browser sends a request to the server to open a streaming connection with the API.
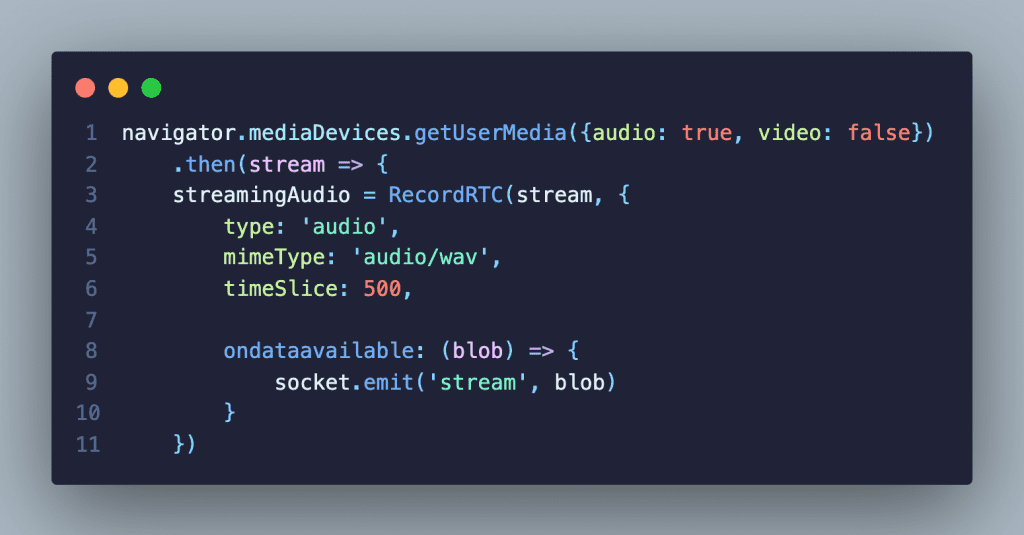
The Streaming Controller listens for a streaming-connected socket message to begin capturing the microphone audio using the RecordRCT library. The RecordRTC library encodes the audio to wav format. The output of the encoding is then streamed to the server over the WebSocket connection.
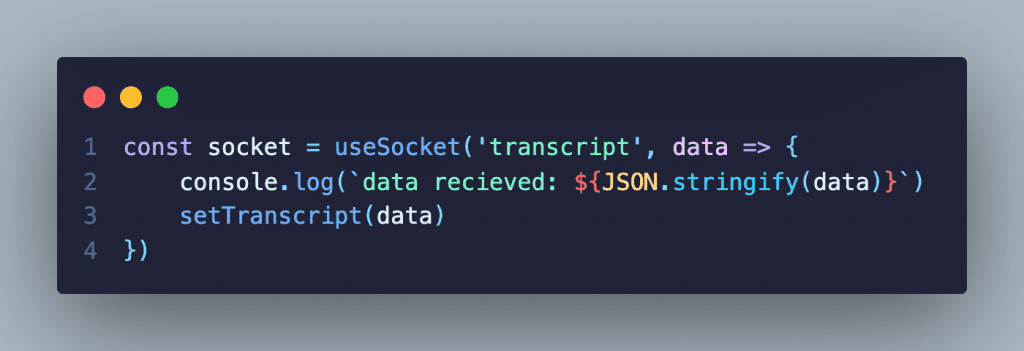
The server then sends that data to the API. The API then sends back transcription information in real-time as it is being processed. When the server receives data from the API and sends it to the browser over WebSocket. The StreamingCaptionViewer listens for the transcription being sent over the socket connection and renders it on the page.
When the Stop Streaming button is clicked the browser sends a request to the server to close the connection to the API. The server then closes the streaming connection with the API.
Why use Rev AI?
Accuracy
Accuracy is important when providing automated services. For ASRs a key measurement of accuracy is the Word Error Rate (WER). WER is measured by the number of errors divided by the total number of words. Errors include words incorrectly transcribed, additional words that were added, and words that were omitted. The lower the WER the more accurate an ASR is. Rev AI has the lowest WER among its competitors
Ease of Use
There is no need to learn some new proprietary format. Interacting with the API is as simple as sending an HTTP request. The API responds with either plaintext or JSON. SecurityCommunication with the API is encrypted both in transit and at rest. You are also given control of your data. Data can be deleted through an API endpoint or deletion policies can be created from the web application. When tighter controls are necessary, the on-premise solution allows you to run the speech-to-text engine in your own private instance.
Pricing
The first 5 hours of speech-to-text translation are free which is more than sufficient enough to test drive the API. After that, it’s $0.035 per minute of speech processed rounded to the nearest 15 seconds. An hour-long audio file would cost approximately $2.10.


Subscribe to The Rev Blog
Sign up to get Rev content delivered straight to your inbox.