YouTube Transcription: How to Get and Upload a YT Transcript
When it comes to marketing your brand or discussing your product, one of the best things you can do is get on YouTube. The video platform is the second-most visited website on the whole World Wide Web, after all. So if you want to be seen, YouTube is the place to be.
To get the most out of the videos you post on YouTube, however, you need to do more than film, edit, and post amazing videos. You need to add a YouTube transcript.
YouTube transcription is essentially a text version of everything said in a YouTube video, and it can pump your YouTube SEO numbers immensely. When you transcribe YouTube video to text, you’re providing accessibility to the deaf and hard of hearing or anyone who simply can’t listen to audio.
But it also makes your video more useful! YouTube transcriptions can be viewed on the YouTube platform itself, and can even be copied and pasted into a document to make it easier to parse through the information.
Transcription makes the content of your video easier to understand, easier to use for research, and easier for YouTube to use for closed captions. Here’s how to start using YouTube video transcription for your projects.
Who Creates YouTube Transcripts?
YouTube transcripts are generally created in one of three ways: You do it yourself, YouTube does it automatically, or you use a transcription service.
If you have the time and bandwidth, you can transcribe your own audio or video tracks and upload them to YouTube to accompany your video. This can be incredibly time-consuming, though, and you’re on your own for proofreading and editing.
YouTube will also automatically transcribe your audio when you opt to add captions after uploading your video. You can either upload your own captions to YouTube or rely on YouTube’s auto-generated captions. Either way, a YouTube transcription will be generated based on captions, which is putting the cart way in front of the horse.
The best way (in our exceedingly humble opinion) to create YouTube transcripts is to use a professional captioning or transcription service. This saves you the time and hassle of doing it yourself while protecting you against the inaccurate captioning and transcription that can happen when YouTube takes the reins.
Using a professional YouTube video transcriber like Rev means that:
- The final transcript will be of higher quality.
- You can export the video transcript in the file format of your choice, making it easier to implement.
- If you’re a subscriber, you’ll het access to Rev’s powerful transcript editing and refining tools, like our Transcript Editor and AI Transcript Assistant.
How to Get a YouTube Transcript on Your Phone
Let’s be real. If someone is watching YouTube, they’re most likely doing so on a phone. Nearly 90% of all YouTube visits are done via mobile devices, so making sure that viewers can fully enjoy or understand your YouTube videos on mobile is imperative. Especially since the YouTube video transcriber is pretty easy to access at any time on your device. Here’s how you do it.
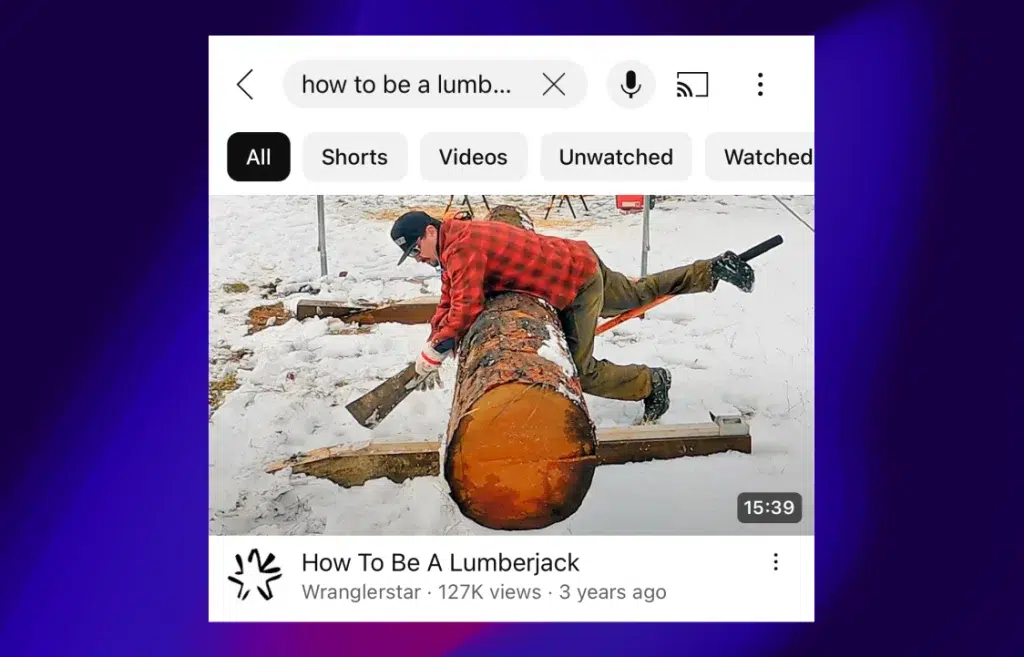
Step One: Find the Video You Want
Open your YouTube app on your phone or tablet and click into the search bar at the top of the screen Type what you’re looking for, then click on the video you want to view and transcribe.
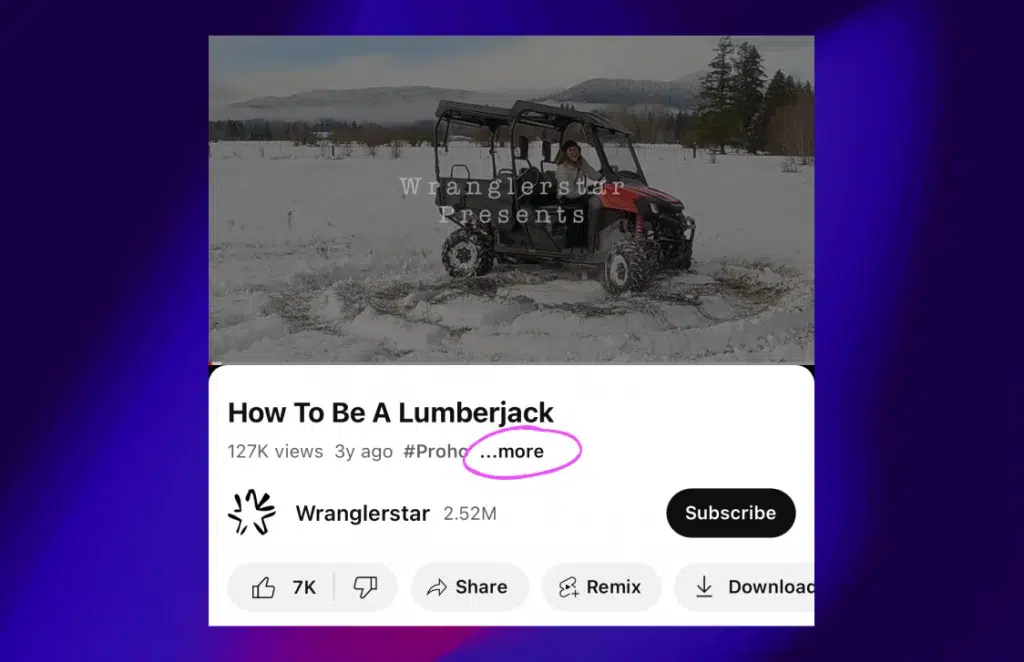
Step Two: Click “More”
Just below your video’s title, you’ll see the “more” option to the right of the view count. Click it!
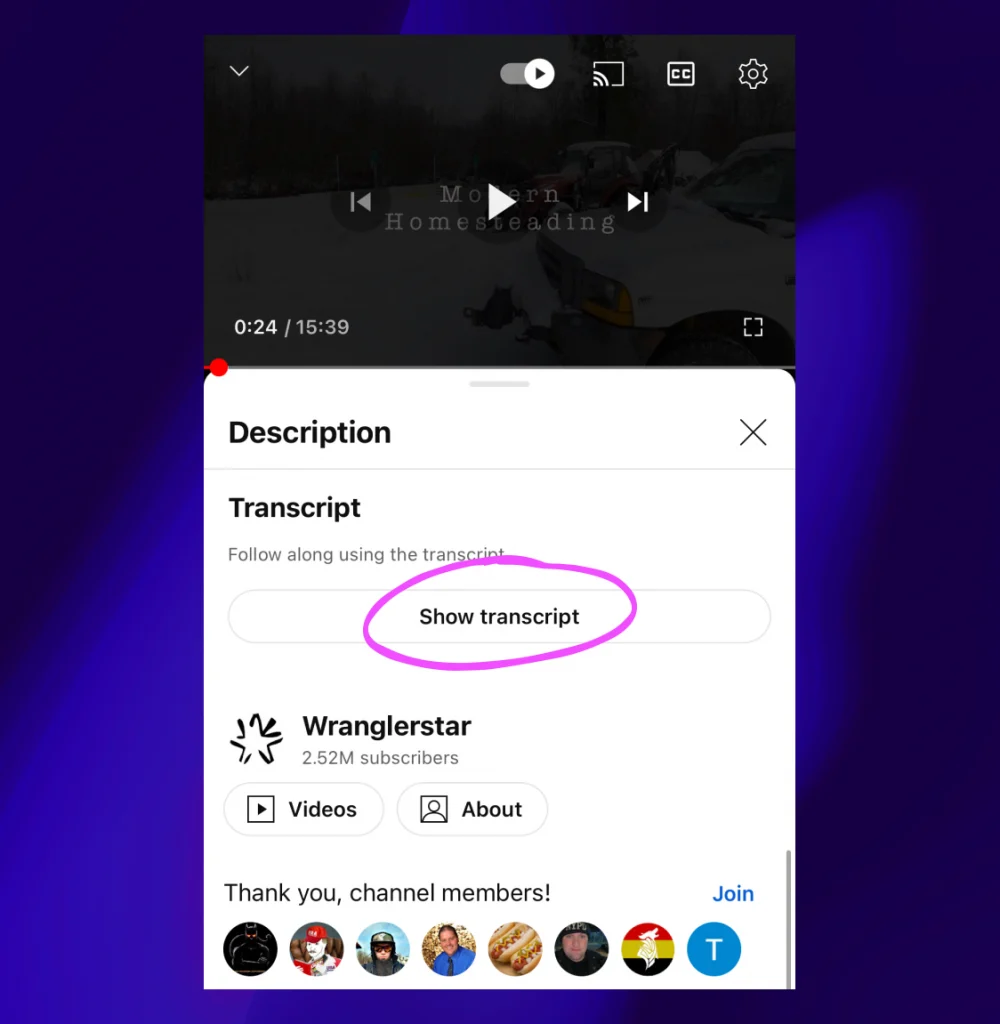
Step Three: Select “Show Transcript”
After clicking “more” just below the video, you’ll probably have to scroll down a bit, depending on the amount of text in the video description. Below the description, click “Show transcript.”
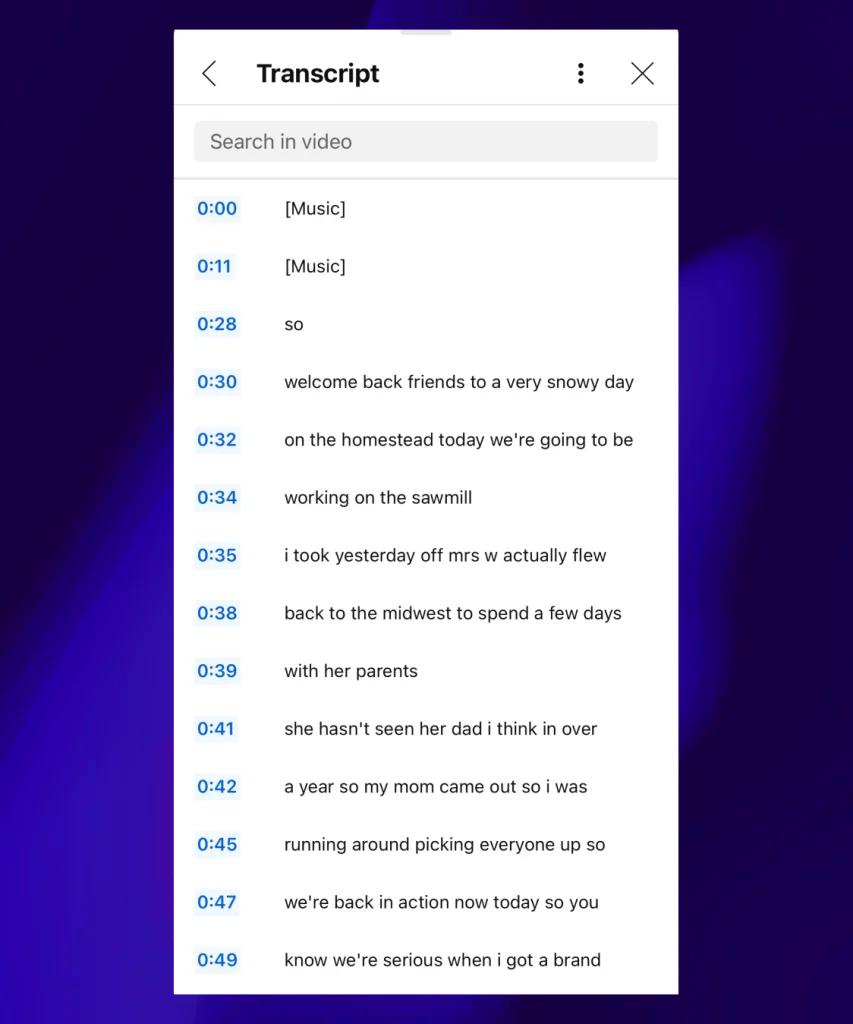
Step Four: View Your Transcript!
Now you can read and review the full transcript at your leisure. While the auto-generated mobile YouTube transcripts don’t feature speaker identification, they are timestamped, making it easy to hop to different sections of the video as needed. You can also search within your YouTube transcript at this time.
How to Get a YouTube Transcript on a Computer
The process for getting a YouTube transcript on a computer is almost the same as getting a YouTube transcript on your phone. It just looks a little different. Here’s how it works.
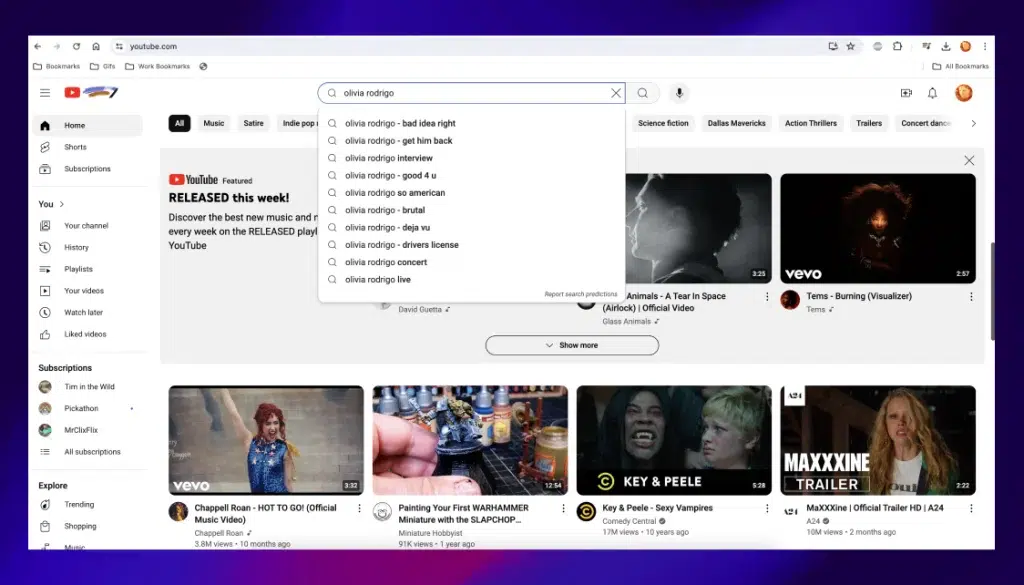
Step One: Go to YouTube.com and Search for Your Video
In your browser, head to YouTube and type your video title (or something similar) into the search bar. Choose the result you want to watch and click it.
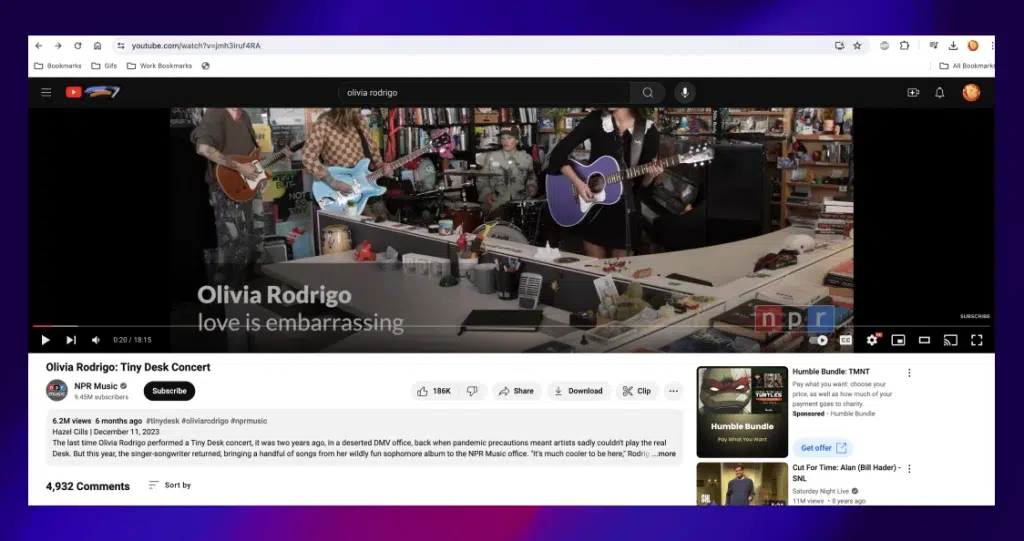
Step Two: Click Into the Video Description
Underneath the video, click “…more” at the end of the video description, This will expand the text box.
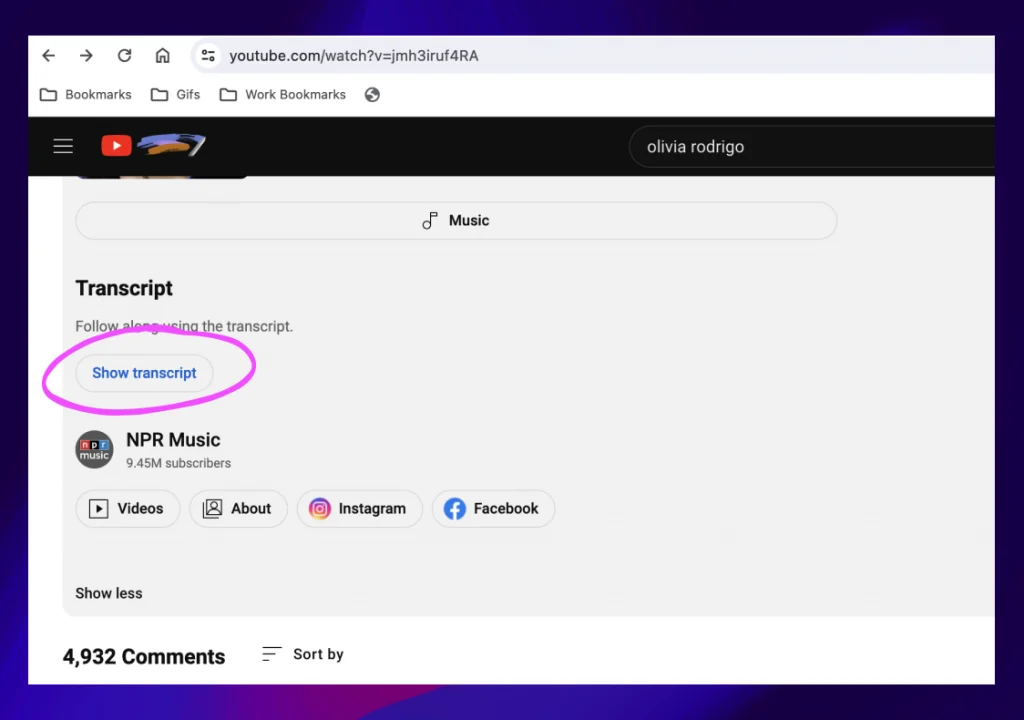
Step Three: Click “Show Transcript”
Below the expanded video description, you’ll see an option to “Show transcript.” Click that button!
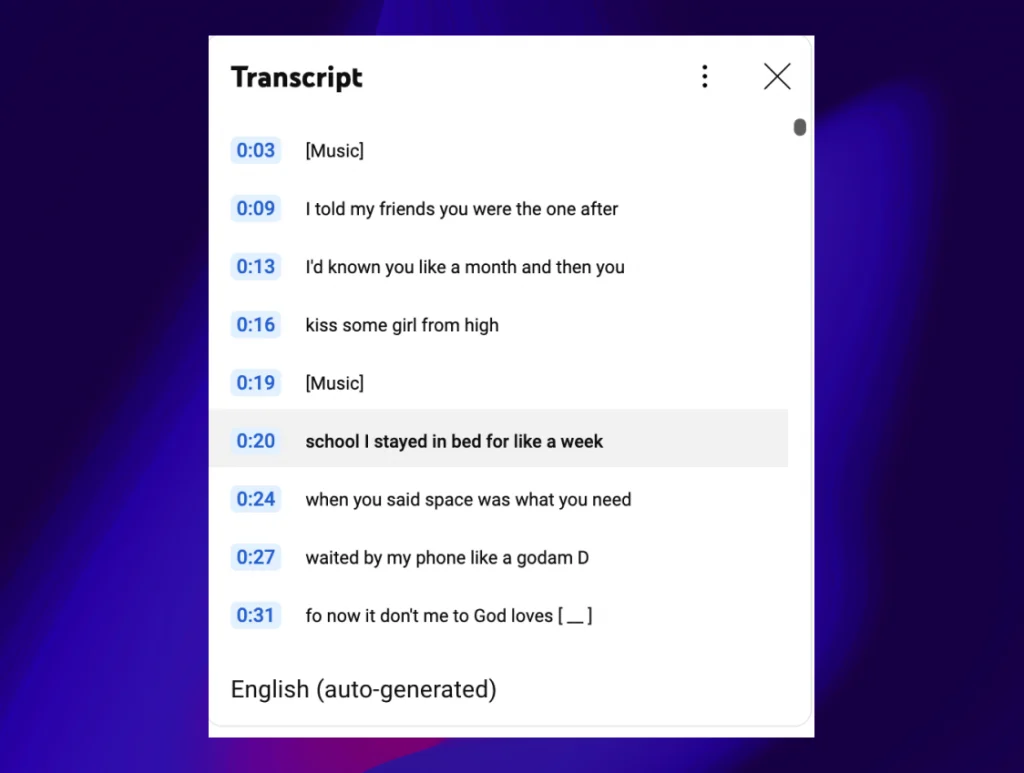
Step Four: Enjoy Your Transcript
Your transcript will appear to the right of the video description. It’ll include an option to turn the timestamp off if you want a cleaner reading experience. Similar to your experience on mobile, the transcript does not have speaker identification.
How to Transcribe a YouTube Video to Text With a Transcription Service
You’ve seen how easy it is to read a YouTube transcript via the platform itself, but how can you transcribe YouTube video to text for your own projects? While YouTube’s automatic transcriptions and captions are quick and easy for viewers to use, you might want more control over the quality of the YouTube transcription for your own work.
Using a service for transcribing a YouTube video to text is the smartest and quickest option. And Rev makes it easy with our fully integrated YouTube captions! Here’s how to use them.
Step One: Upload Your YouTube URL to a Transcription Service
If you’ve opted to use Rev as your YouTube transcription service (and why wouldn’t you?), the steps are simple. First, upload the link to the YouTube video you wish to transcribe.
Rev offers both professional human transcription services and AI transcription services, so choose which you’d like to use. If you need something nearly immediately, our AI transcription is a perfect option. If you need near-perfect accuracy, Rev’s human transcription service is 99% accurate. After you paste your link, you’ll be taken to our “Checkout” screen.
Step Two: Select Your Optional Add-ons
Before checking out, Rev offers several paid add-ons for our Human and AI Transcription services, including:
- Rush My Order: If time is of the essence, simply select Rush My Order at checkout to get your transcript up to five times faster than our standard turnaround times.
- Timestamping: Adding timestamps can be helpful if you know that after you transcribe a YouTube video, you’ll want to closely review and ensure that the audio matches up with the text, second by second.
- Verbatim: A verbatim transcript includes filler words like “um” and “ah,” as well as false starts and nonverbal communication descriptions.
- Instant First Draft: Instant First Draft automates the first version of your transcript so that you instantly have a text version of your YouTube video; meanwhile, our Revvers continue to work on and polish your final transcript so that you have a perfect version soon.
Step Three: Consider Post-Production
With every transcript, Rev offers a number of handy post-production tools, such as:
- AI Transcript Assistant: AI Transcript Assistant uses AI to not only create summaries of your transcript (and therefore your YouTube video), but also to pull out and distill information like key quotes, insights, and data.
- Rev Workspaces: Rev Workspaces allow for seamless collaboration between you and your team members with sharing capabilities.
- Transcript Editor: If your YouTube video transcript will be repurposed for research or other uses, be sure to put any finishing touches on it in the Rev Transcript Editor.
Step Four: Click “Checkout” and Receive Your Transcript
The length of time it takes for our professionals to transcribe your video depends on the video length, but most videos just take a few hours. Our automatic transcription service is nearly instant, but it will be a little less accurate.
You will receive your YouTube transcript in your account and get a notification via email when it’s finished!
How to Upload Your Transcript to YouTube
Now that you’ve transcribed your YouTube video, you need to know how to add that transcript to your video. YouTube will use your accurate transcript for both captions and subtitles, and to make your transcript available to all. Rev makes it easy to add your transcript and take advantage of these features!
Here’s how to add that YT video transcript in just a few easy steps.
- Log onto your YouTube channel and go to your channel homepage.
- Click “Manage Videos” towards the top.
- Select the video you want to add the captions to and select “Subtitles”
- Choose the language you want and click “Add.”
- Click “Upload File,” then choose either “With Timing” or “Without Timing,” then click “Continue.”
- Select your transcript/caption file from your computer, and click Open.
- YouTube will automatically refer to this file for your captions and subtitles, and when choosing “View Transcript,” your viewers will see this file to the right of your video description. Cool, right?
What to Know About YouTube’s Automatically Generated Captions
YouTube’s auto-generated captions can be handy to use, but they’re not always the greatest quality. According to a University of Minnesota whitepaper about correcting YouTube inaccuracies, YouTube automatic captions typically provide about 60—70% accuracy. That means that more than one in three words could be wrong.
At Rev, we value accuracy above all else. And in our opinion, 70% accuracy just doesn’t cut it! What good is providing ultimate access to your video if a third of the information is wrong? That could be more harmful than not having any captions at all! To improve your YouTube statistics, we recommend a professional captioning service.
Time Coded Files For Greater YouTube Transcript Accuracy
To ensure even greater accuracy with your YouTube video transcript and make your file more useful for everyone, consider adding timecodes to your transcription files.
A time coded, or timestamped, caption file eliminates the chance of the words not matching up with the corresponding speech or images in the video. YouTube will read the timecode of each portion of your accurate text and correlate that timecode with its automatically generated captions to ensure alignment between your text and the images on screen. It’s a small but important detail that Rev makes easy to get right.
When you’re checking out with your Rev YouTube transcript, just click the “Timestamping” option, and your file will properly align your transcript with your YouTube video.
You can also choose to have important sounds transcribed, which is an underrated feature for setting tone and mood for those who can’t listen to the audio. After all, you put a lot of time into your video score, and it would be a shame if everyone couldn’t enjoy your genius needle drop!
Rev Helps You YouTube Better
Now you know how to transcribe a YouTube video, which provides better SEO results, adds accessibility for your audience, and makes your YouTube video’s searchability much better than it would be without one.
If you’re going to be on YouTube, it only makes sense to use Rev’s easy process for transcribing your video and uploading the transcript. The pros certainly outweigh the cons, because, well, there are no cons!


Subscribe to The Rev Blog
Sign up to get Rev content delivered straight to your inbox.