
Remote working is growing in popularity, especially amid the pandemic. As more teams increase their remote workforce, it becomes critical for teams to communicate via video conferencing software.
While video conferencing software is a stellar way to stay connected, studies show that employees forget up to half of the information presented within one hour of the meeting. Within 24 hours, they forget an average of 70 percent of the material, and within one week, employees will forget as much as 90 percent of the information.
Companies can combat this problem with a simple solution: recording meetings.
Lifesize is a video conferencing system that makes it easy to host meetings, record them, and download them for future reference.
This article will provide detailed instructions on how to record a meeting using Lifesize, how to access a recording, and how to add captions and subtitles with Rev.
How to record in Lifesize video conference
As soon as all of your participants are in your meeting, you’re ready to record your call. Here’s how to record a call in LIfesize cloud recording.
1. When you are logged into the system, you’ll notice a navigation bar. To start recording, click the red circle “Record” button.
2. In some instances, Lifesize will prompt you to enter a recording key. Enter your recording key.
3. As soon as you have pressed record, and entered the recording key if applicable, you will see a recording icon.
4. Once you are ready to stop recording, click “stop recording.” Your recording will be automatically saved to your account.
It’s as easy as that!
How to get the Lifesize recording file
If you want to download your Lifesize recording file so you can add captions or subtitles, here is the process you need to follow.
1. Login to your Lifesize UVC Video Center account.
2. Select “View recordings” in your account.
3. Turn your attention to the left sidebar and select “Recordings” and then “Recordings Feed.”
4. Click on the recording you want to download, and press “download.”
5. Save your recording to your desktop to upload to Rev.
If you want to simply share your content without downloading it, Lifesize provides you with this option as well. Instead of clicking on “download,” you can click on the share icon in the bottom right corner.
You will get two links from Lifesize video recording. One link is a shareable link within your account. This Lifesize record and share link is only accessible to people that have access to the account. The other option is a public share link that anyone can click on and access.
If you want to add captions or subtitles to your recording of your Lifesize video conference, then you’ll need to download your file and upload it in Rev.
How to upload that Lifesize recording to Rev for captions or subtitles
Sometimes sharing a meeting recording isn’t enough. For example, let’s say you have a global workforce and need to communicate a message to employees that speak different languages. For this, you need subtitles on your videos.
Similarly, if you want to meet all accessibility standards, it’s important to add captions to your recordings.
Here’s how to use Rev to add subtitles and captions.
The first step in adding subtitles or captions to your Lifesize recoding is to create a Rev account.
If you don’t have a Rev account, create one at Rev.com.
Once you have signed up, log in to your account.
When you first log in, Rev will offer you three options, including transcription, captions, and foreign subtitles. To add captions, click on “learn more” in the “captions” box.
As soon as you click on “learn more,” Rev will direct you to a new page. On this page, you will see detailed information about the price per video minute, the turnaround time, and the accuracy. Review this information and then click “get started.”
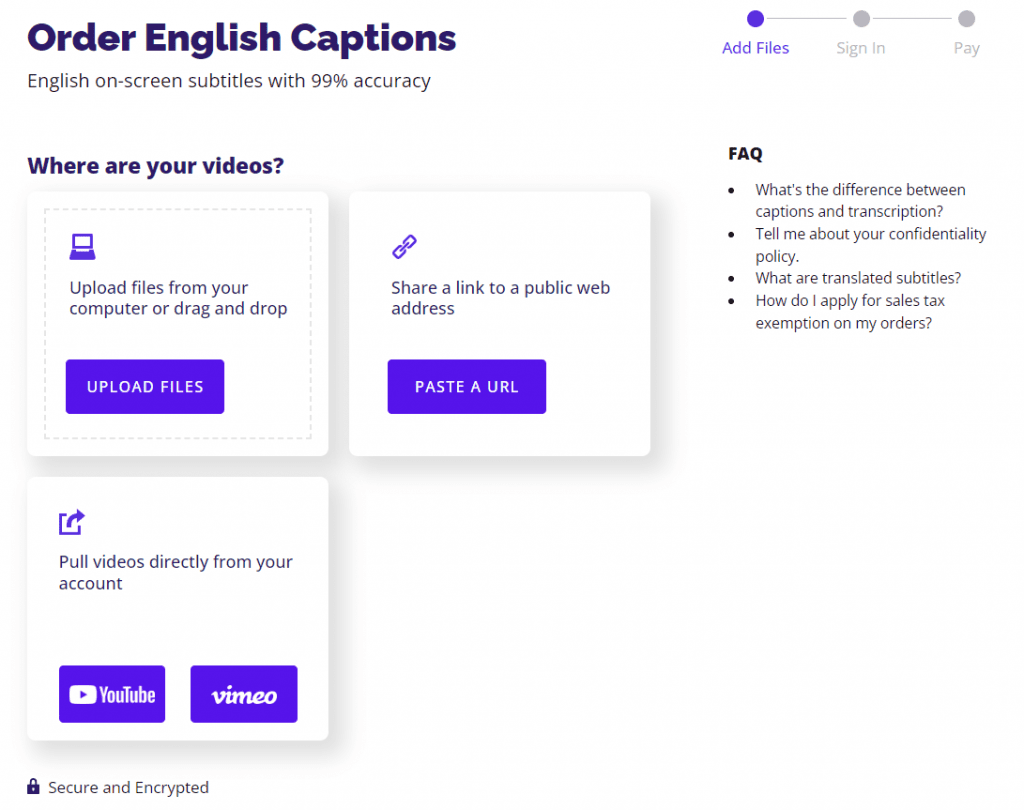
On the next page, you have three options for uploading your video, including uploading a file from your computer, sharing a link to a public web address, and pulling videos from Vimeo or YouTube.
Since you downloaded your video from Lifesize and saved it to your desktop, click on “Upload Files” and select the file you downloaded.
Rev will work on recognizing your file. As soon as Rev processes your video, click on “Upload.”

As soon as you press “Upload,” you’re ready to create your order. Remember with Rev, you don’t have to do any of the hard captioning work. You simply upload your video and hire out the work to a qualified Rev employee.
On the next page, you will see all of your order details. This includes cost, turnaround, and total price.
From here, you can check out, pay for your order, and Rev will start working on your captions.
If you are interested in ordering subtitles for your file, you would follow the exact same process, except choose “Foreign Subtitles” at the beginning of the process.
Once you receive your order back, you’re ready to share it with your audience.


